I've been asked by a few different people to provide a walk through on how to replace an alternator on a Subaru.
This guide covers any 4 cylinder EJ series engine from Subaru. Both turbo and non turbo models. (basically any 4 cylinder 1989 until now).
The car in this guide is a 2004 Subaru Impreza WRX.
Tools and supplies needed:
- New Alternator
- New Alternator Belt (not required, but its cheap and a good idea to replace while you have it off)
- Assorted Sockets (10mm, 12mm, 13mm, and 14mm if I remember right. Deep sockets work best)
- A Prybar or Long Screwdriver
- Needle Nose Plyers
Time Required :
If this is your first time, probably about 30 minutes. I can do these in about 10 or 15 minutes myself.
Step one -
Sit there and stare at your Subaru for a minute. Why? Just simply because its a bad ass car.

Step two -
Gather up all of your tools and supplies and have them ready.
Step three -
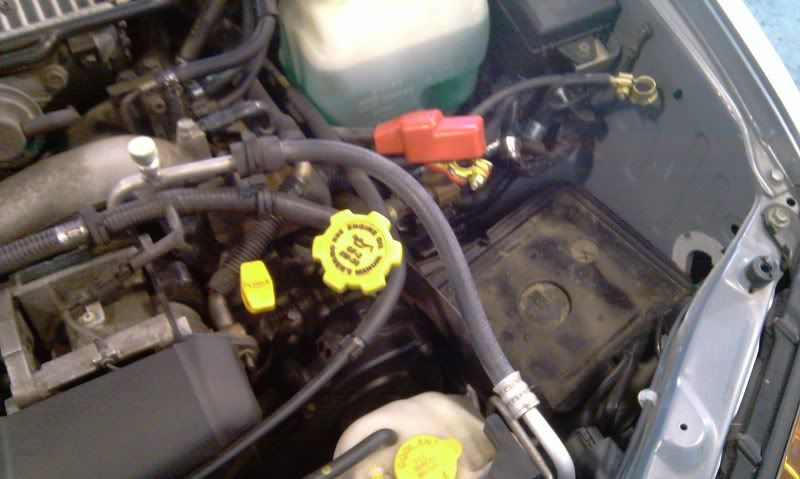
Open up the hood and disconnect the battery. THIS IS IMPORTANT. If you fail to disconnect the battery, you will be grounding out your tools and making all kinds of lovely popping noises and sparks. You don't want to do that lol. It can screw up your electrical system. So make sure your battery is disconnected. Actually, this is good practice when doing any kind of mechanical work to a car. The car I was photographing for this guide got a new battery with the new alternator, so I had to completely remove it from the car.
Step four -
Take the plastic cover off that sits over the belts on the front of the engine. Its a couple of 10mm bolts. Easy to get off. On the WRX and STI, there are some lines that clip to the top of it. The easiest way to get them off the cover is to use needle nose plyers on the bottom sided to undo the clips.

A bottom view of the cover. Towards the middle / bottom / left you can see one of the clips that clip on the lines
Here is what you will end up with after you remove the cover
Step five -
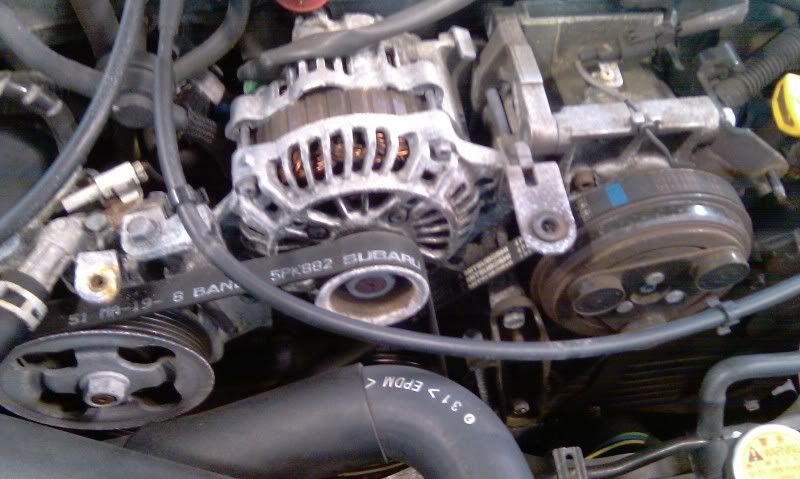
Now you need to loosen the tension on the belt so you can take it off the alternator pulley (or take it all the way out if you're going to go ahead and replace it.
First, losen the mounting bolt on the driver side of the alternator. You don't need to take it all the way out yet (actually that would be a bad idea), just get it loose. Its close to the AC Compressor
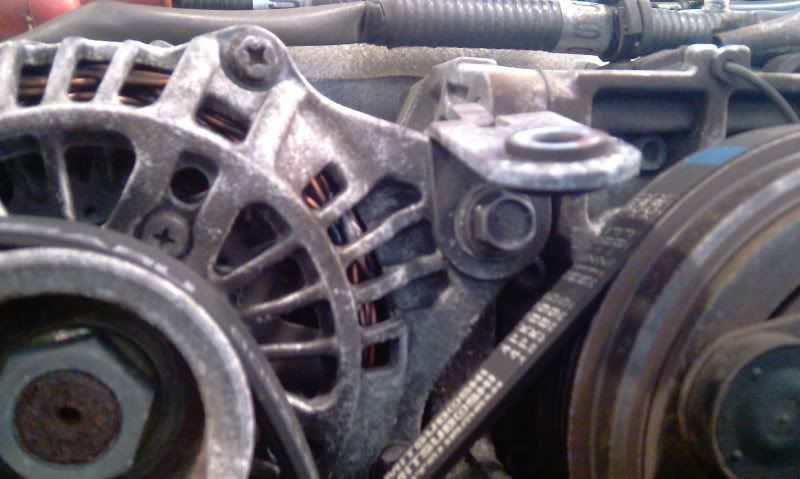
Now, go to the other side of the alternator and look for this :
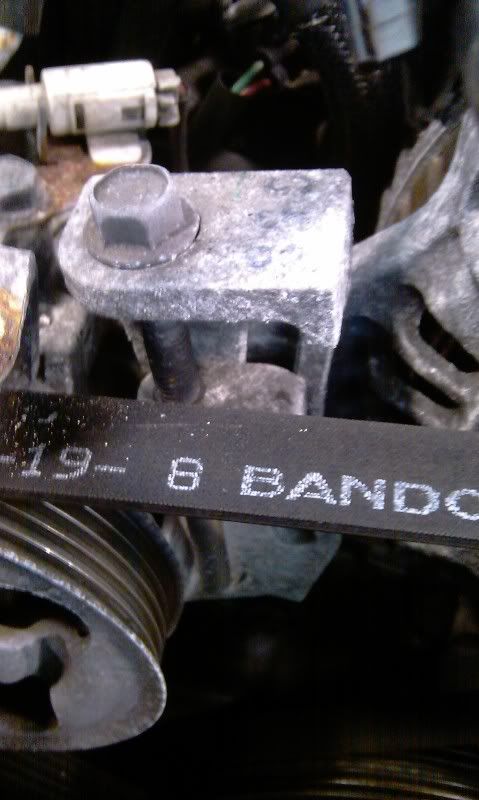
Now that you found it, look right under where the belt was and you will see this:
Loosen the bottom bolt (don't take it out).
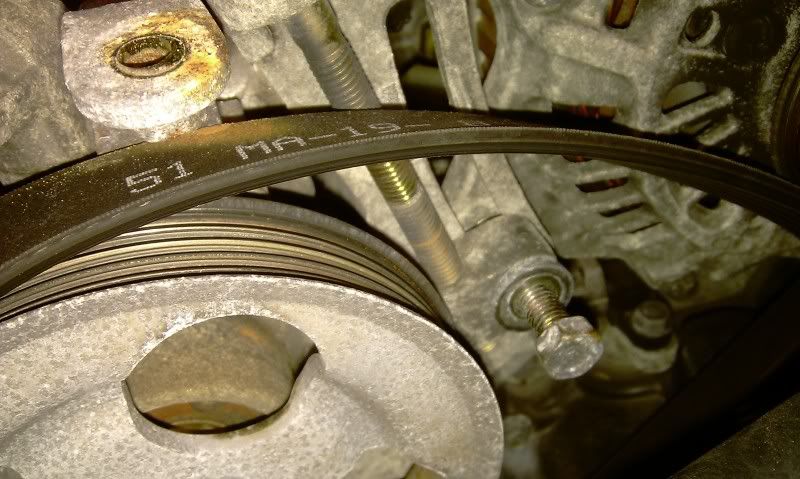
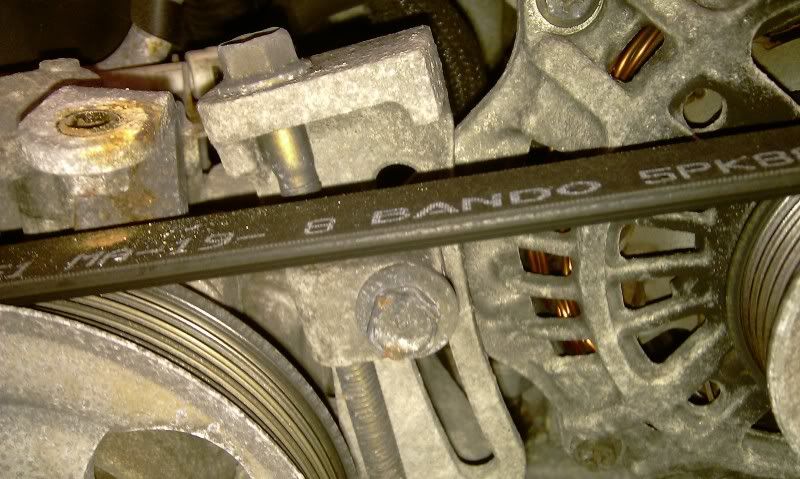
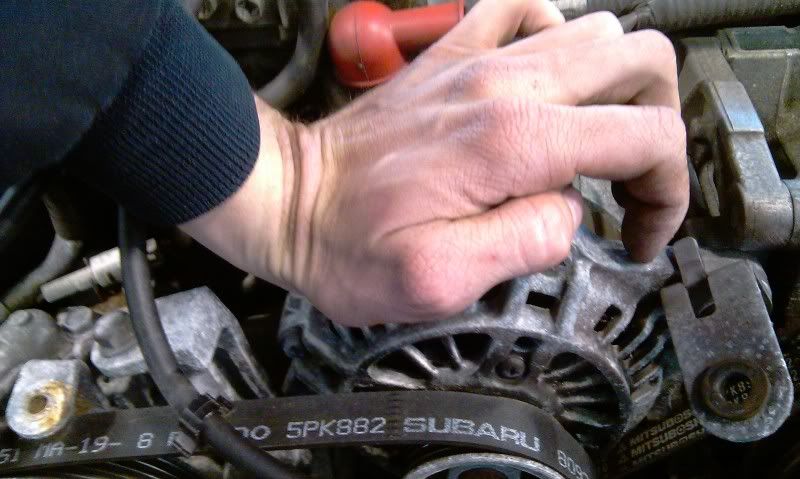
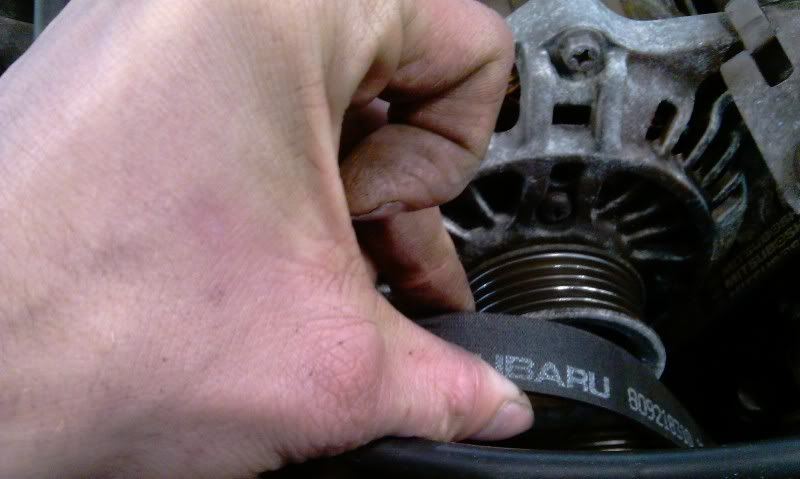
Now go back towards the top of the tensioner assembly and start loosening the top bolt. This will take the tension off the belt. You're going to have to go quite some ways. After you get it loose enough, you will be able to slide the belt off the pulley. You may have to push down on the alternator at the end to get it to move all the way down
Step six -
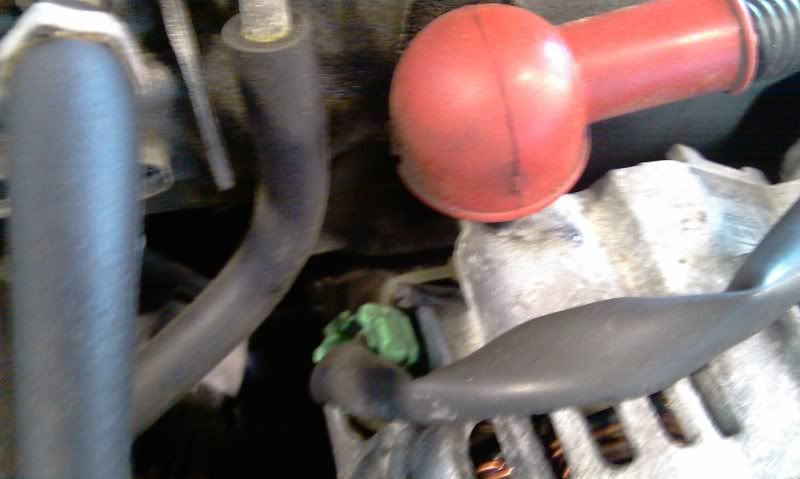
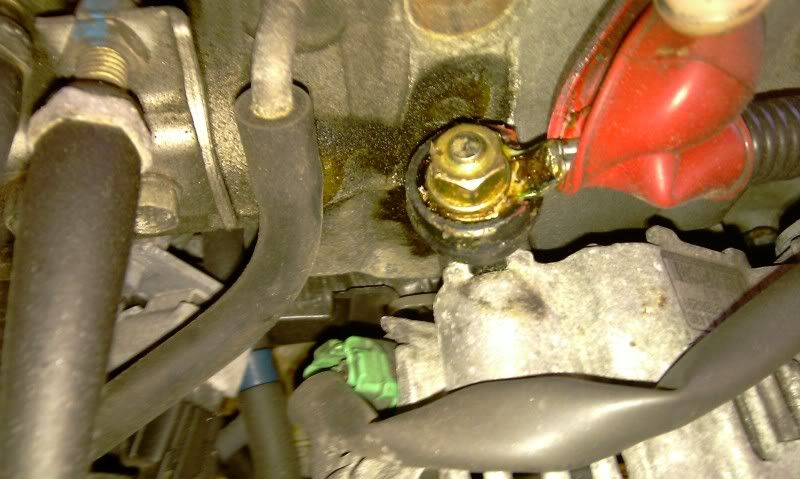
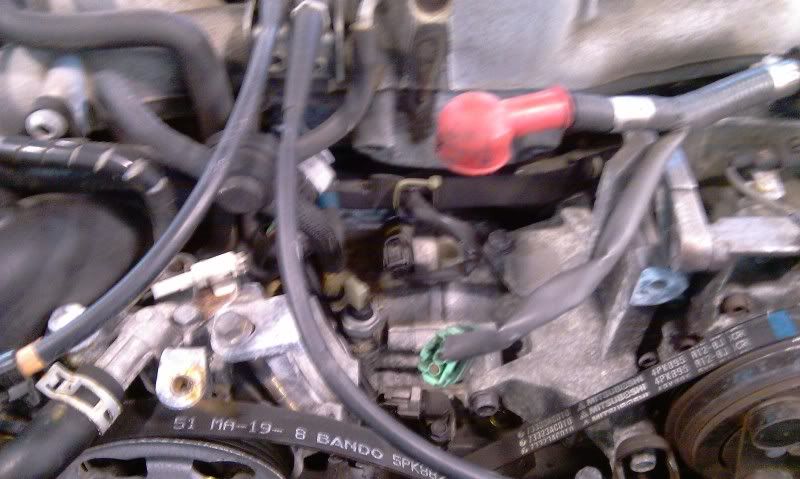
Take a look at the top of the alternator towards the back and look for a red rubber boot. Pull it out of the way and remove the 10mm nut that sits under it. then look to the left of that to the green clip that snaps into the alternator. Remove that as well. Both can be seen in these pictures :
Step seven -
Remove the driver side bolt and the bottom bolt on the belt tensioner from step five. Be careful of the driver side bolt however. There is a clip on the back side of it that will fall down and get lost if you don't have your hands on it.
Step eight -
Lift the alternator out of the car. It may be kind of hard to get out, so a prybar and a hammer may help it break free.
Step nine -
Compare the new and old alternators to make sure they are the same. This includes electrical connections, pulley grooves / size, bolt holes, etc.
Step ten
Drop in your new alternator. You may have to pry on it a little bit or tap it with a soft hammer to get the driver side bolt hole to line up.
Now just continue to put it back together by reversing the above steps.
I've heard of some new Subaru alternators requiring a 15 minute break-in period before they will put out a charge. So if your new alternator isn't putting out 14 volts right away, don't panic. Just let it idle there for 15 minutes then re-check it.
DISCLAIMER :
If you follow this guide, you should not run into any problems. I do not take responsibility for any damage you may cause to your vehicle while working on it following this guide. As always, if your vehicle is rusted, use penitrating oil to help break the rust free. Don't over torque bolts, and use common sense.
You may use and print this guide for your own personal use. If you would like to re-publish this guide, please contact me for permission.
This guide covers any 4 cylinder EJ series engine from Subaru. Both turbo and non turbo models. (basically any 4 cylinder 1989 until now).
The car in this guide is a 2004 Subaru Impreza WRX.
Tools and supplies needed:
- New Alternator
- New Alternator Belt (not required, but its cheap and a good idea to replace while you have it off)
- Assorted Sockets (10mm, 12mm, 13mm, and 14mm if I remember right. Deep sockets work best)
- A Prybar or Long Screwdriver
- Needle Nose Plyers
Time Required :
If this is your first time, probably about 30 minutes. I can do these in about 10 or 15 minutes myself.
Step one -
Sit there and stare at your Subaru for a minute. Why? Just simply because its a bad ass car.
Step two -
Gather up all of your tools and supplies and have them ready.
Step three -
Open up the hood and disconnect the battery. THIS IS IMPORTANT. If you fail to disconnect the battery, you will be grounding out your tools and making all kinds of lovely popping noises and sparks. You don't want to do that lol. It can screw up your electrical system. So make sure your battery is disconnected. Actually, this is good practice when doing any kind of mechanical work to a car. The car I was photographing for this guide got a new battery with the new alternator, so I had to completely remove it from the car.
Step four -
Take the plastic cover off that sits over the belts on the front of the engine. Its a couple of 10mm bolts. Easy to get off. On the WRX and STI, there are some lines that clip to the top of it. The easiest way to get them off the cover is to use needle nose plyers on the bottom sided to undo the clips.
A bottom view of the cover. Towards the middle / bottom / left you can see one of the clips that clip on the lines
Here is what you will end up with after you remove the cover
Step five -
Now you need to loosen the tension on the belt so you can take it off the alternator pulley (or take it all the way out if you're going to go ahead and replace it.
First, losen the mounting bolt on the driver side of the alternator. You don't need to take it all the way out yet (actually that would be a bad idea), just get it loose. Its close to the AC Compressor
Now, go to the other side of the alternator and look for this :
Now that you found it, look right under where the belt was and you will see this:
Loosen the bottom bolt (don't take it out).
Now go back towards the top of the tensioner assembly and start loosening the top bolt. This will take the tension off the belt. You're going to have to go quite some ways. After you get it loose enough, you will be able to slide the belt off the pulley. You may have to push down on the alternator at the end to get it to move all the way down
Step six -
Take a look at the top of the alternator towards the back and look for a red rubber boot. Pull it out of the way and remove the 10mm nut that sits under it. then look to the left of that to the green clip that snaps into the alternator. Remove that as well. Both can be seen in these pictures :
Step seven -
Remove the driver side bolt and the bottom bolt on the belt tensioner from step five. Be careful of the driver side bolt however. There is a clip on the back side of it that will fall down and get lost if you don't have your hands on it.
Step eight -
Lift the alternator out of the car. It may be kind of hard to get out, so a prybar and a hammer may help it break free.
Step nine -
Compare the new and old alternators to make sure they are the same. This includes electrical connections, pulley grooves / size, bolt holes, etc.
Step ten
Drop in your new alternator. You may have to pry on it a little bit or tap it with a soft hammer to get the driver side bolt hole to line up.
Now just continue to put it back together by reversing the above steps.
I've heard of some new Subaru alternators requiring a 15 minute break-in period before they will put out a charge. So if your new alternator isn't putting out 14 volts right away, don't panic. Just let it idle there for 15 minutes then re-check it.
DISCLAIMER :
If you follow this guide, you should not run into any problems. I do not take responsibility for any damage you may cause to your vehicle while working on it following this guide. As always, if your vehicle is rusted, use penitrating oil to help break the rust free. Don't over torque bolts, and use common sense.
You may use and print this guide for your own personal use. If you would like to re-publish this guide, please contact me for permission.