Grinder34
Track Monkey
This project is pretty easy.
Tools Required:
12 mm socket/wrench
8 mm socket/wrench
Phillips Screw Driver
Pliers
Fan (Optional/recommended)
Step 1:
Remove Seats (no pictures).
This involves removing the two 12 mm bolts by rear passengers' calves, and taking out the seat bottom.
Next, there are four 12mm bolts underneath the seat back. Then there will be two uprights behind the seats, and some sound deadening.
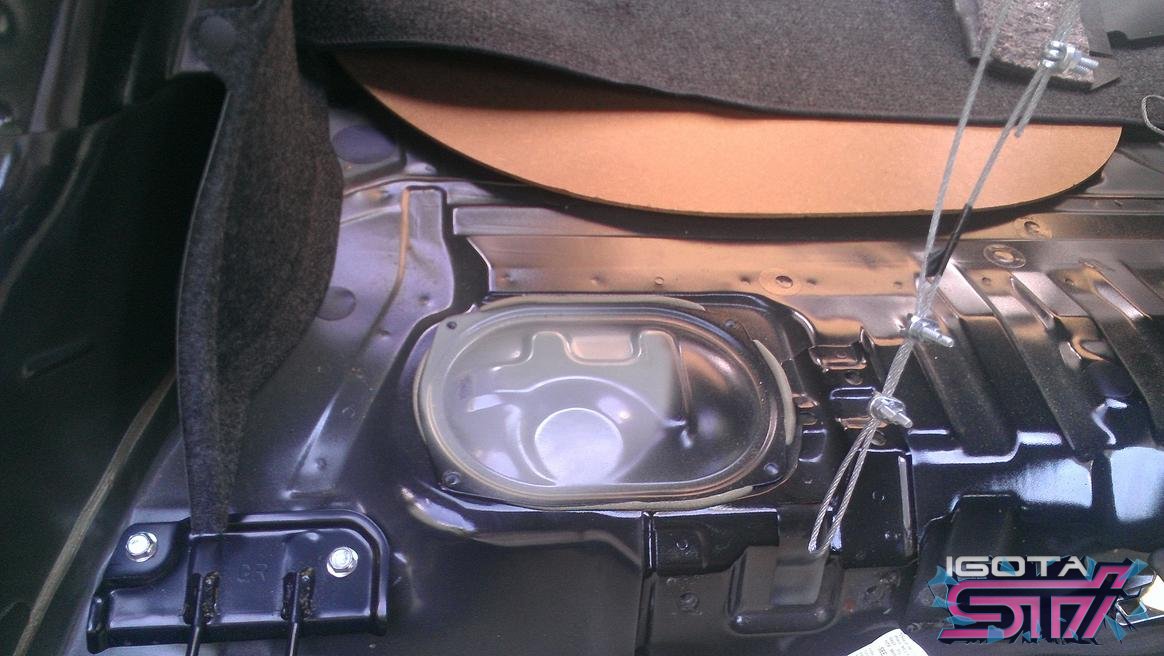
Step 2:
Remove fuel tank cover. This is located right behind the passenger side seatback.
There are four phillips screws holding it down.
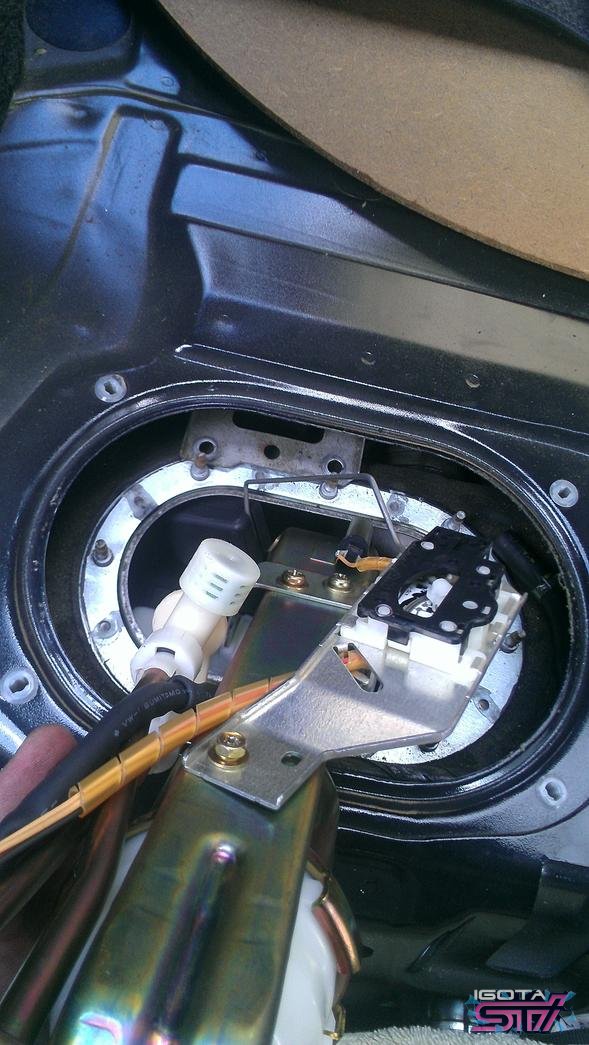
Step 3:
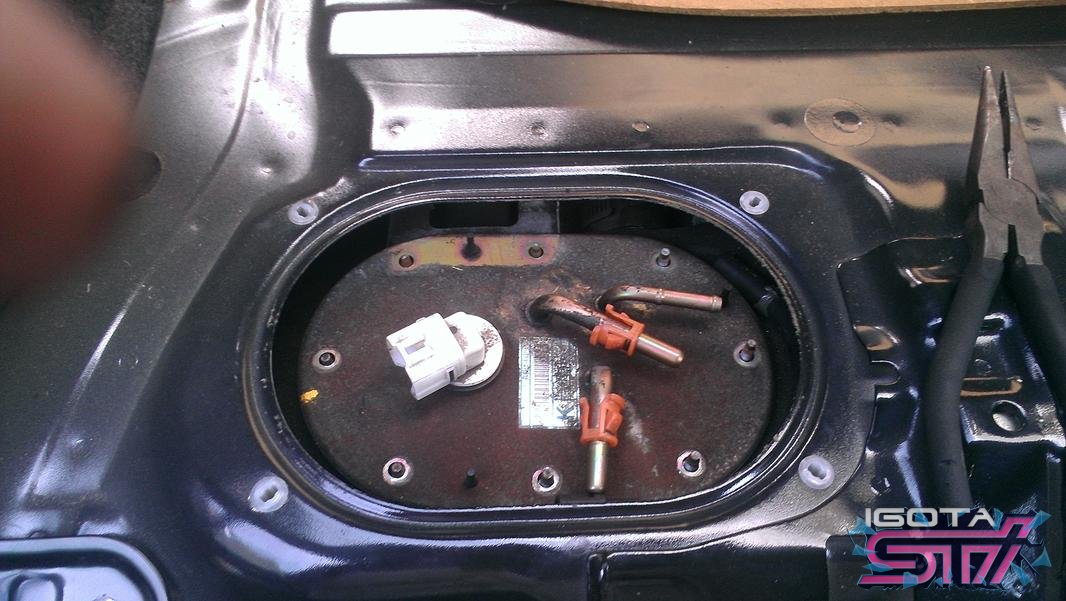
Disconnect all fuel lines and plugs.
The line facing towards the front of the car may spew some fuel. I think there are ways around that (disconnect wiring plug and attempt to crank car. Please someone else verify this... I just dealt with spilt fuel).
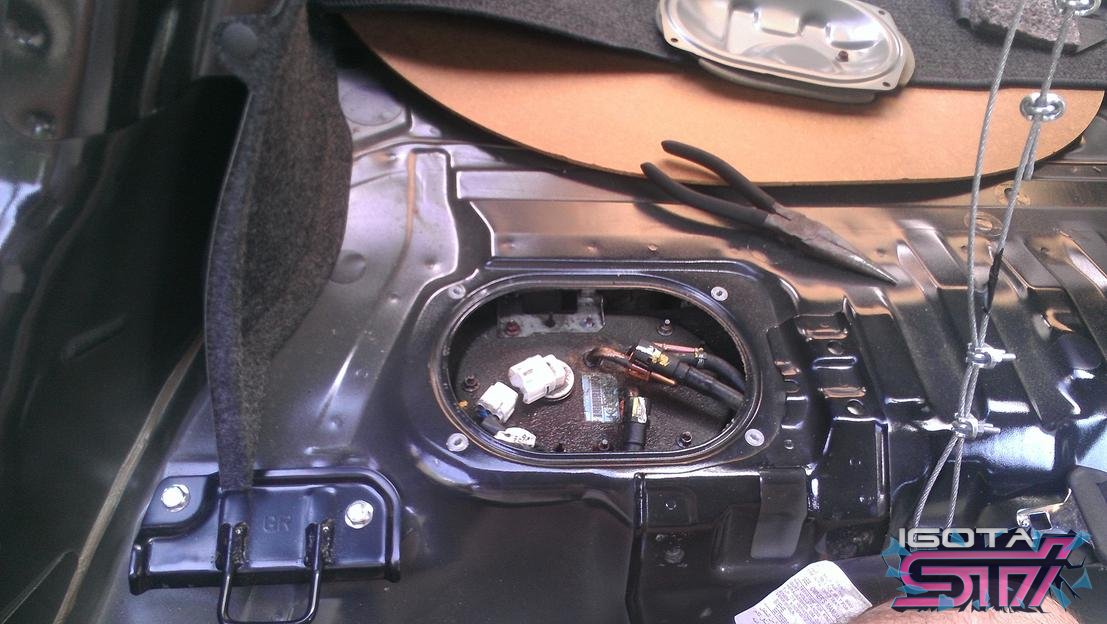
Tuck all the lines out of the way.
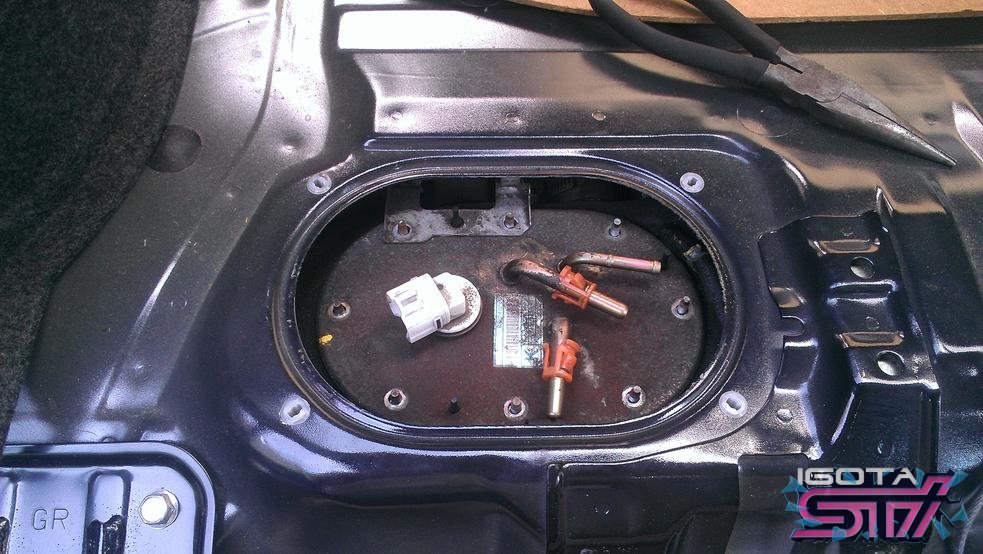
Towards the rear of the car there is a metal bracket, you'll have to push that out of the way as well.
Step 4:
At this point it's a good idea to have a fan pointed into the car! Gas fumes will make you loopy!

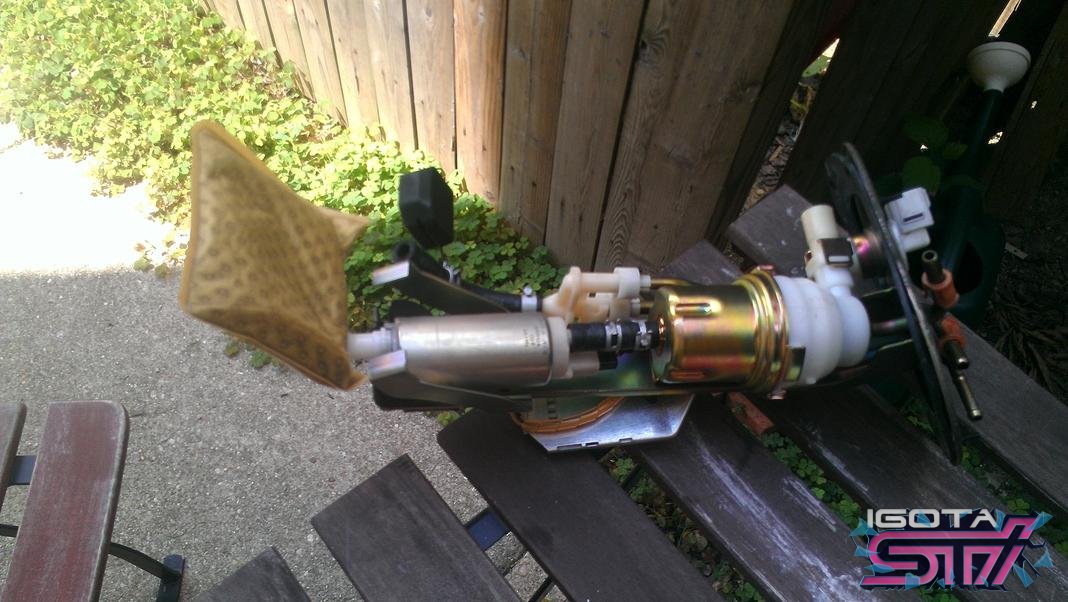
Step 5:
Remove the fuel pump assembly! This will take some contorting of the assembly. Be careful not to bend the fuel float thingie that is on a swing arm.

I have a trick! See the screw on the back of the fuel pump assembly? It holds the float in place. If you loosen it just a bit, the whole float mechanism can swing, making things a little less tricky. Remember, you just want it loose, dont take it off!
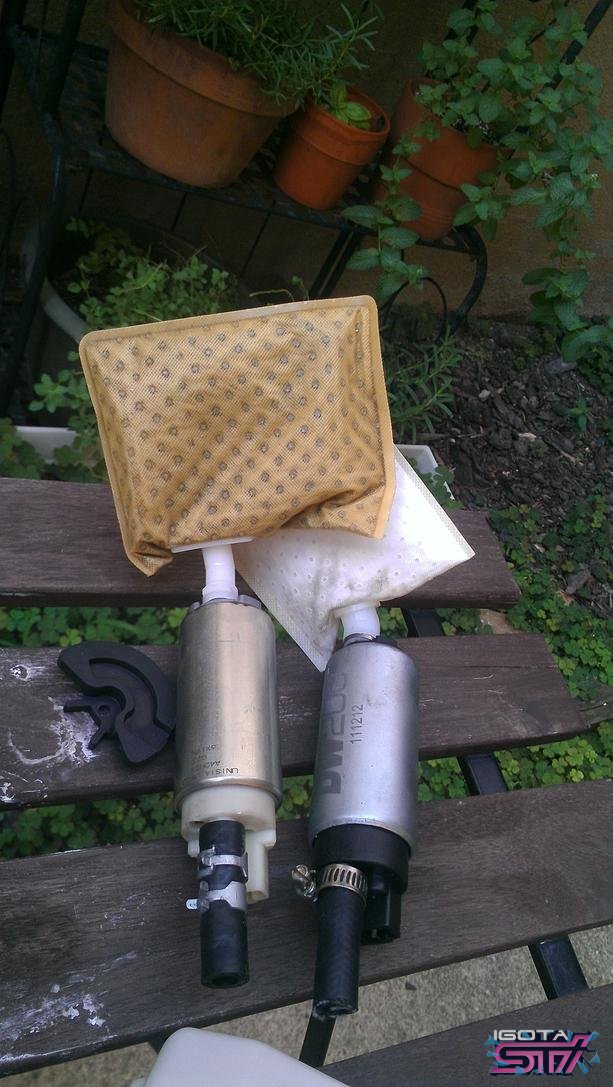
Step 6:
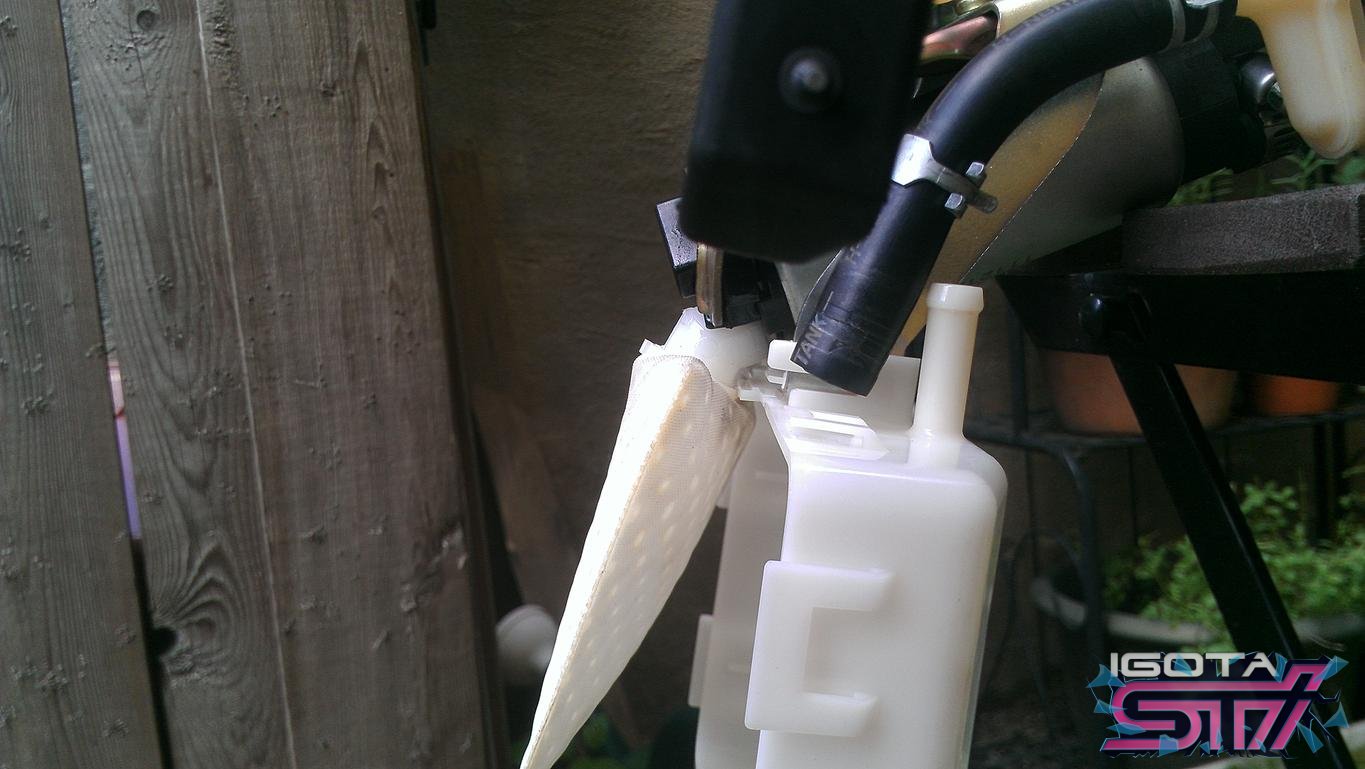
Remove the black/white box from around the sock. I dont have a before picture, only an after. You'll also want to move the hose clamps from off the brass piece above the fuel pump. You'll also need to unplug the wire harness.
Step 7:
I dont have pictures for this part. This is all the test-fitting and assembly of the fuel pump. I did this previously. You'll probably want/need to cut the old/new hose to the proper length. You'll also need to attach the sock and secure it with some sort of clip that should've been included.
Step 8:
To get my pump (DW200) to fit, i had to BEND the bottom of the fuel pump bracket. The prong on the left in the following pic has been bent, while the one on the right has not. The bending you're doing is just of the prongs, and you need to bend it down, away from the rest of the assembly.
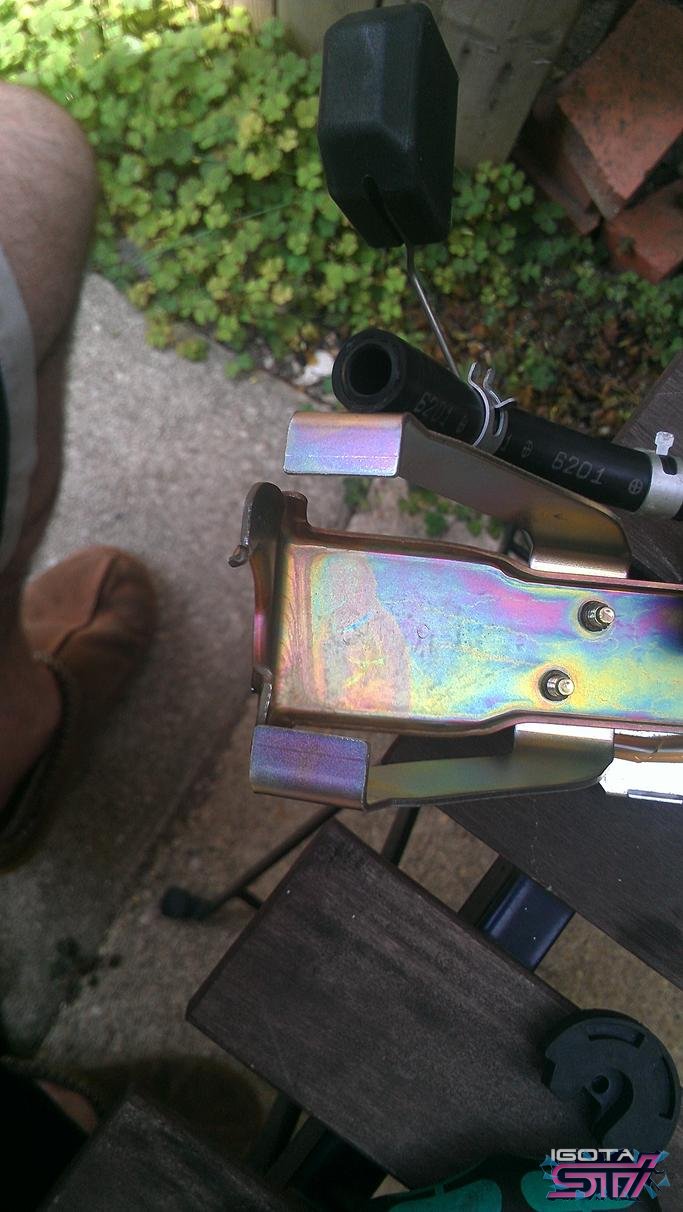
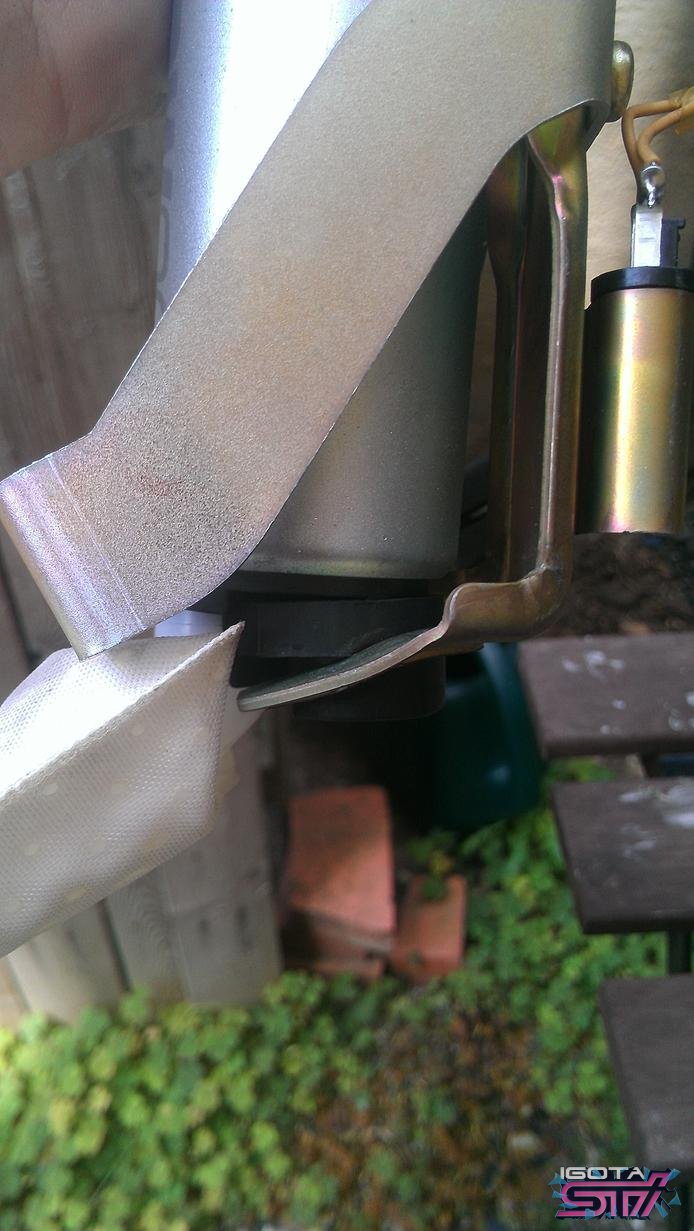
In the above pic you can see what I mean. After taking that pic i cleaned up the bend a bit more, but it never looked quite factory. The new pump is just a big too big for the assembly, and I dont know a way around it!
Step 9:
Put the white/black box back on, and dont forget to attach the hoses to the white box (if you removed them in the first place). This will take a bit of forcing, as the white "elbow" connecting the pump and the sock is shorter than the OEM one. You can kind of see that in the pic below.
Step 10:
Stop, look over everything. Make sure you didnt forget to attach any hoses wires, etc.. or tighten any clamps.
Step 11: At this point you're ready to re-install everything. Dont forget to tighten up the float assembly (if you loosened it in step 5) before you finish dropping it into the tank. Having it loose helps get it into position, but it needs to be tight on there, with the little notch lined up. Then re-attach all hoses, etc and hope the car starts right up!
Tools Required:
12 mm socket/wrench
8 mm socket/wrench
Phillips Screw Driver
Pliers
Fan (Optional/recommended)
Step 1:
Remove Seats (no pictures).
This involves removing the two 12 mm bolts by rear passengers' calves, and taking out the seat bottom.
Next, there are four 12mm bolts underneath the seat back. Then there will be two uprights behind the seats, and some sound deadening.
Step 2:
Remove fuel tank cover. This is located right behind the passenger side seatback.
There are four phillips screws holding it down.
Step 3:
Disconnect all fuel lines and plugs.
The line facing towards the front of the car may spew some fuel. I think there are ways around that (disconnect wiring plug and attempt to crank car. Please someone else verify this... I just dealt with spilt fuel).
Tuck all the lines out of the way.
Towards the rear of the car there is a metal bracket, you'll have to push that out of the way as well.
Step 4:
At this point it's a good idea to have a fan pointed into the car! Gas fumes will make you loopy!
Step 5:
Remove the fuel pump assembly! This will take some contorting of the assembly. Be careful not to bend the fuel float thingie that is on a swing arm.
I have a trick! See the screw on the back of the fuel pump assembly? It holds the float in place. If you loosen it just a bit, the whole float mechanism can swing, making things a little less tricky. Remember, you just want it loose, dont take it off!
Step 6:
Remove the black/white box from around the sock. I dont have a before picture, only an after. You'll also want to move the hose clamps from off the brass piece above the fuel pump. You'll also need to unplug the wire harness.
Step 7:
I dont have pictures for this part. This is all the test-fitting and assembly of the fuel pump. I did this previously. You'll probably want/need to cut the old/new hose to the proper length. You'll also need to attach the sock and secure it with some sort of clip that should've been included.
Step 8:
To get my pump (DW200) to fit, i had to BEND the bottom of the fuel pump bracket. The prong on the left in the following pic has been bent, while the one on the right has not. The bending you're doing is just of the prongs, and you need to bend it down, away from the rest of the assembly.
In the above pic you can see what I mean. After taking that pic i cleaned up the bend a bit more, but it never looked quite factory. The new pump is just a big too big for the assembly, and I dont know a way around it!
Step 9:
Put the white/black box back on, and dont forget to attach the hoses to the white box (if you removed them in the first place). This will take a bit of forcing, as the white "elbow" connecting the pump and the sock is shorter than the OEM one. You can kind of see that in the pic below.
Step 10:
Stop, look over everything. Make sure you didnt forget to attach any hoses wires, etc.. or tighten any clamps.
Step 11: At this point you're ready to re-install everything. Dont forget to tighten up the float assembly (if you loosened it in step 5) before you finish dropping it into the tank. Having it loose helps get it into position, but it needs to be tight on there, with the little notch lined up. Then re-attach all hoses, etc and hope the car starts right up!
")