You are using an out of date browser. It may not display this or other websites correctly.
You should upgrade or use an alternative browser.
You should upgrade or use an alternative browser.
GD Funk32's 04 STi race car Build V-Mount,TS EFR7163
- Thread starter funk32
- Start date
if is the SM183 single element wing made by Simon Mcbeaths wing shop.
http://www.sm-designs.co.uk/wingshophome.html
http://www.sm-designs.co.uk/wingshophome.html
Grinder34
Track Monkey
@Gregroot198521 the MSI frame will be released at $3000 as of right now, which will include the frame, swaybar with blades and endlinks.
@Grinder34, I do have extra sitting at my house in Edmonton (on the other side of the country from me at the moment) when I go home around xmas if you still need it then I can cut ya some off.
Hah, its a bit after christmas, but any chance the offer is still good?!
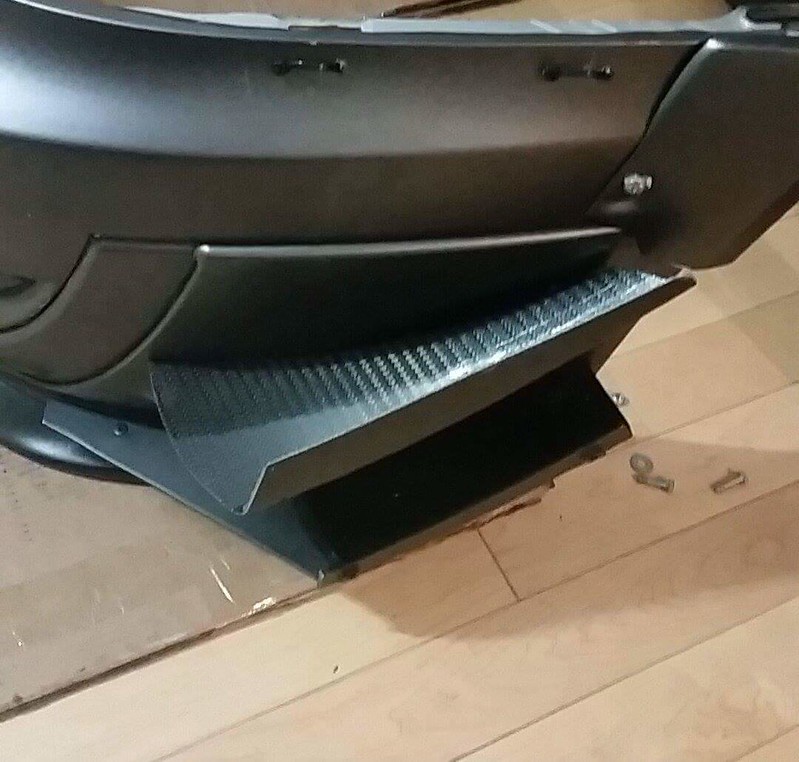
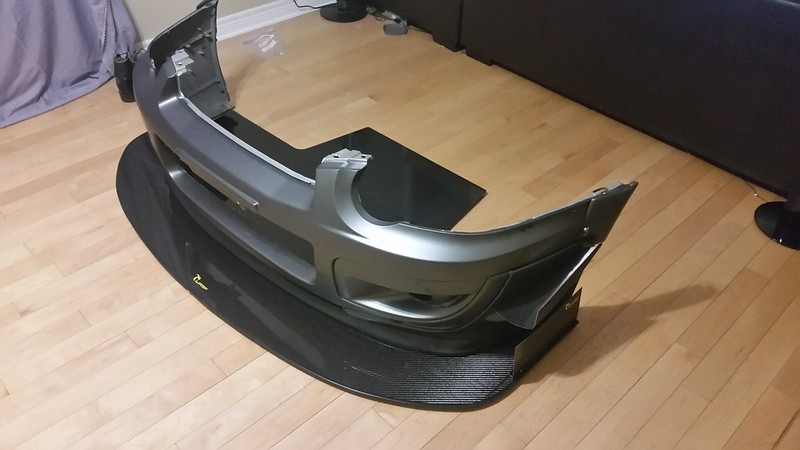
After my short work trip to Edmonton, I flew back to ON where Air Canada was polite enough to cancel my flight to Kingston on the grounds of weather. I need to point out that both Toronto and Kingston were clear until well past my landing time and that both flights left this morning while the snow was actually falling and hail was hitting Kingston. They told me I could wait until Wednesday to fly back due to all the other flights being full. Also that they would not provide a hotel due to weather being out of there control. So I made best use of this and put myself into a hotel and booked myself on a train back home. But first I thought I would make a stop over at Touge Tuning to see the guys and chat, also I had a package that was going out today so I just picked it up. While I was there Fedex showed up with my splitter (yay), let me tell you it was a scary 10sec while the delivery guy jammed himself through the doors LOL. First thing we noticed was the End Plates were actually included and the splitter was noticeably heavier than the one I had back in Kingston, and there were more metal skid bars on the bottom.
the splitter looks and feels very well constructed but it very upset about how all this went down. I know have the trunk and splitter sitting at Touge Tuning which I will drive back down in march to grab them and bring them back to kingston OR install them there if the car and weather co-operate during March break.... maybe a tune somewhere in there.....
 20160216_125946 by David, on Flickr
Here are some quick pictures of the trunk, Canards and End plates. I was able to fit the canards and endplates in my luggage so they made it home.
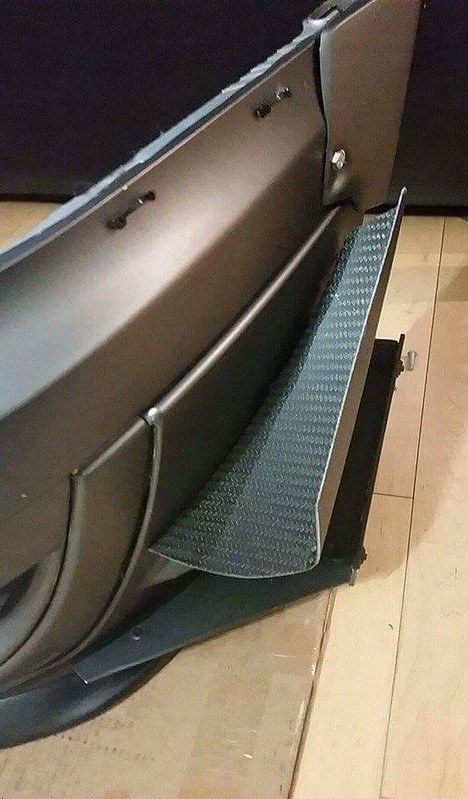
with the canards you can see the fit well, I just need to remove the older canard as the bottom ones wont work when the endplates are installed.
 received_10156434572330198 by David, on Flickr
 received_10156434572335198 by David, on Flickr
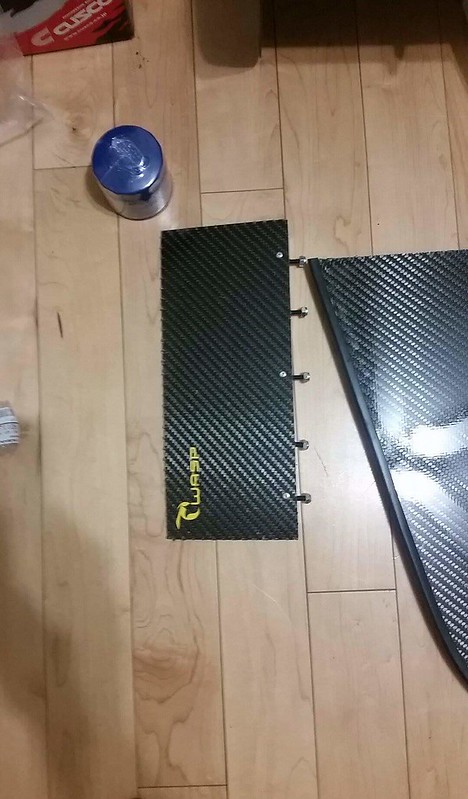
this is what the endplates look like, the edges are not as clean as I would like so I may end up cleaning them up.
 received_10156434594275198 by David, on Flickr
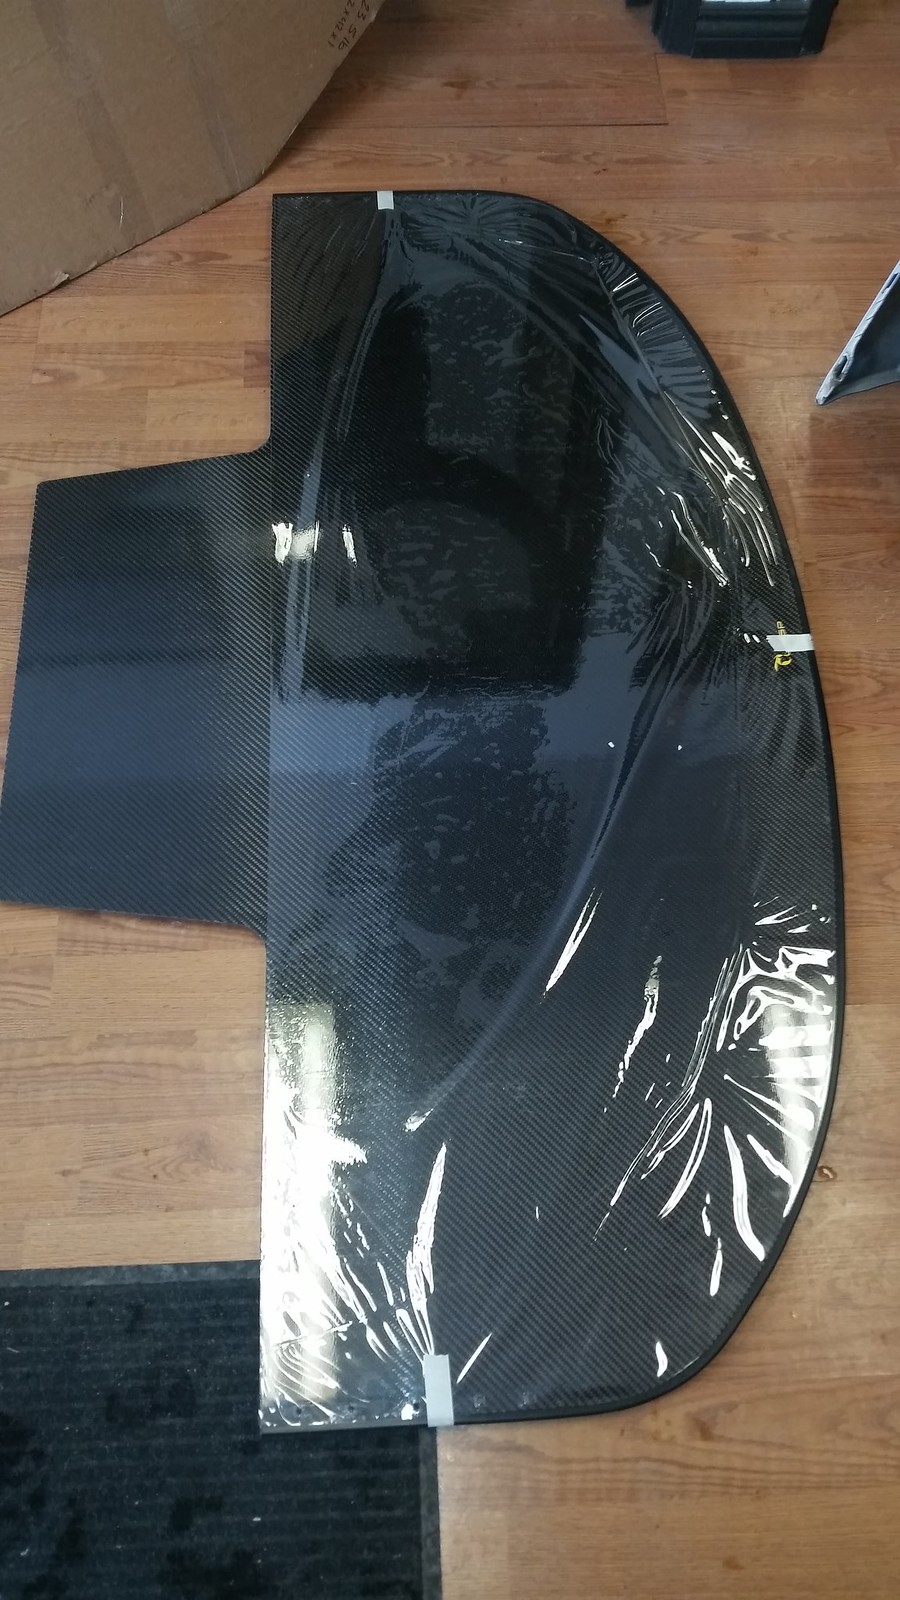
Here is the trunk, it is just a skin and weighs in around 4lbs.
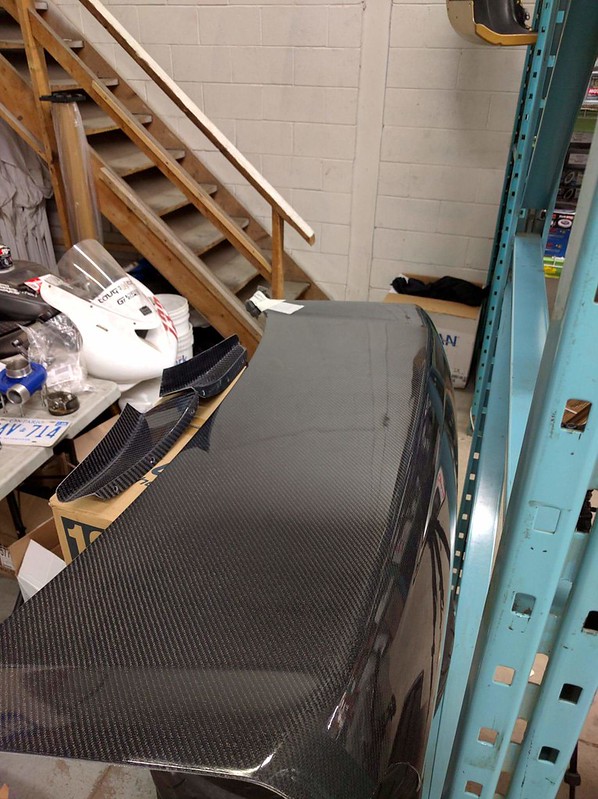 received_10153759904420590 by David, on Flickr
the splitter looks and feels very well constructed but it very upset about how all this went down. I know have the trunk and splitter sitting at Touge Tuning which I will drive back down in march to grab them and bring them back to kingston OR install them there if the car and weather co-operate during March break.... maybe a tune somewhere in there.....
20160216_125946 by David, on FlickrHere are some quick pictures of the trunk, Canards and End plates. I was able to fit the canards and endplates in my luggage so they made it home.
with the canards you can see the fit well, I just need to remove the older canard as the bottom ones wont work when the endplates are installed.
received_10156434572330198 by David, on Flickrreceived_10156434572335198 by David, on Flickrthis is what the endplates look like, the edges are not as clean as I would like so I may end up cleaning them up.
received_10156434594275198 by David, on FlickrHere is the trunk, it is just a skin and weighs in around 4lbs.
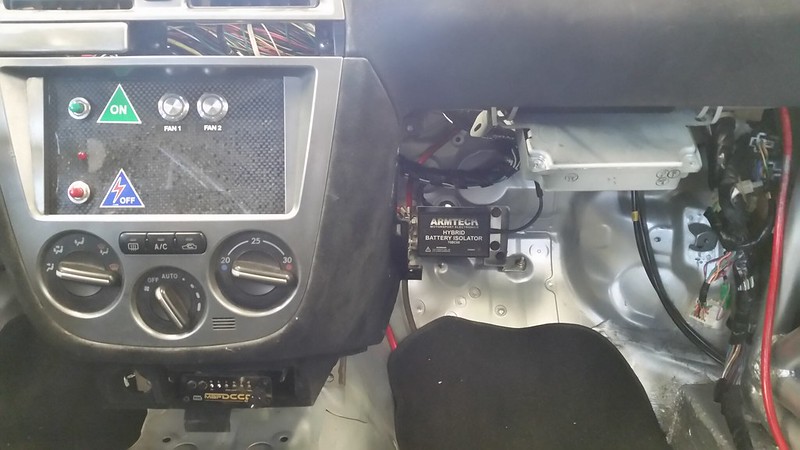
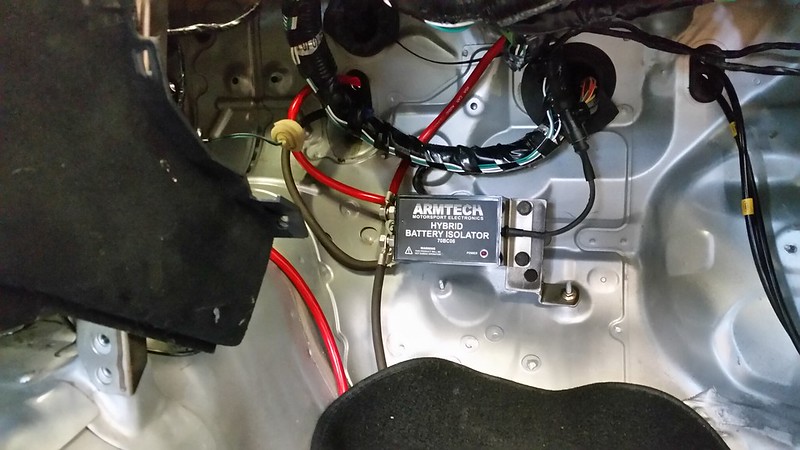
received_10153759904420590 by David, on FlickrI took time to sort out how to Remount the ARMTECH battery Isolator (kill switch). I always thought my first mounting location was a bit of an eye sore. This time I looked for a spot that was out of the way and slightly out of sight yet I needed to make sure there was enough room around it to get air to it as it does get warm during operation. It is not completely finished but this is the 90% solution.
 20160220_151017 by David, on Flickr
 20160220_150932 by David, on Flickr
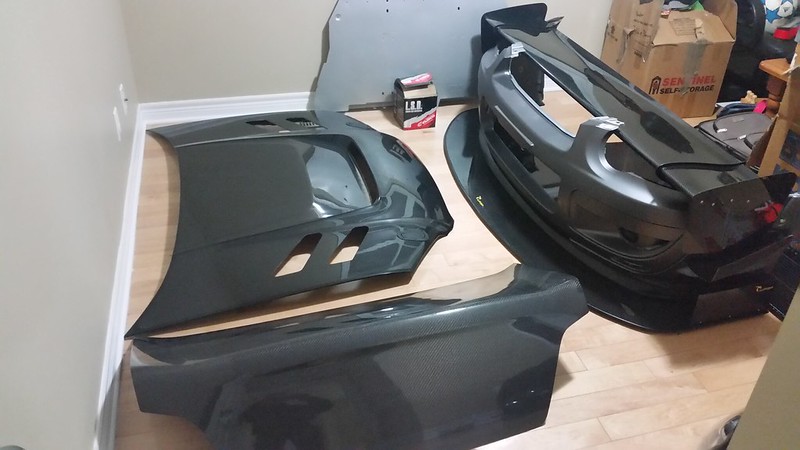
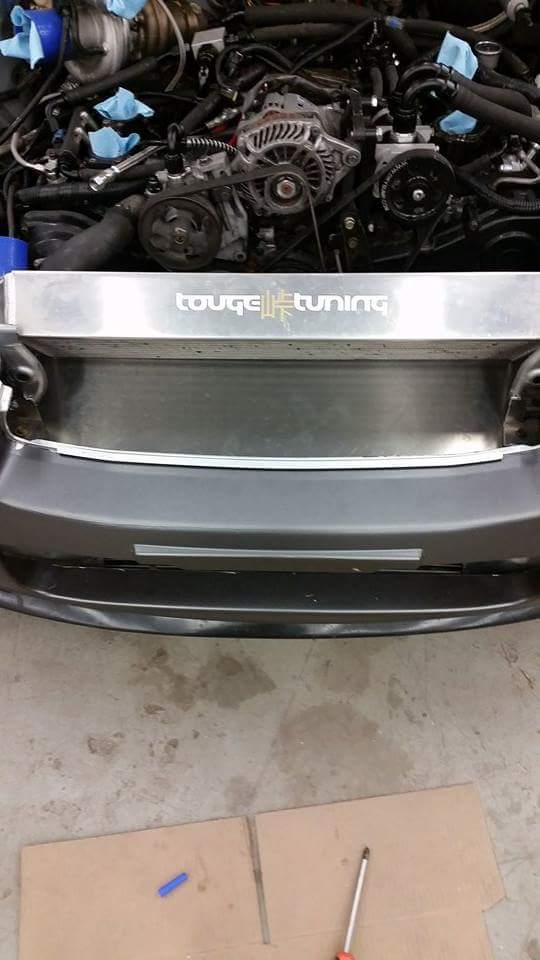
20160220_151017 by David, on Flickr20160220_150932 by David, on FlickrI decided to make a run down to Touge Tuning since I was bored. Picked up the new splitter and trunk.
 20160221_183129 by David, on Flickr
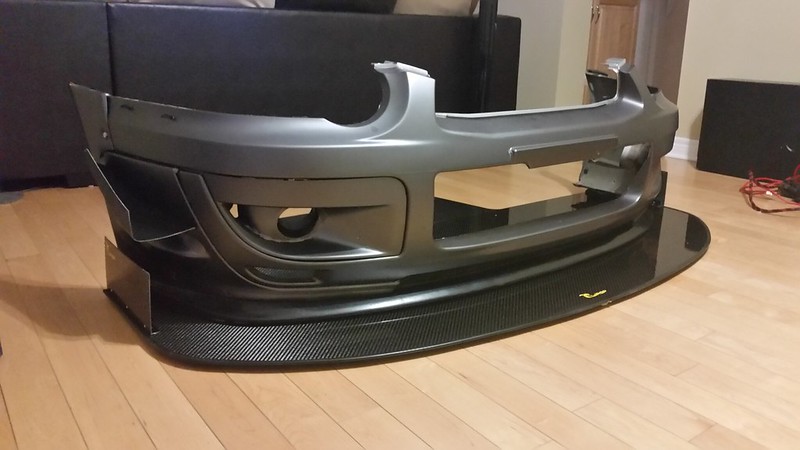
Splitter is right on the money this time 5" past the furthest point on the bumper (licence plate holder).
 20160221_182256 by David, on Flickr
 20160221_182332 by David, on Flickr
 20160221_182315 by David, on Flickr
20160221_183129 by David, on FlickrSplitter is right on the money this time 5" past the furthest point on the bumper (licence plate holder).
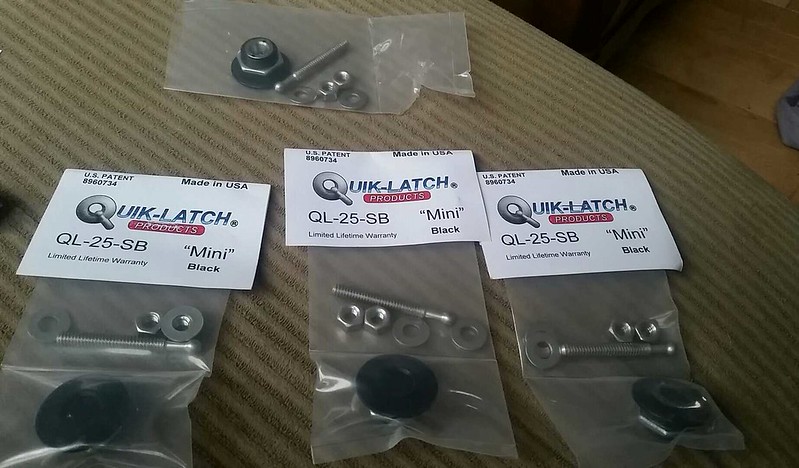
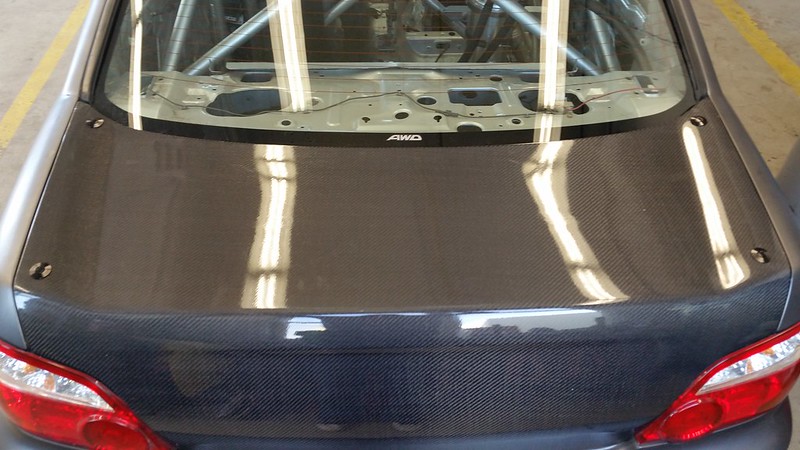
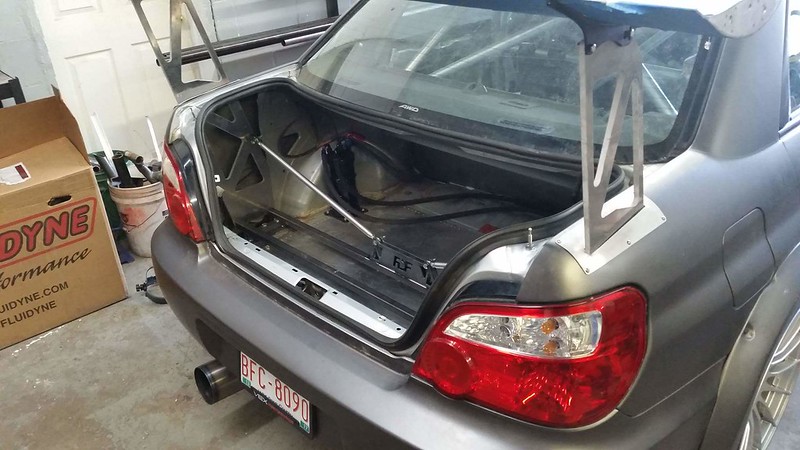
20160221_182256 by David, on Flickr20160221_182332 by David, on Flickr20160221_182315 by David, on Flickrwith some help from a friend we were able to get a few things sorted out, but there is still a fair amount of work left to do before this thing can be started again. We started with removing the heavy OEM trunk that already did not have the STi wing on it, pretty crazy the amount these weigh. Once the trunk was off we test fitted the Wasp trunk skin which was super light. To secure the new trunk lid down I wanted to use a system that would be easy to install and easy to use but look clean. I thought about using aerotech latches like I have up front on the hood but thought they would be too bulky, then I remembered seeing the quick releases people use on the bumpers and went looking for them. Lucky Brandon needed to order some for his self and I was able to jump on his order for a set of Quik-Latches (mini versions). They are super easy to install, easy to use and look very clean when all said and done.
 1458155906508 by David, on Flickr
I used 4 of these fancy latches to secure the lid down. took a bit to figure out how we could mark the trunk, the old dab of grease trick wouldnt work due to the fact the track needed pressure to sit flush and this would cause the grease to make a line and not a nice dot. The weight savings from this right now is 40lbs, this number will drop a bit when I can add up the weight from the wing and uprights, I suspect I will be around the 30lbs mark.
 20160317_140621 by David, on Flickr
After that I put the final wiring harness back in while Brandon remounted the Sparco harness ( felt good to sit in the seat for the test fit. When we were done that I did a quick check to ensure all the AN12 lines for the drysump were tight so I could fill the tank full of oil. I was also able to secure the lines from the fuel tank to the radium surge tank. I still need to sort out the mounting for the surge tank, I have it pretty much where I want it, just need to think of the finer details lol.
so now that everything was on the car that needed to be on the car for startup we were able to clean up the floor and drop her back down on all 4 wheel, forgot how low the car really is when it is sitting on ground level haha, still need to sort out a proper hide height and alignment.
 20160317_140642 by David, on Flickr
 20160317_140607 by David, on Flickr
really all that is missing right now on the exterior is the wing, still waiting on mounts to be completed.
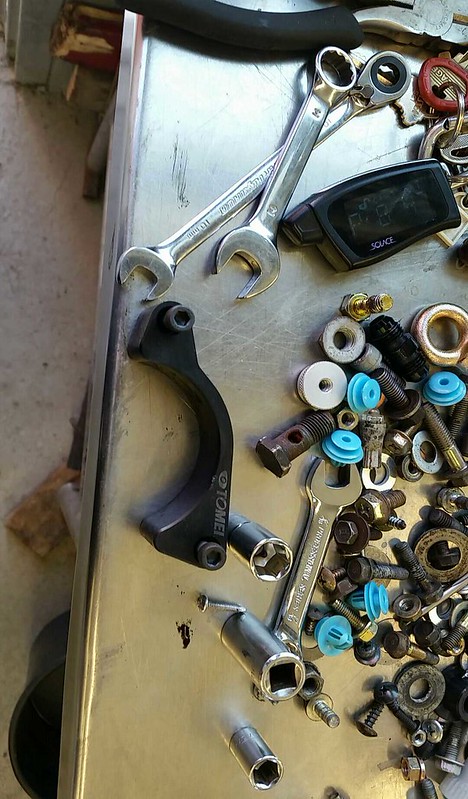
SOOOO after all this work was done and we started cleaning up the work area and throwing out the garbage and organizing things I found a part that SHOULD have already been on the car. It seems I have somehow forgot to put the timing belt guide back on while timing the motor... Now I need to rip the front end off again to get this thing on, boy way I ever pissed and upset with myself that I had forgot such an important part.
 1458235447000 by David, on Flickr
1458155906508 by David, on FlickrI used 4 of these fancy latches to secure the lid down. took a bit to figure out how we could mark the trunk, the old dab of grease trick wouldnt work due to the fact the track needed pressure to sit flush and this would cause the grease to make a line and not a nice dot. The weight savings from this right now is 40lbs, this number will drop a bit when I can add up the weight from the wing and uprights, I suspect I will be around the 30lbs mark.
20160317_140621 by David, on FlickrAfter that I put the final wiring harness back in while Brandon remounted the Sparco harness ( felt good to sit in the seat for the test fit. When we were done that I did a quick check to ensure all the AN12 lines for the drysump were tight so I could fill the tank full of oil. I was also able to secure the lines from the fuel tank to the radium surge tank. I still need to sort out the mounting for the surge tank, I have it pretty much where I want it, just need to think of the finer details lol.
so now that everything was on the car that needed to be on the car for startup we were able to clean up the floor and drop her back down on all 4 wheel, forgot how low the car really is when it is sitting on ground level haha, still need to sort out a proper hide height and alignment.
20160317_140642 by David, on Flickr20160317_140607 by David, on Flickrreally all that is missing right now on the exterior is the wing, still waiting on mounts to be completed.
SOOOO after all this work was done and we started cleaning up the work area and throwing out the garbage and organizing things I found a part that SHOULD have already been on the car. It seems I have somehow forgot to put the timing belt guide back on while timing the motor... Now I need to rip the front end off again to get this thing on, boy way I ever pissed and upset with myself that I had forgot such an important part.
1458235447000 by David, on FlickrWOW I have not updated this in a very long time and for good/bad reasons. Work has taken a lot of my time and then the car didn't want to play ball at all. I can tell you it almost came down to a part out, Idin and Chris from Touge made a good effort to keep me in the game.
I will start off from where I ended,
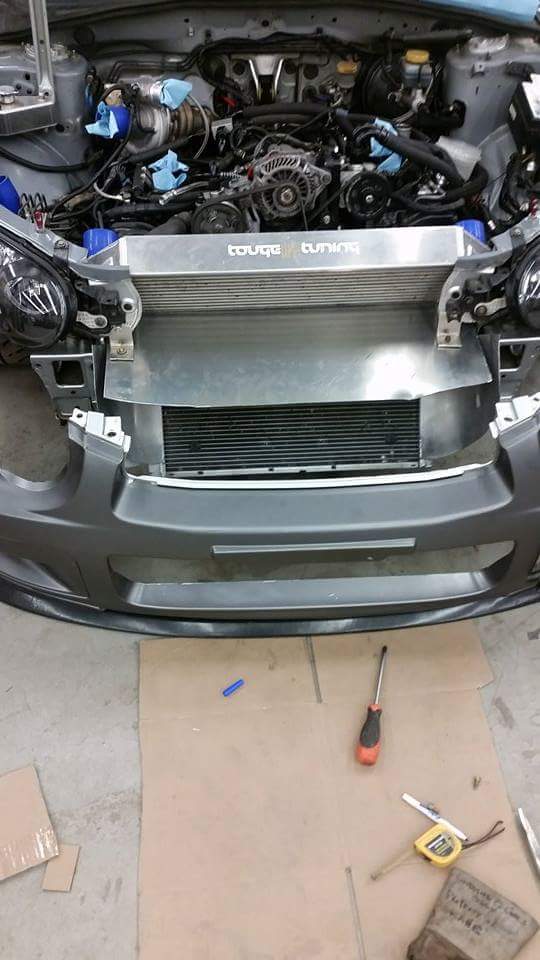
Once the motor was in and things we getting sorted out I asked my buddy Brandon to make a divider plate between the Rad and IC. It turned out better than expected, now the air will be pushed threw the respected cooler.
 received_10156656706395109 by David, on Flickr
 received_10156656706340109 by David, on Flickr
After that was done we moved onto the wiring and to start getting the car ready to run. Well some where along the way I missed a connector under the dash, that took a few hours to figure out what it was as it really just presented itself as a bad ground. almost ended up pulling the harness out again FML. Once that was fixed we thought we were ready to fire up and we were, she too a little longer than I would have wanted to build oil pressure but it came up and then we fired her up.... MY GOD it didnt like that, she was running rough as all hell. after working on her so much and late nights every night we also missed the coil packs on the passenger side, can't blame anyone but myself for not checking. So I drove the car home that night.
Next day was Dyno day and of course this bitch didnt want to play, it started of with the WG not opening up until 26psi (should have been 19psi) so we checked to see if the arm was jammed but it looked good, then we took it out and tested it with compressed air slowly going up in pressure until we started to see it move. We decided to take it apart and remove one of the springs and go from there. Luckily it worked but it left us with a very low spring and just cranked up the preload to get her to where we needed it. We started doing pulls and then something very weird started happening, it was acting like a slipping clutch but things werent adding up as we were on a lot lower boost, but I almost threw-up as I had spent a good amount of money on the OS Giken clutch. Turned everything off rest the dyno and bam back up and running. But I can tell you I was extremely disappointed in the numbers and I will not post them.
SO what happens when you don't make the power you wanted with a set turbo? you go bigger, now we have a Twin Scroll EFR 7670 ewg'ed.
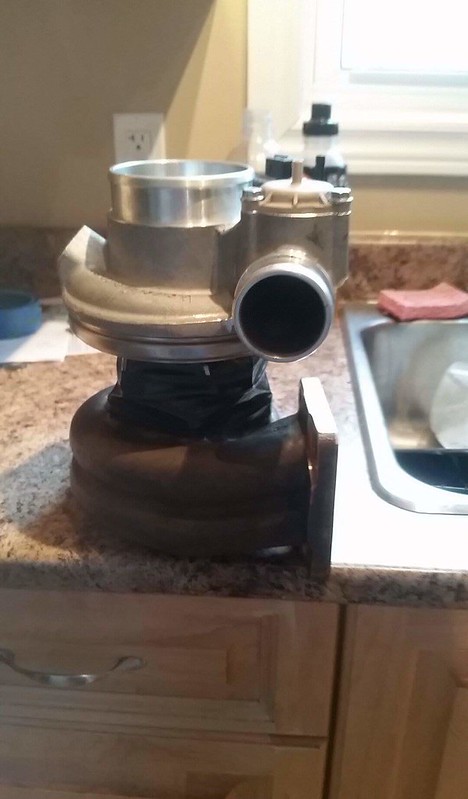 received_10156730226955198 by David, on Flickr
now that we have the new turbo in it was time to get a real alignment done as I missed my appointment last time before the last dyno day, was able to drive the car there and when they went to put it onto the rack the rear diff blew as you can here in the video below it did not sound good at all.
http://youtu.be/9e1EjQx8P18
SO with this mess I had the car towed home and started looking for a new diff, found out the the east coast values used diffs a lot higher than we did in the west. I sent a message to Ryan at vex to see if they had anything instock, he was quick to help me out. First we went over what was wrong and to double check that it wasn't just an axel that popped out, but everything felt and looked good. So he said we could drop ship a OS Giken diff right to my house but then I would need someone to install it and that would have been impossible on the time line I was on. He then told me that hey have a rebuilt OS Giken super lock installed into a 04 rear housing and sitting on the shelf which was waiting to be put on their rally car but he would be willing to send it out to me, I had it at the house in less then 15hrs from Calgary to Kingston (pretty much the other side of the country) and installed in under 30min. NOW filling the damn diff without a fluid gun killed me LOL that took like an hour FML
Old diff out which was made quick and painless due to the MSI rear frame and t-bar delete
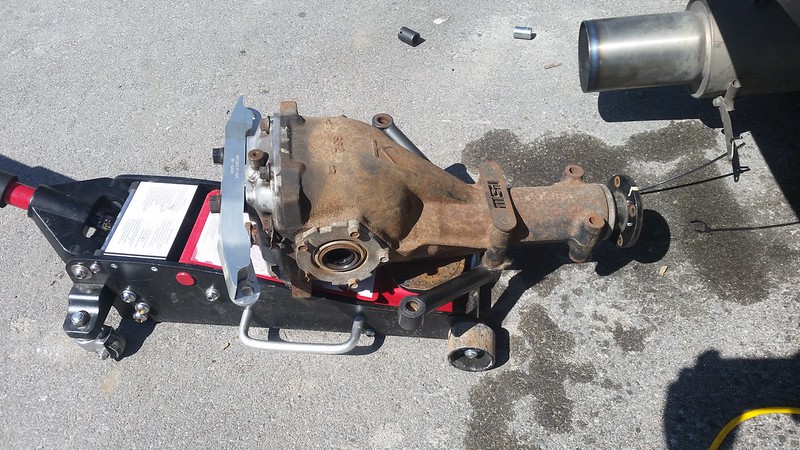 20160507_103805 by David, on Flickr
new diff
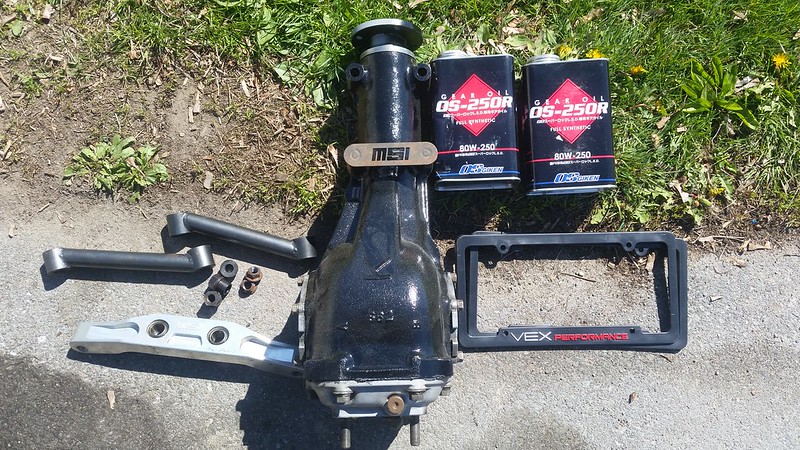 20160510_101004 by David, on Flickr
SO that's all back in and back to the alignment shop, for another round of BS. Car went onto the rack no problem, but barely came off the rack, thought for sure now the transmission was toast and jumped way to far ahead of myself without thinking as I was stressed out and just getting fedup with the car. I ripped the transmission out and apart to see what I could find.
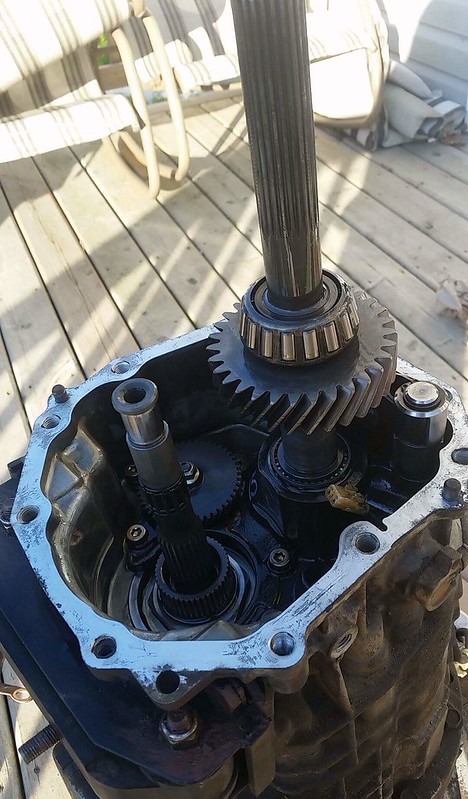 received_10156791927615198 by David, on Flickr
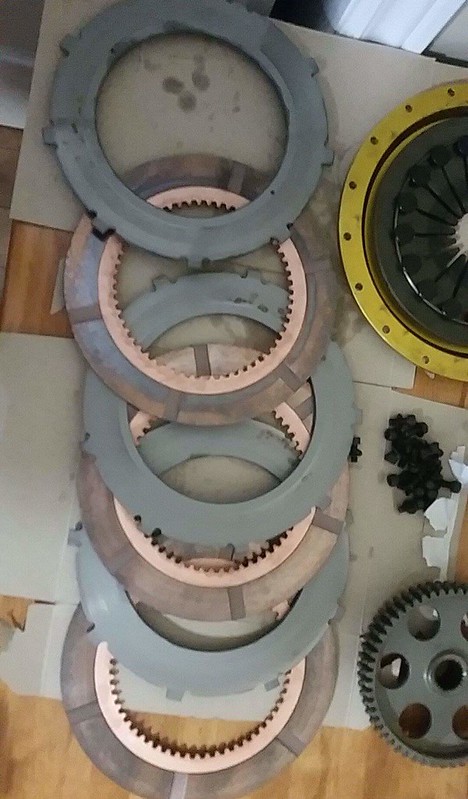 received_10156791951995198 by David, on Flickr
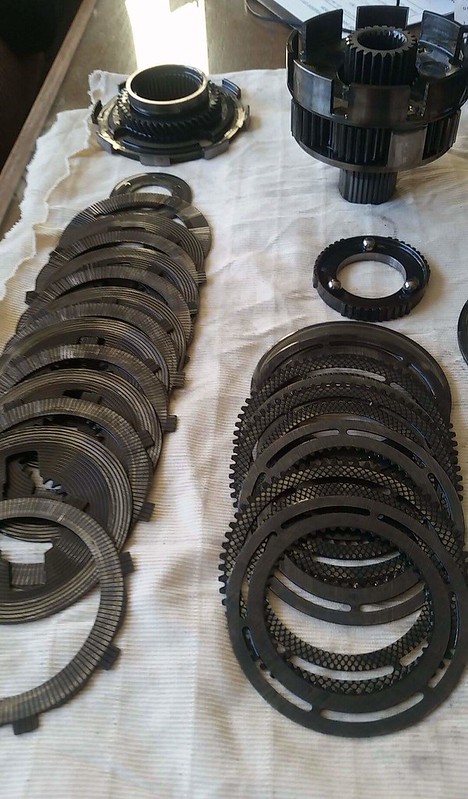 received_10156791918410198 by David, on Flickr
ALL THIS WAS FOR NOTHING FUCK!!! after finding nothing wrong with it I looked at the back of the car and the driver side rear axel was out about 1.5-2 INCHS and the passenger side was just about to pop out, since I didn't have the dccd hooked up she wouldn't move. I was SOOO MAD with myself and the Shop, needless to say I am not going back there again.
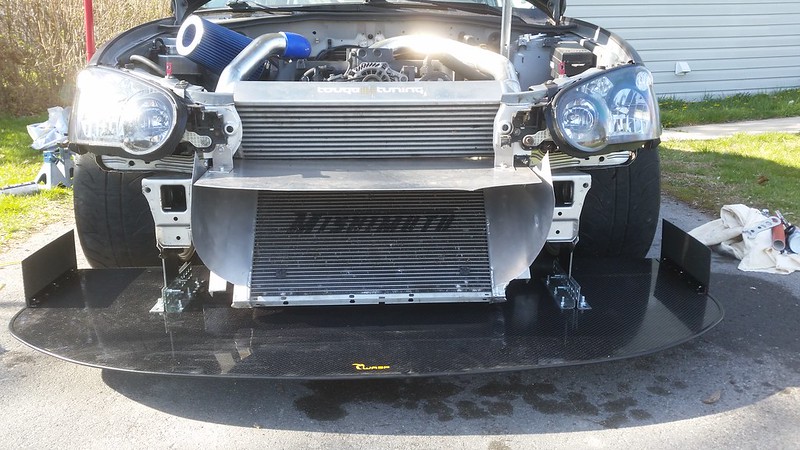
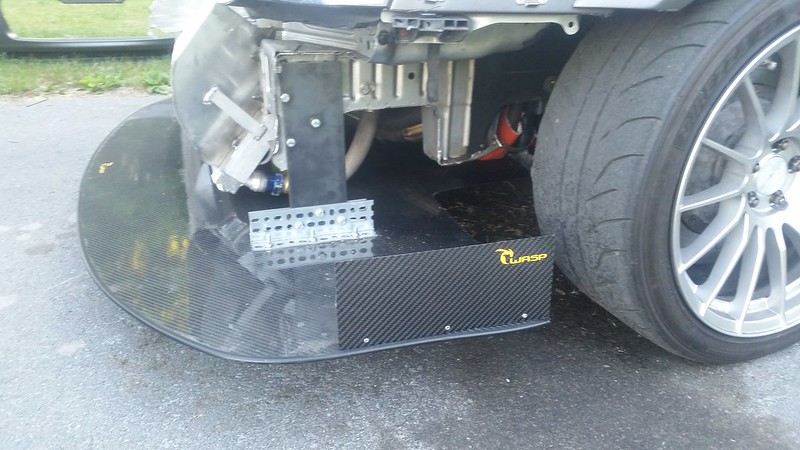
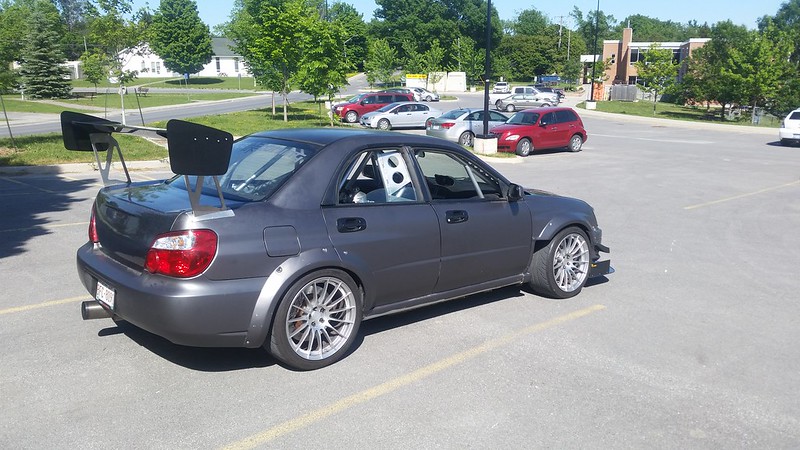
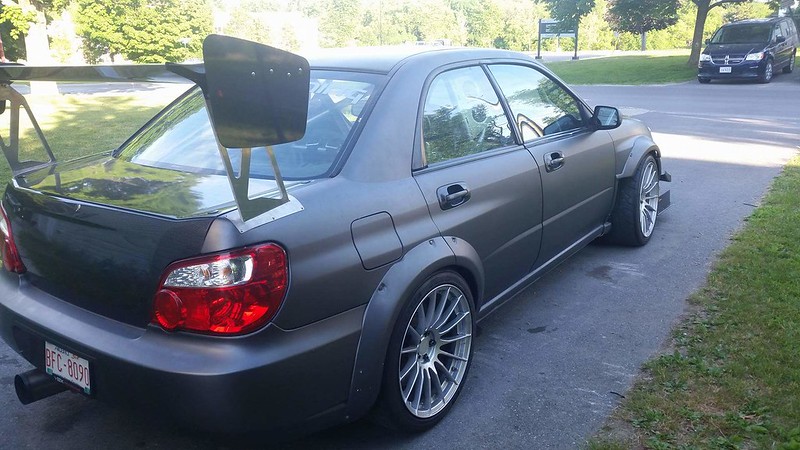
I then had to take a long break due to work, but when I came home I went to work on mounting the splitter, since WASP again screwed me some more by failing to send a chassis mounting bracket. Once that was done I sent the car out to get the wing installed. I am pretty happy with it but there will be some tweeks made to make it even more stable and move it back a few inchs.
 20160430_165712 by David, on Flickr
 20160619_200433 by David, on Flickr
 received_10156916251520198 by David, on Flickr
 20160616_162005 by David, on Flickr
 received_10156991627505198 by David, on Flickr
While I was testing the car out I noticed that we started getting lower than ideal oil pressure, after double and triple checking with different senders and gauges it was found to be true. To fix this I went back to the 11mm pump I had on before I swapped to the cosworth 10mm, not sure what was going on but this might be a sign of something worse I might just be doing a patch job, or there is something going on the with oiling within the 7670 as that is the only thing that has changed.
Final F U from the car was while it was performing some HARD PARKING booth duty during a CSCS event the PS shit the bed, almost burnt threw the belt. it was not safe to dive home, now Chris stayed up till midnight to wait for me at at the touge shop while it was towed there where it sat until I had time to go get it. Testing at home so far seems to point to the rack as I had a rebuilt pump replace the pump that was on the car and the problem is still there. I grabbed a old wrx rack from a local guy to test when I get back from my vacation.
Hope you all enjoy that updated.
I will start off from where I ended,
Once the motor was in and things we getting sorted out I asked my buddy Brandon to make a divider plate between the Rad and IC. It turned out better than expected, now the air will be pushed threw the respected cooler.
received_10156656706395109 by David, on Flickrreceived_10156656706340109 by David, on FlickrAfter that was done we moved onto the wiring and to start getting the car ready to run. Well some where along the way I missed a connector under the dash, that took a few hours to figure out what it was as it really just presented itself as a bad ground. almost ended up pulling the harness out again FML. Once that was fixed we thought we were ready to fire up and we were, she too a little longer than I would have wanted to build oil pressure but it came up and then we fired her up.... MY GOD it didnt like that, she was running rough as all hell. after working on her so much and late nights every night we also missed the coil packs on the passenger side, can't blame anyone but myself for not checking. So I drove the car home that night.
Next day was Dyno day and of course this bitch didnt want to play, it started of with the WG not opening up until 26psi (should have been 19psi) so we checked to see if the arm was jammed but it looked good, then we took it out and tested it with compressed air slowly going up in pressure until we started to see it move. We decided to take it apart and remove one of the springs and go from there. Luckily it worked but it left us with a very low spring and just cranked up the preload to get her to where we needed it. We started doing pulls and then something very weird started happening, it was acting like a slipping clutch but things werent adding up as we were on a lot lower boost, but I almost threw-up as I had spent a good amount of money on the OS Giken clutch. Turned everything off rest the dyno and bam back up and running. But I can tell you I was extremely disappointed in the numbers and I will not post them.
SO what happens when you don't make the power you wanted with a set turbo? you go bigger, now we have a Twin Scroll EFR 7670 ewg'ed.
received_10156730226955198 by David, on Flickrnow that we have the new turbo in it was time to get a real alignment done as I missed my appointment last time before the last dyno day, was able to drive the car there and when they went to put it onto the rack the rear diff blew as you can here in the video below it did not sound good at all.
http://youtu.be/9e1EjQx8P18
SO with this mess I had the car towed home and started looking for a new diff, found out the the east coast values used diffs a lot higher than we did in the west. I sent a message to Ryan at vex to see if they had anything instock, he was quick to help me out. First we went over what was wrong and to double check that it wasn't just an axel that popped out, but everything felt and looked good. So he said we could drop ship a OS Giken diff right to my house but then I would need someone to install it and that would have been impossible on the time line I was on. He then told me that hey have a rebuilt OS Giken super lock installed into a 04 rear housing and sitting on the shelf which was waiting to be put on their rally car but he would be willing to send it out to me, I had it at the house in less then 15hrs from Calgary to Kingston (pretty much the other side of the country) and installed in under 30min. NOW filling the damn diff without a fluid gun killed me LOL that took like an hour FML
Old diff out which was made quick and painless due to the MSI rear frame and t-bar delete
20160507_103805 by David, on Flickrnew diff
20160510_101004 by David, on FlickrSO that's all back in and back to the alignment shop, for another round of BS. Car went onto the rack no problem, but barely came off the rack, thought for sure now the transmission was toast and jumped way to far ahead of myself without thinking as I was stressed out and just getting fedup with the car. I ripped the transmission out and apart to see what I could find.
received_10156791927615198 by David, on Flickrreceived_10156791951995198 by David, on Flickrreceived_10156791918410198 by David, on FlickrALL THIS WAS FOR NOTHING FUCK!!! after finding nothing wrong with it I looked at the back of the car and the driver side rear axel was out about 1.5-2 INCHS and the passenger side was just about to pop out, since I didn't have the dccd hooked up she wouldn't move. I was SOOO MAD with myself and the Shop, needless to say I am not going back there again.
I then had to take a long break due to work, but when I came home I went to work on mounting the splitter, since WASP again screwed me some more by failing to send a chassis mounting bracket. Once that was done I sent the car out to get the wing installed. I am pretty happy with it but there will be some tweeks made to make it even more stable and move it back a few inchs.
20160430_165712 by David, on Flickr20160619_200433 by David, on Flickrreceived_10156916251520198 by David, on Flickr20160616_162005 by David, on Flickrreceived_10156991627505198 by David, on FlickrWhile I was testing the car out I noticed that we started getting lower than ideal oil pressure, after double and triple checking with different senders and gauges it was found to be true. To fix this I went back to the 11mm pump I had on before I swapped to the cosworth 10mm, not sure what was going on but this might be a sign of something worse I might just be doing a patch job, or there is something going on the with oiling within the 7670 as that is the only thing that has changed.
Final F U from the car was while it was performing some HARD PARKING booth duty during a CSCS event the PS shit the bed, almost burnt threw the belt. it was not safe to dive home, now Chris stayed up till midnight to wait for me at at the touge shop while it was towed there where it sat until I had time to go get it. Testing at home so far seems to point to the rack as I had a rebuilt pump replace the pump that was on the car and the problem is still there. I grabbed a old wrx rack from a local guy to test when I get back from my vacation.
Hope you all enjoy that updated.
Hah, its a bit after christmas, but any chance the offer is still good?!
lol i still have it in edmonton
Real Auto Dynamics
New member
Holy Crap you've been busy. I thoroughly enjoyed reading this thread! Nice job! :tup:
Holy Crap you've been busy. I thoroughly enjoyed reading this thread! Nice job! :tup:
Thank you glad you enjoyed it.
SudoSTI
Member
Excellent thread. I very much dig the flocked interior. I'm going to have to do that. I'm a little bummed the reverse intake manifold didn't work out with the Kaminari hood. I'm reverse intake manifold right meow but not v-mounted like you. I was really hoping to be able to fit a Kaminari hood. I'm also excited to see your results with the EFR 7670. That was the turbo I originally wanted to go with but limited my budget and went for the baby version (S256).
Excellent thread. I very much dig the flocked interior. I'm going to have to do that. I'm a little bummed the reverse intake manifold didn't work out with the Kaminari hood. I'm reverse intake manifold right meow but not v-mounted like you. I was really hoping to be able to fit a Kaminari hood. I'm also excited to see your results with the EFR 7670. That was the turbo I originally wanted to go with but limited my budget and went for the baby version (S256).
if you are not using the AC and move the Alt to that location you could make it work. I have a drysump pump in that location so I could not squeeze it in.
thanks for the kind words.
Similar threads
- Replies
- 2
- Views
- 964
- Replies
- 2
- Views
- 1K
- Replies
- 7
- Views
- 5K