2004-2007 GD Rear Strut Clunk Fix just for the people of IGOTASTi !!!
First I'm not going to list tools because I am working out of a shop and have tools most people might not have. Second if you need help identifying the tools that might be needed to complete this job you might want to do some soul searching and see if this would be something you can handle with the skills you have. Third air tools are you friend with this job.
Now let the fun begin
Remove-seat bottom and seat back
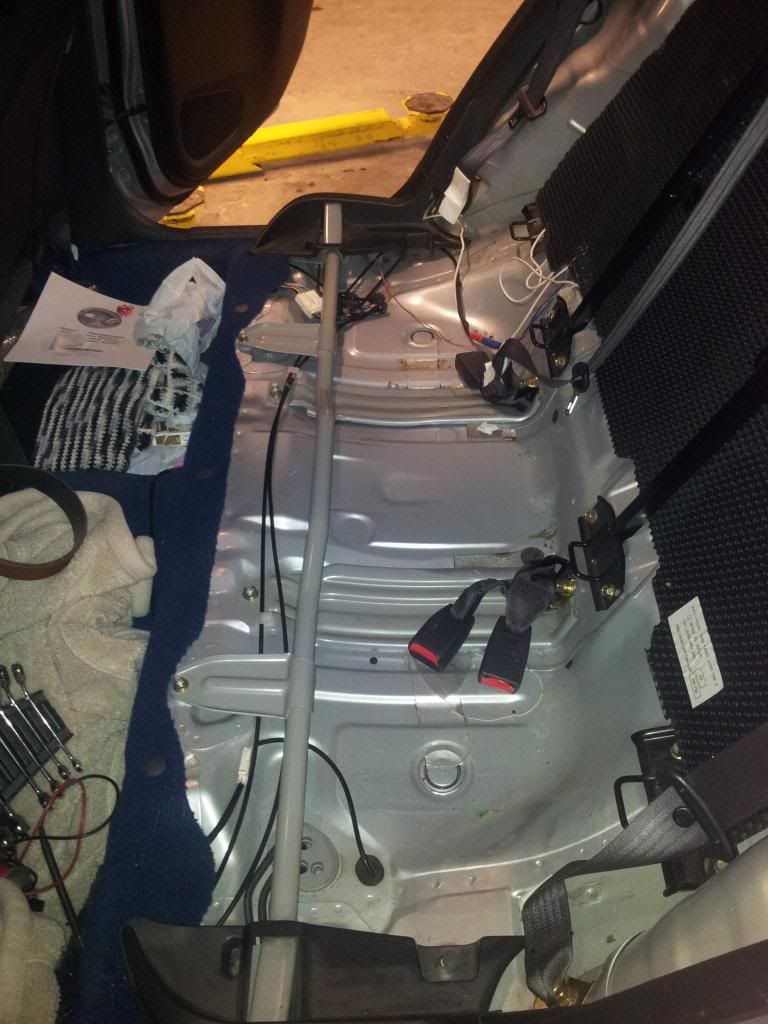
you would be surprized what you can find under here.
Look up next to where the seat belts are attached, you will see a large metal cap held on with 3 12mm nuts - This cap/nuts hold the top of the rear strut and must be removed to separate the strut from the car
I used a 14mm socket to remove the seat belt retractor so I could move it out of the way for the time being.
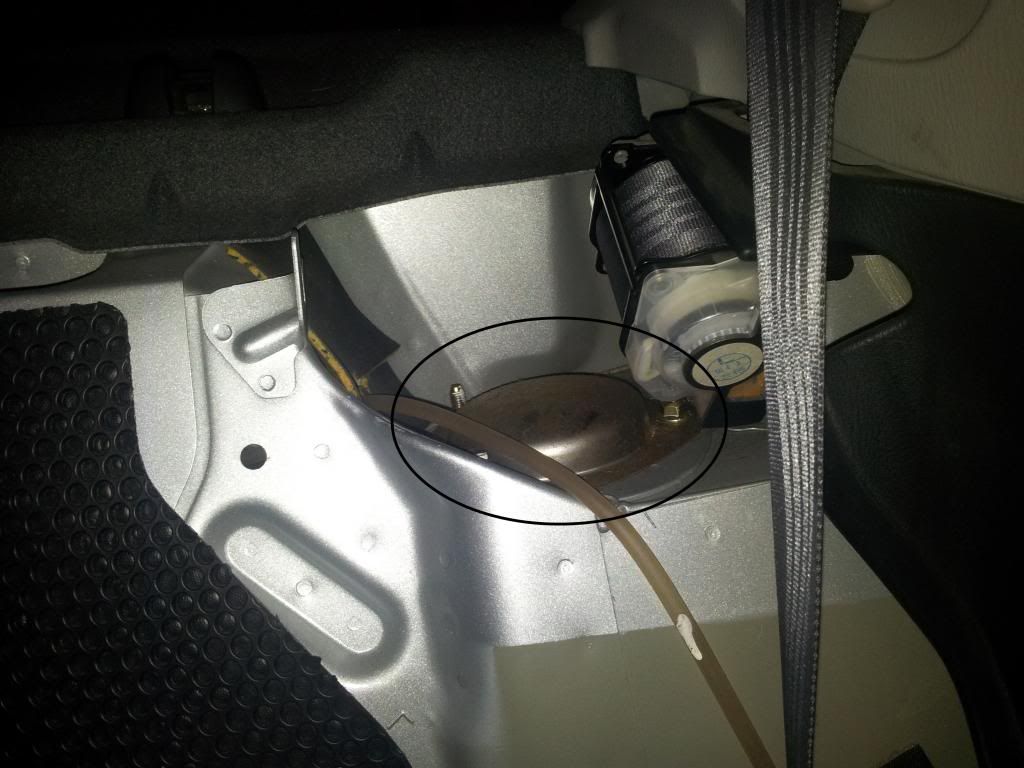
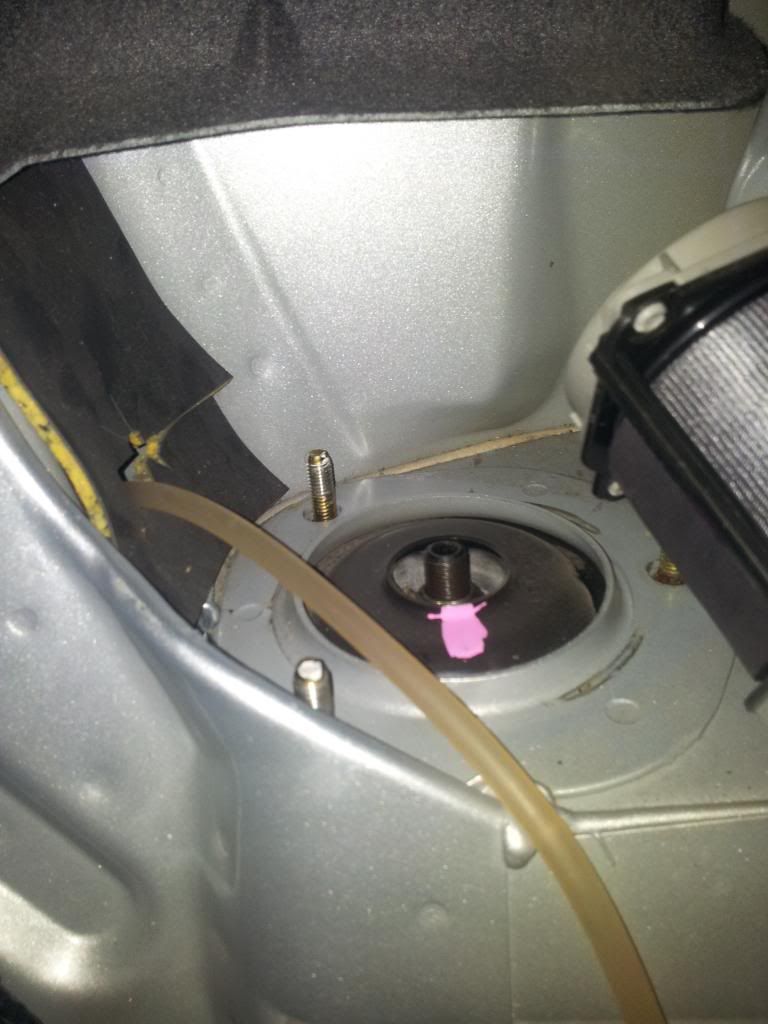
I removed both sides before raising the car (I used a lift)
Go head and get the car lifted up. Now that the top of the struts are removed the rear end will hang a little lower then normal. Remove tires and go ahead a leave the 19mm sock on what ever you were using (air power is your friend).
Remove the the clip holding the brake line to the strut.
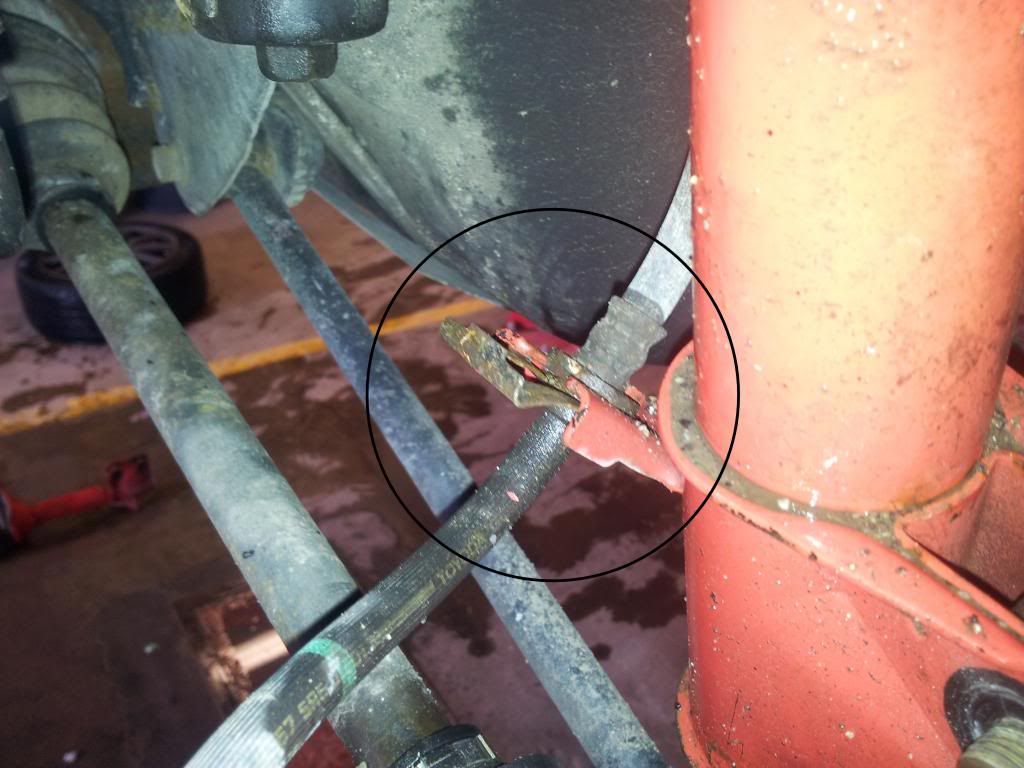
Remove the two 19mm bolts/nuts holding the strut to the hub.
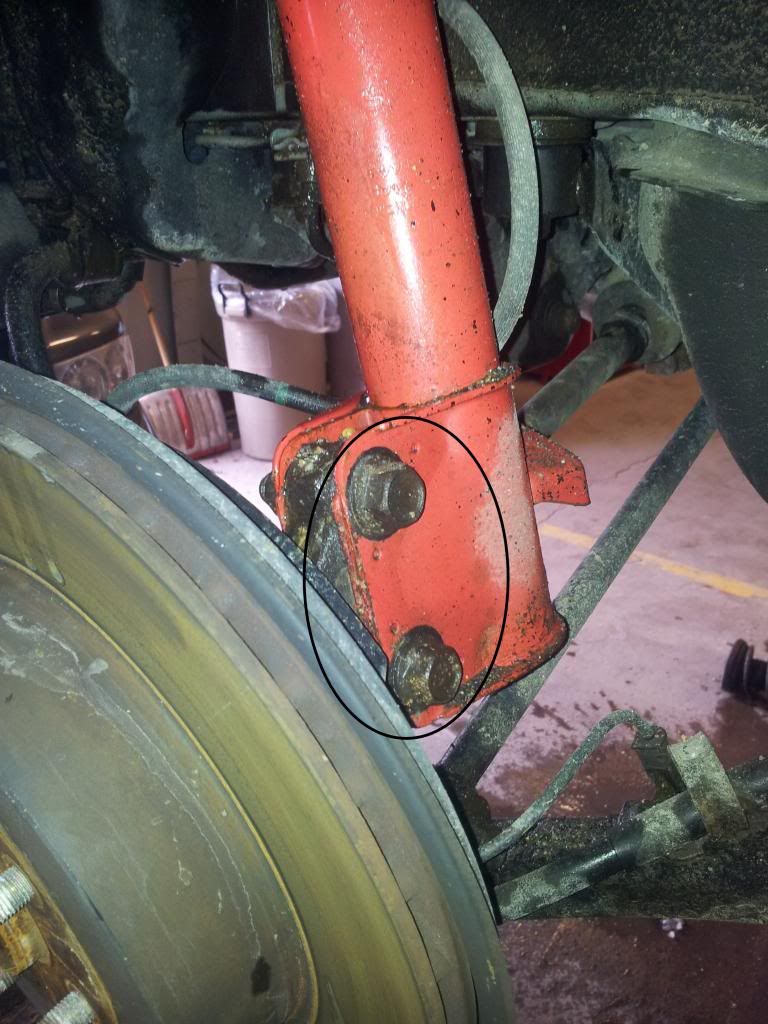
After the bolts are removed you can now remove the strut from the car.
Go head and brake down the strut - Remove the nut on top of the strut to remove the top hat and spring (air power is your friend)
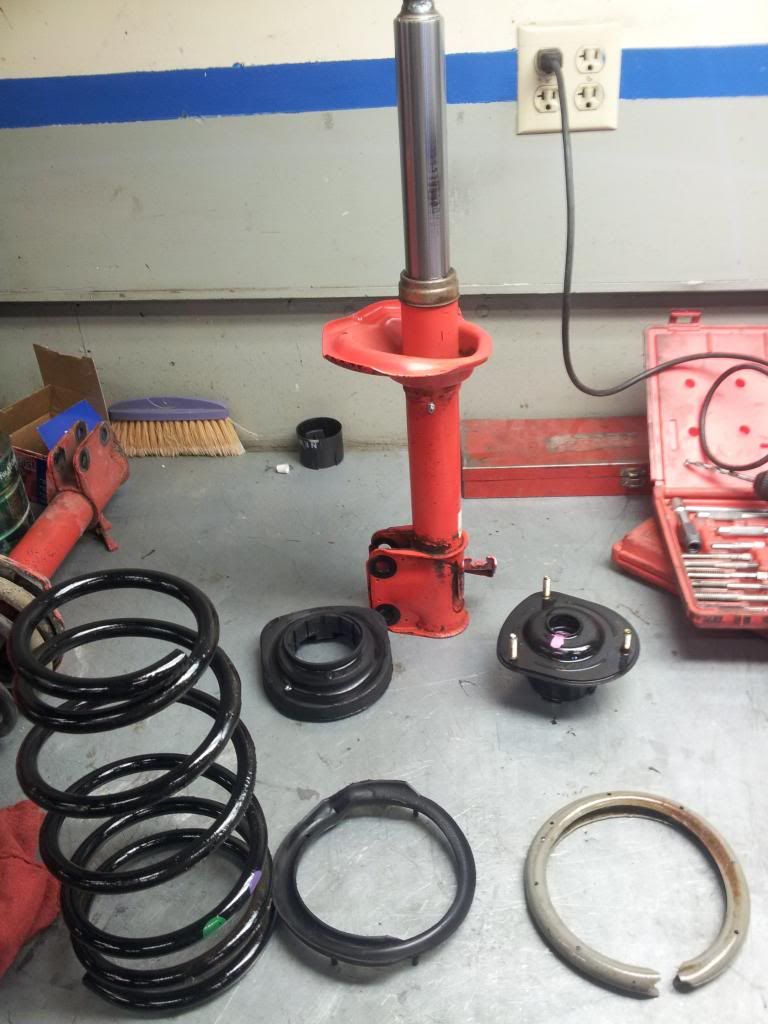
Remove the nut on the bottom of the strut housing to separate the inverted strut from the strut housing (air power is your friend)
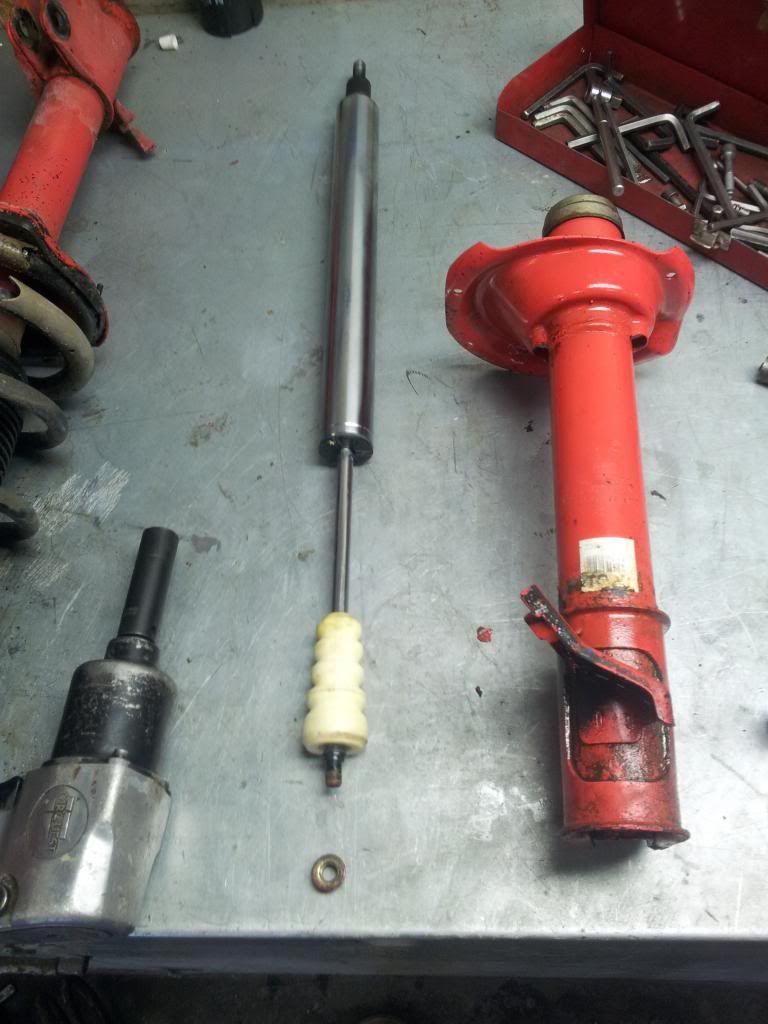
Now it is time to start cleaning - Clean off the inverted strut by wiping down the outside with a rag, pay close attention to the cleanliness of your work area this could make or brake this rebuild.
When cleaning the strut housing make sure to clean between the upper and lower metal bushing and around the seal, anything below that is not really important and to tell you the truth a pain in the ass to get to. Pay close attention to the area between the metal bushing this is where we will be installing the grease fitting so you will not have to do this all over again if and when they start to clunk again.
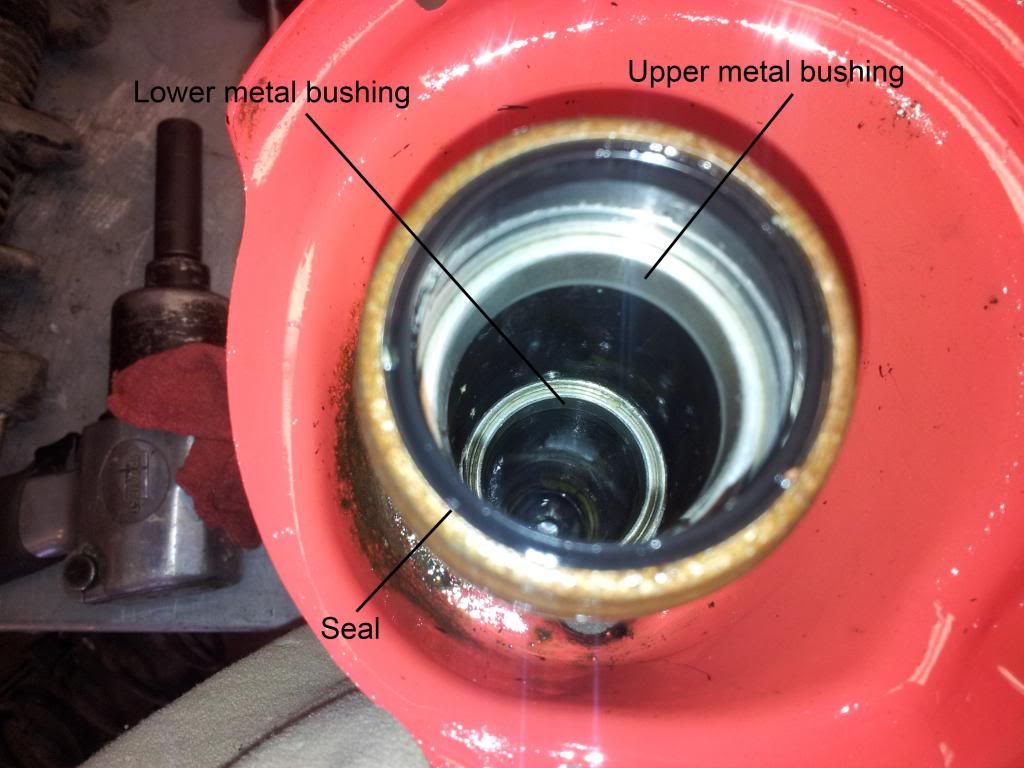
You can see by the design of the strut housing that if there is no lubrication between the inverted strut and the metal bushings it could cause a lot of friction and binding hence the clunk. We are going to help solve this little oversight of engineering by installing a grease fitting placed between the upper and lower metal bushing. This will allow us to fill the area in between with lubrication in the way of grease and to use the pressure of the grease gun to force grease between the strut and metal bushings cutting friction and doing away with the CLUNK!!!
Tools-
Drill
Drill bit - size will depend on what kind of grease fitting you will be using
Tread tap - size will depend on drill bit size and grease fitting
Parts-
Grease fitting
The first thing that needs to be identified will be the place to install the grease fitting. Remember it needs to be in an area that is easily reached with a grease gun, in between the upper and lower metal bushings and some what protected from the elements. (I chose to place it facing the rear of the car)
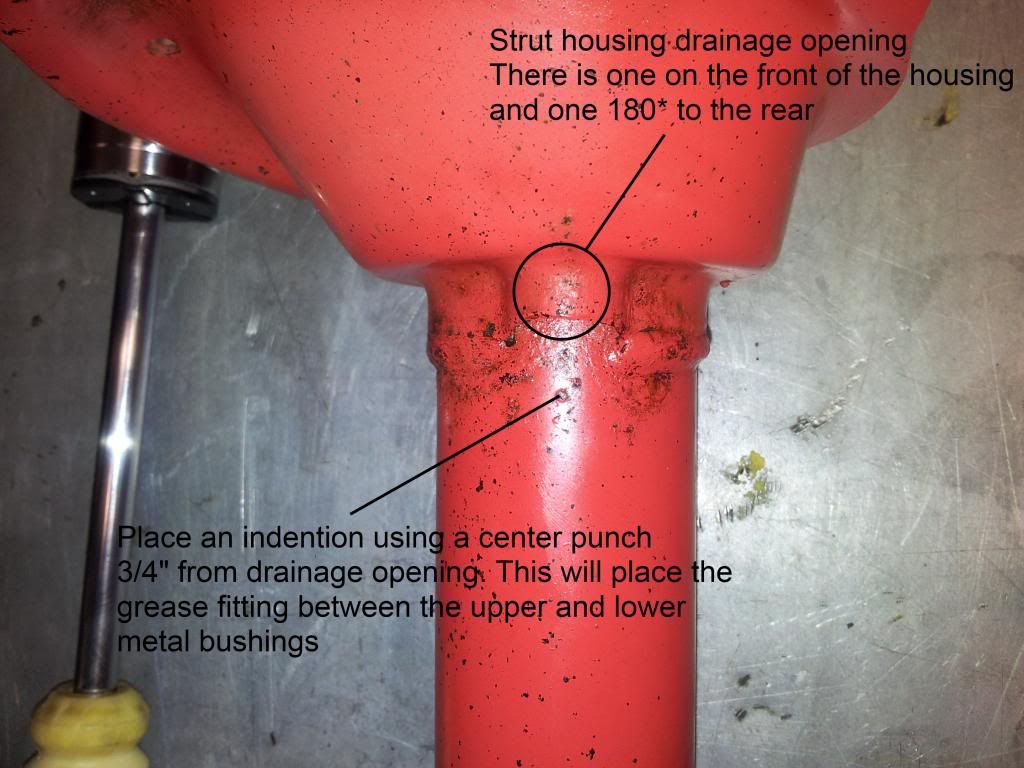
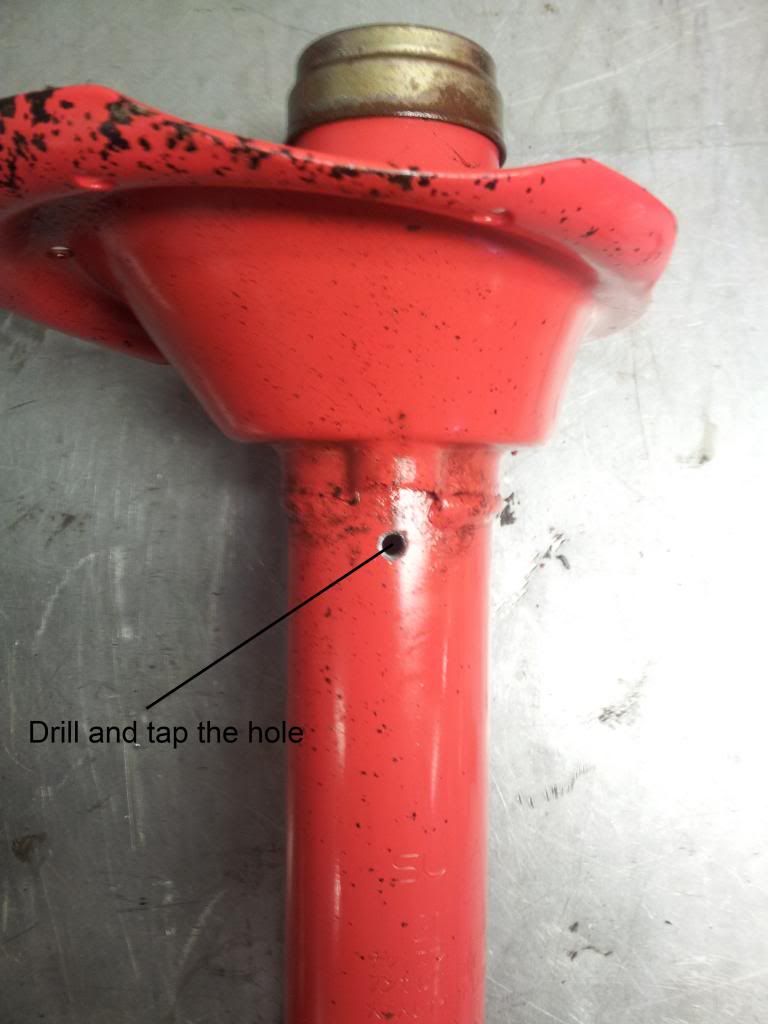
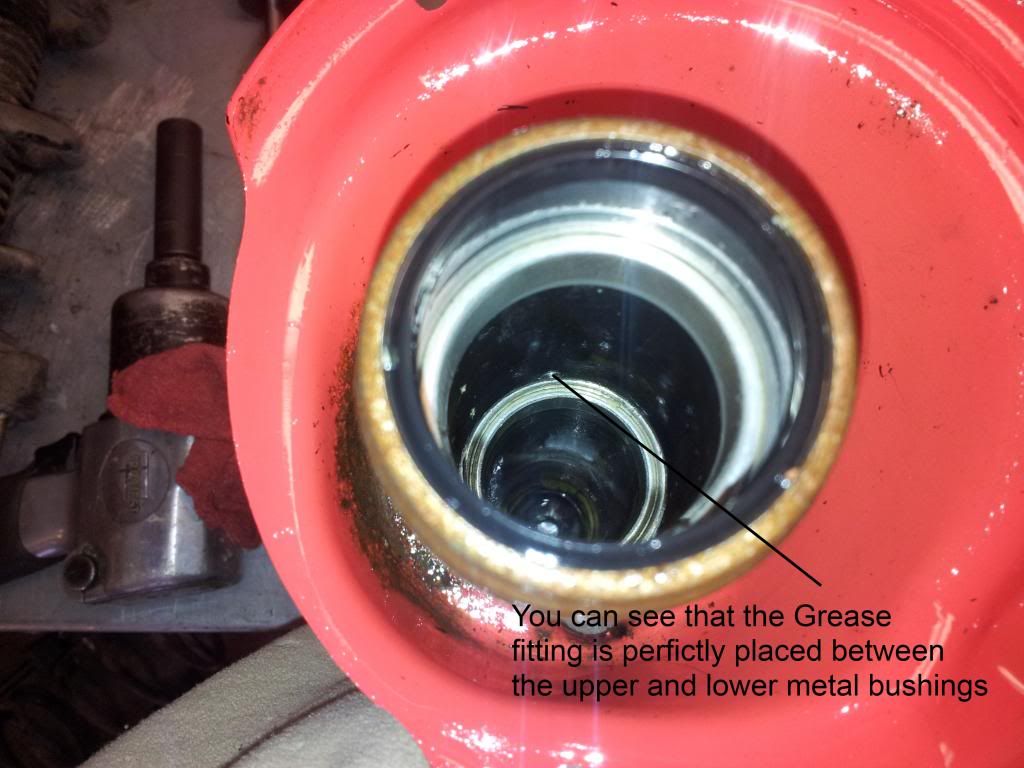
Now Would be a great time to clean up after yourself. You just drilled and tapped a hole how much of the metal went where it was not suppose to? Give the strut housing a complete cleaning!!!
Here comes the best part of this.
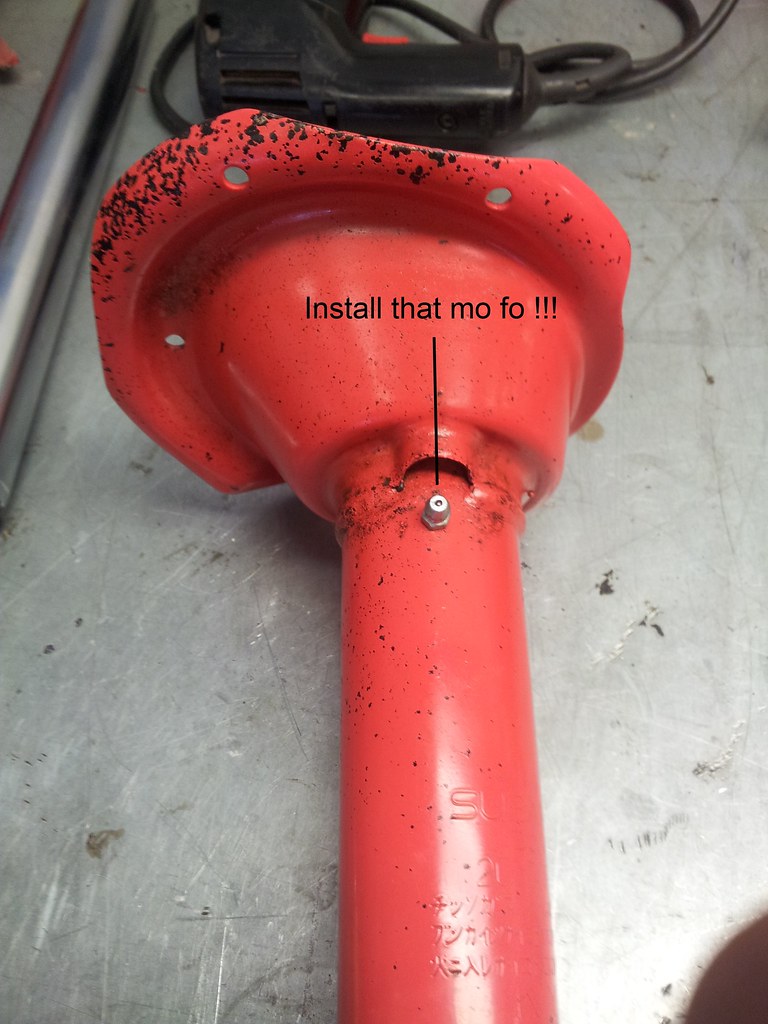
Now that the hard part is over it is time to get dirty, go ahead and grab your favorite grease. You need to pre grease the strut housing by filling in the space in between the two metal bushing and around the seal, the more the better.
Now add a small slathering of grease to the inverted shock. Most of this will come off during reinsertion of the the shock into the shock housing.
Install the the shock into the shock housing
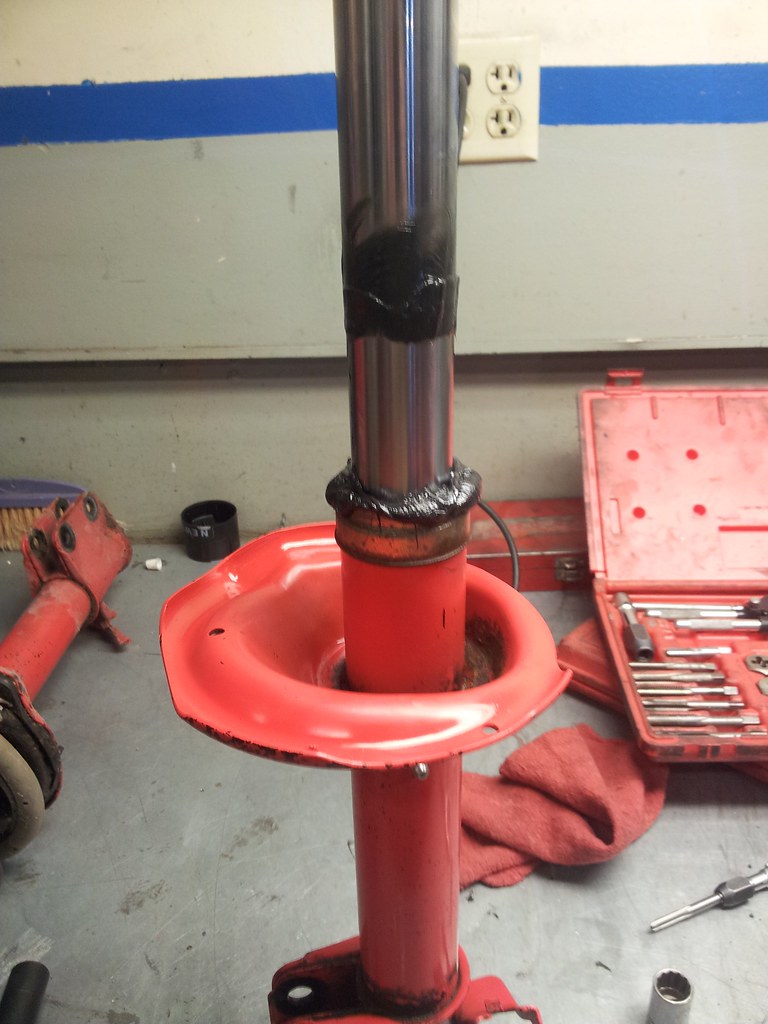
Told you it would get all over the place. Clean that shit up!!!
at this point it is just putting everything back together and reinstalling the struts back on the car.
After installation, but before mounting the tires back on, go ahead and put 3 to 4 shots of grease into them just to build a little pressure inside of the strut. (dont over do it or you might blow the seal off the top of the strut)
After installation of the tires you should rise and lower the car to exercise the struts and get the grease moving.
Now drive around and enjoy you clunk free life style.
Funny after thought - I thought my car had something wrong with it because it was NOT clunking around town :tard:
First I'm not going to list tools because I am working out of a shop and have tools most people might not have. Second if you need help identifying the tools that might be needed to complete this job you might want to do some soul searching and see if this would be something you can handle with the skills you have. Third air tools are you friend with this job.
Now let the fun begin
Remove-seat bottom and seat back

you would be surprized what you can find under here.
Look up next to where the seat belts are attached, you will see a large metal cap held on with 3 12mm nuts - This cap/nuts hold the top of the rear strut and must be removed to separate the strut from the car
I used a 14mm socket to remove the seat belt retractor so I could move it out of the way for the time being.


I removed both sides before raising the car (I used a lift)
Go head and get the car lifted up. Now that the top of the struts are removed the rear end will hang a little lower then normal. Remove tires and go ahead a leave the 19mm sock on what ever you were using (air power is your friend).
Remove the the clip holding the brake line to the strut.

Remove the two 19mm bolts/nuts holding the strut to the hub.

After the bolts are removed you can now remove the strut from the car.
Go head and brake down the strut - Remove the nut on top of the strut to remove the top hat and spring (air power is your friend)

Remove the nut on the bottom of the strut housing to separate the inverted strut from the strut housing (air power is your friend)

Now it is time to start cleaning - Clean off the inverted strut by wiping down the outside with a rag, pay close attention to the cleanliness of your work area this could make or brake this rebuild.
When cleaning the strut housing make sure to clean between the upper and lower metal bushing and around the seal, anything below that is not really important and to tell you the truth a pain in the ass to get to. Pay close attention to the area between the metal bushing this is where we will be installing the grease fitting so you will not have to do this all over again if and when they start to clunk again.

You can see by the design of the strut housing that if there is no lubrication between the inverted strut and the metal bushings it could cause a lot of friction and binding hence the clunk. We are going to help solve this little oversight of engineering by installing a grease fitting placed between the upper and lower metal bushing. This will allow us to fill the area in between with lubrication in the way of grease and to use the pressure of the grease gun to force grease between the strut and metal bushings cutting friction and doing away with the CLUNK!!!
Tools-
Drill
Drill bit - size will depend on what kind of grease fitting you will be using
Tread tap - size will depend on drill bit size and grease fitting
Parts-
Grease fitting
The first thing that needs to be identified will be the place to install the grease fitting. Remember it needs to be in an area that is easily reached with a grease gun, in between the upper and lower metal bushings and some what protected from the elements. (I chose to place it facing the rear of the car)


Now Would be a great time to clean up after yourself. You just drilled and tapped a hole how much of the metal went where it was not suppose to? Give the strut housing a complete cleaning!!!
Here comes the best part of this.

Now that the hard part is over it is time to get dirty, go ahead and grab your favorite grease. You need to pre grease the strut housing by filling in the space in between the two metal bushing and around the seal, the more the better.
Now add a small slathering of grease to the inverted shock. Most of this will come off during reinsertion of the the shock into the shock housing.
Install the the shock into the shock housing

Told you it would get all over the place. Clean that shit up!!!
at this point it is just putting everything back together and reinstalling the struts back on the car.
After installation, but before mounting the tires back on, go ahead and put 3 to 4 shots of grease into them just to build a little pressure inside of the strut. (dont over do it or you might blow the seal off the top of the strut)
After installation of the tires you should rise and lower the car to exercise the struts and get the grease moving.
Now drive around and enjoy you clunk free life style.
Funny after thought - I thought my car had something wrong with it because it was NOT clunking around town :tard:
Last edited:
