TK-421
New member
Welcome to another How to Install by TK-421!
Today we will be covering the installation procedure for installing the Shifter Assembly.
The Shifter Assembly Install can be used as a reference for installing either a Short Throw or Stock Replacement, I will cover both.
Alright as always lets go over the parts and tools you will need to accomplish this task at hand.
The Parts:
A Short Throw Shifter of your choice, recommended shifters are Kartboy, Cobb and TWM.
Silicone Paste and White Lithium Grease will also be needed to help lubricate the new parts.
On to Tools. As I have covered before, I do this sort of work for a living, and I have tools at my disposal that the average hobbist doesn't own, please keep that in mind.
Installing a shifter is pretty straight forward and doesn't require that many special tools and equipment to install. You'll be working with some very basic hand tools today.
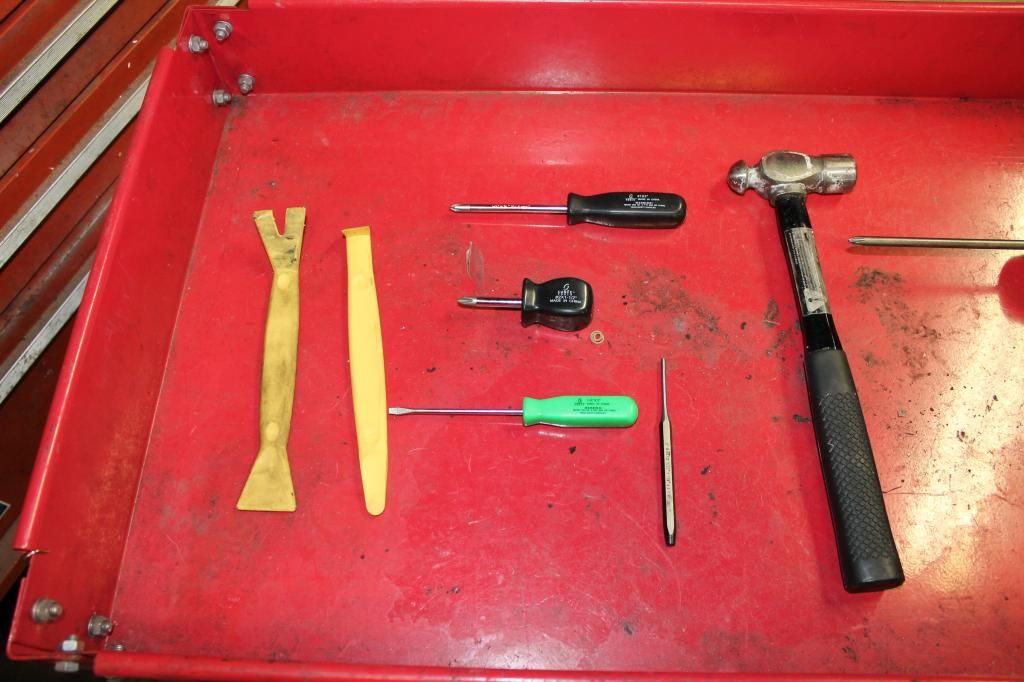
The tools you will need include....
A Phillps Head Screwdriver
Two Flat Head Screwdrivers
A Pair of Side Cutters
A Pair of Internal Snap Ring Pliers, this maybe the only tool you may need to go out and purchase. You can pick a basic set up at your local hardware store or sears for under $20 bucks.
Two 12mm Wrenches
Floor Jack
Two Safety Stands
3/8 Flat Punch
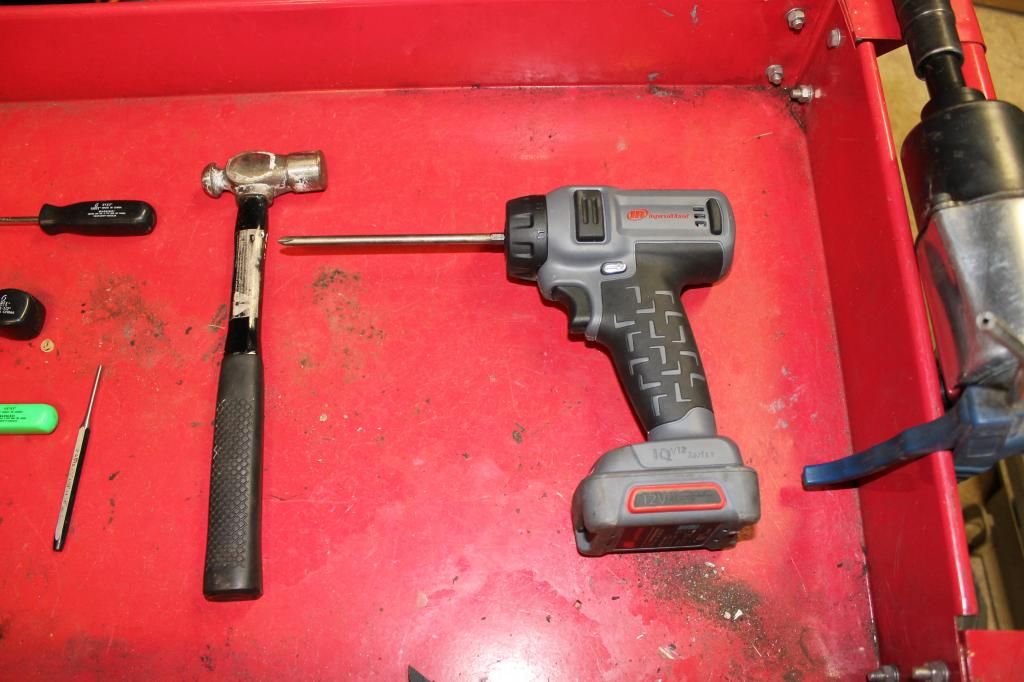
Small Ball Peen Hammer
Optional Tools Include....
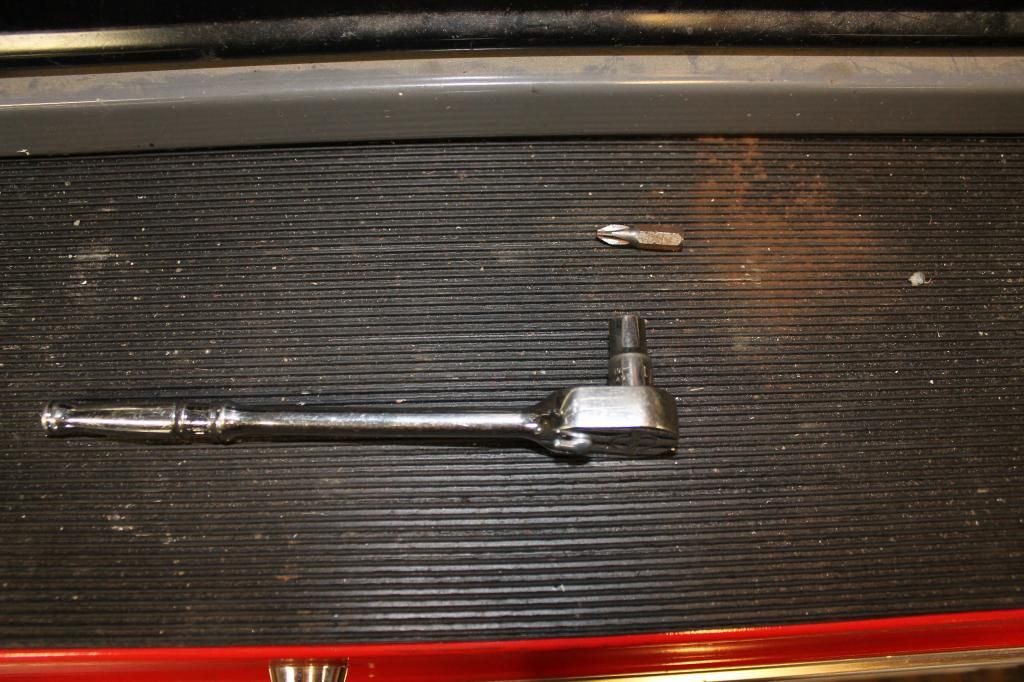
10mm Socket
1/4 Drive 12 inch Extension
1/4 Drive Ratchet
Cordless Screw Gun or Cordless Drill
12mm Ratcheting Wrench
Flashlight/Tasklight/Droplight, some form of Illumination
Magnetic Parts Tray
Trim Removal Tools or Bone Tools as called in Dealerships
Alright lets get to work.
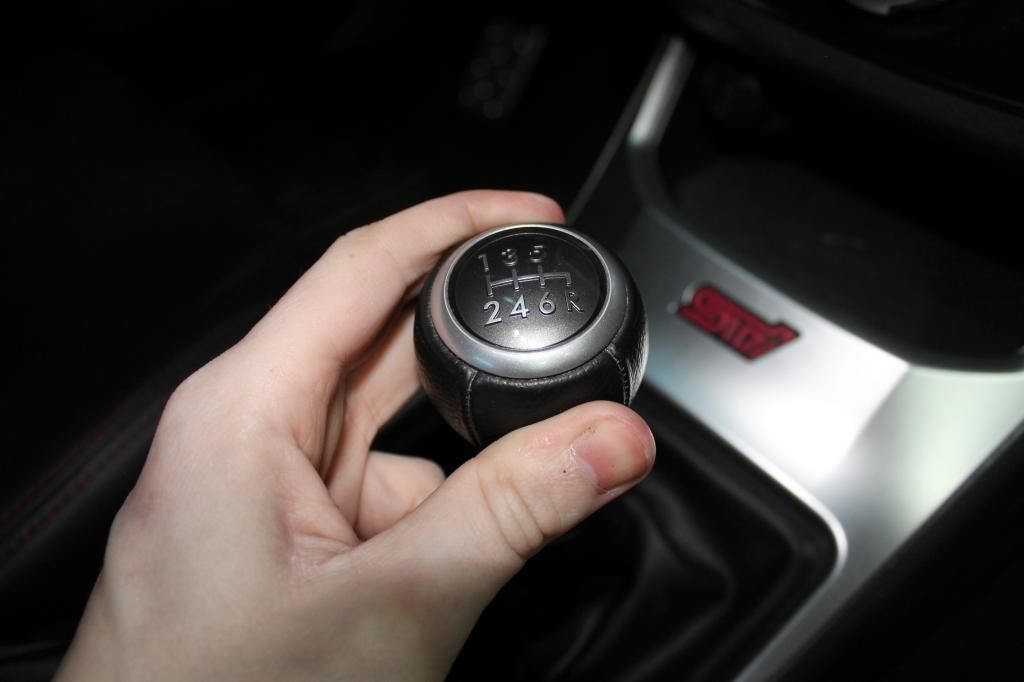
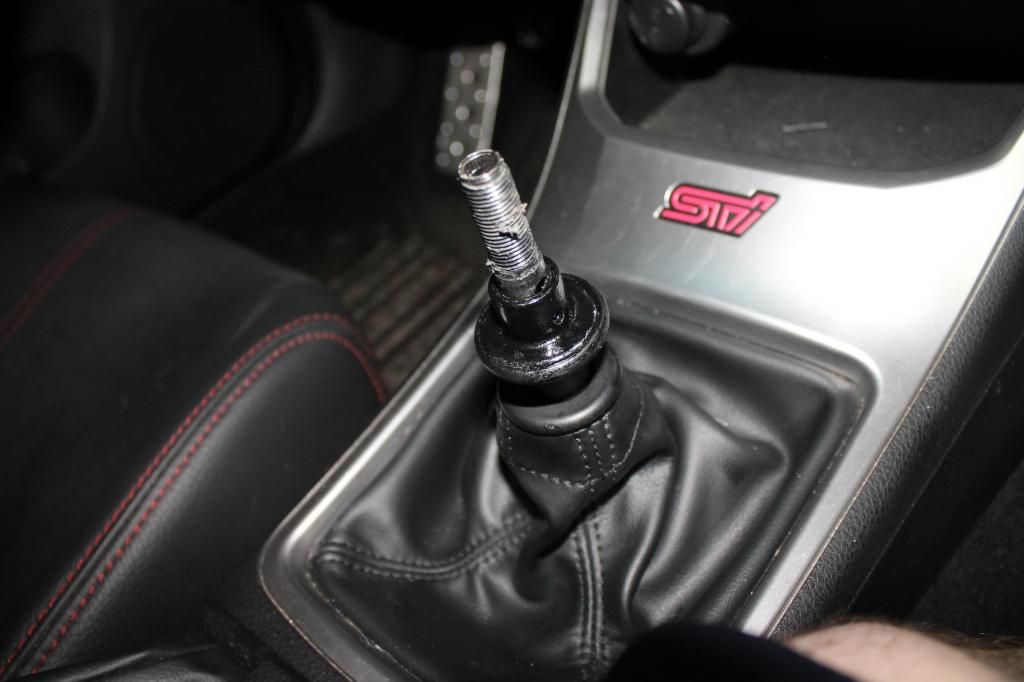
Go into your car and start by twisting the shift knob counter clockwise to remove it from the shifter.
Now comes a tricky part.
Take your Punch and Hammer, your going to be removing the roll pin that holds the reverse lockout cable in place and allows the stock reverse lockout lever to actuate the cable.
Take the punch and hammer and carefully tap out the roll pin SLOWLY. If your NOT installing the Perrin Reverse lockout, YOU DO NOT WANT TO LOSE THE ROLL PIN!!!! It will put a damper in your mood like no other!!! This is one of the reasons I say to use a Magnetic Parts Tray. You can pick these things up on the cheap at places like Northern Tool and Harbor Freight.
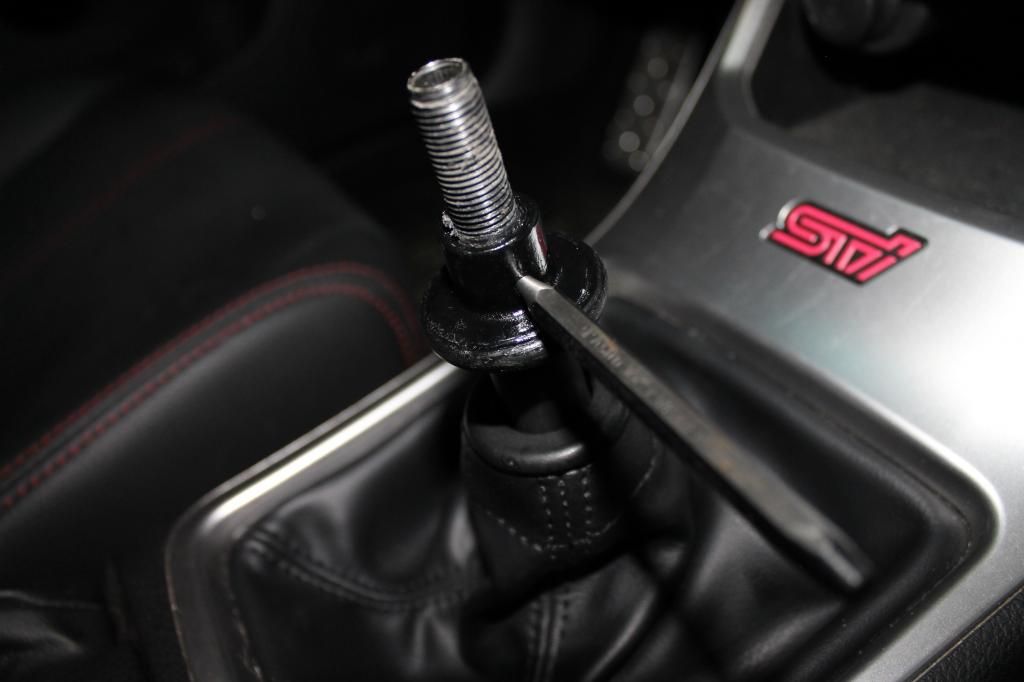
Now you can remove the stock pieces. Which include the stock reverse lockout, a spring and a small rubber piece at the bottom of the shifter.
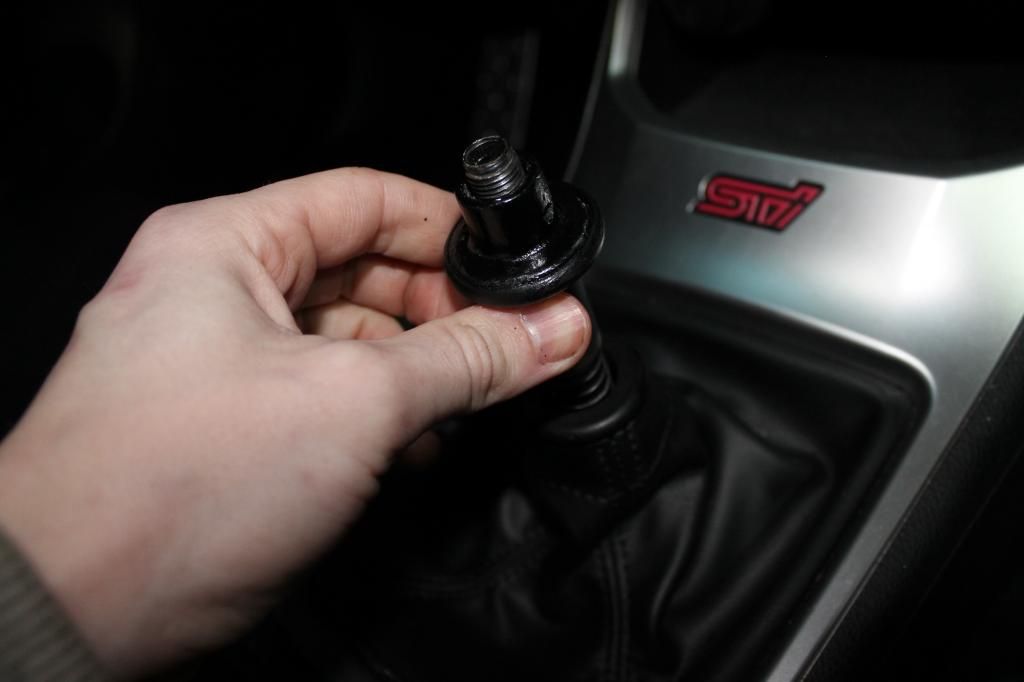
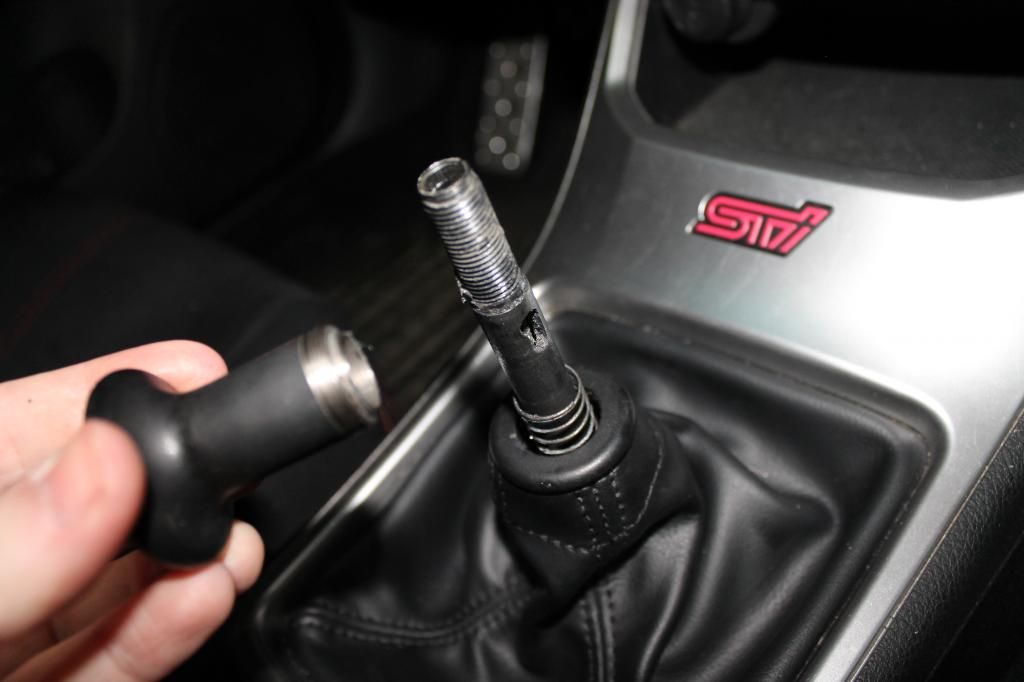
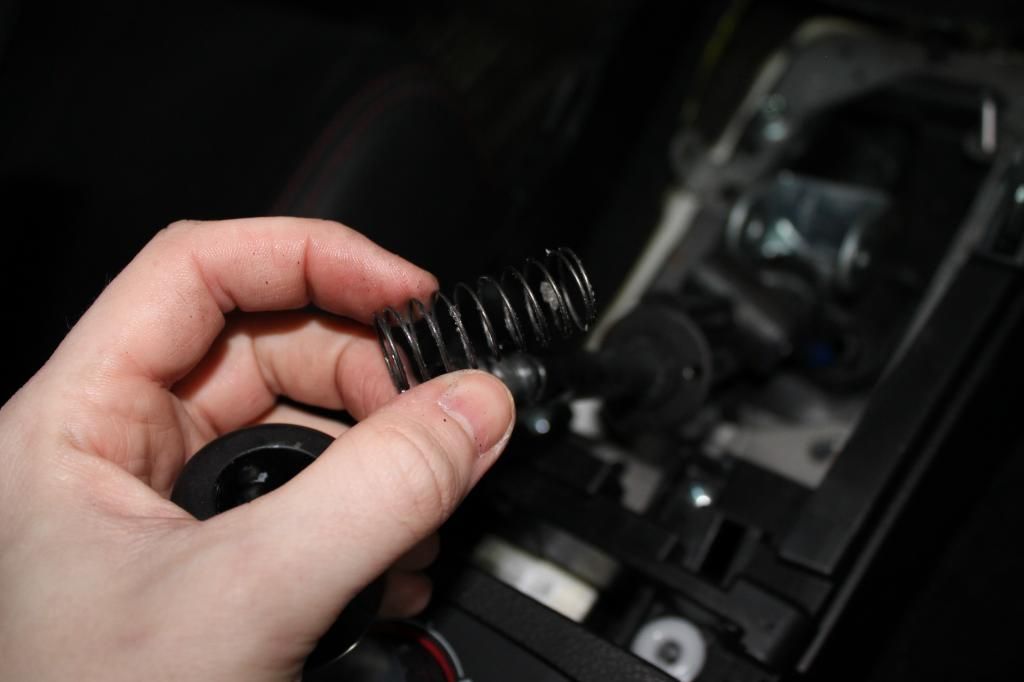
Now its time to take out your center console and armrest. This procedure is slightly different between certain years. This one is specific to the 2008 and up STi. To remove the center console in older years please consult a service manual if you are unsure on how to do that. The center consoles in these cars are not hard to remove and most of the process in all years is very straight forward and usually only have a couple of screws or they are just clipped into place.
To remove the center console in GR and GV chassis it is as follows
Open the center arm rest compartment, and remove all your crap that you have in there (Don't kid anyone, everyone stuff their crap in there)
Now remove the small piece of square carpet that Subaru felt necessary to include. Underneath that you will find two screws with 10mm bolt heads. You need to remove these.
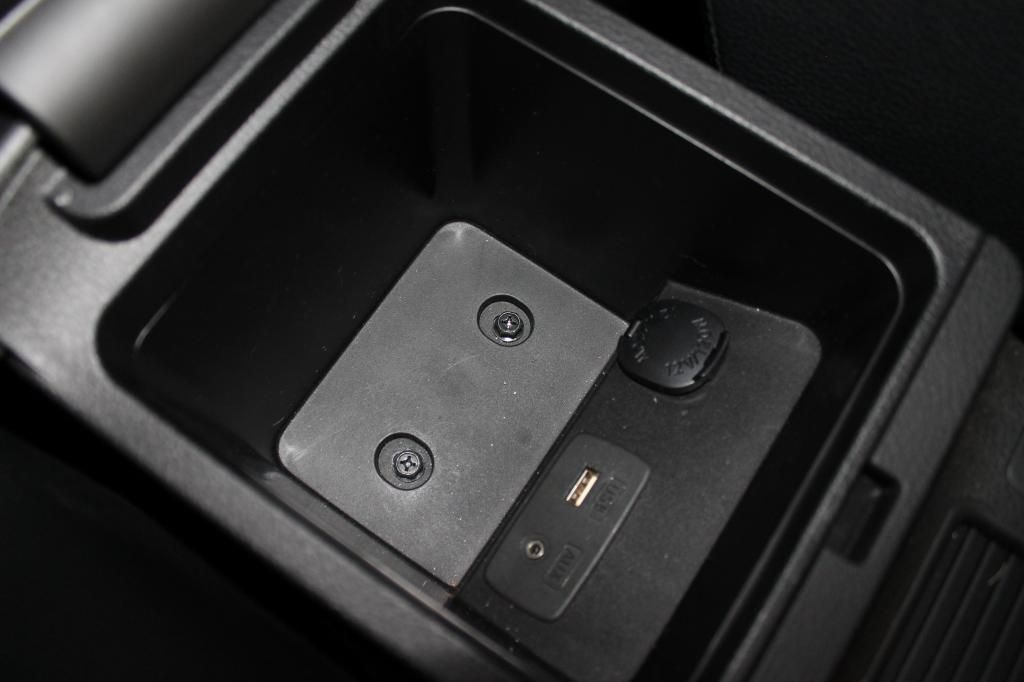
Take your Phillips head screwdriver/Screw Gun/Drill or 10mm socket with long extension and ratchet and remove these and set them aside, I put these in the parts tray.
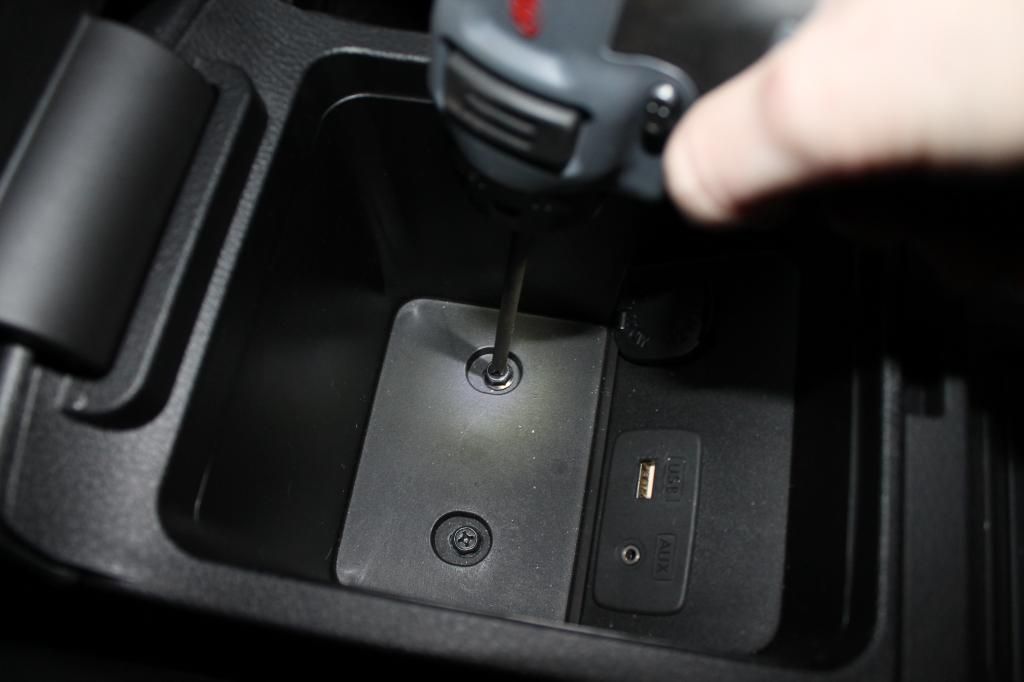
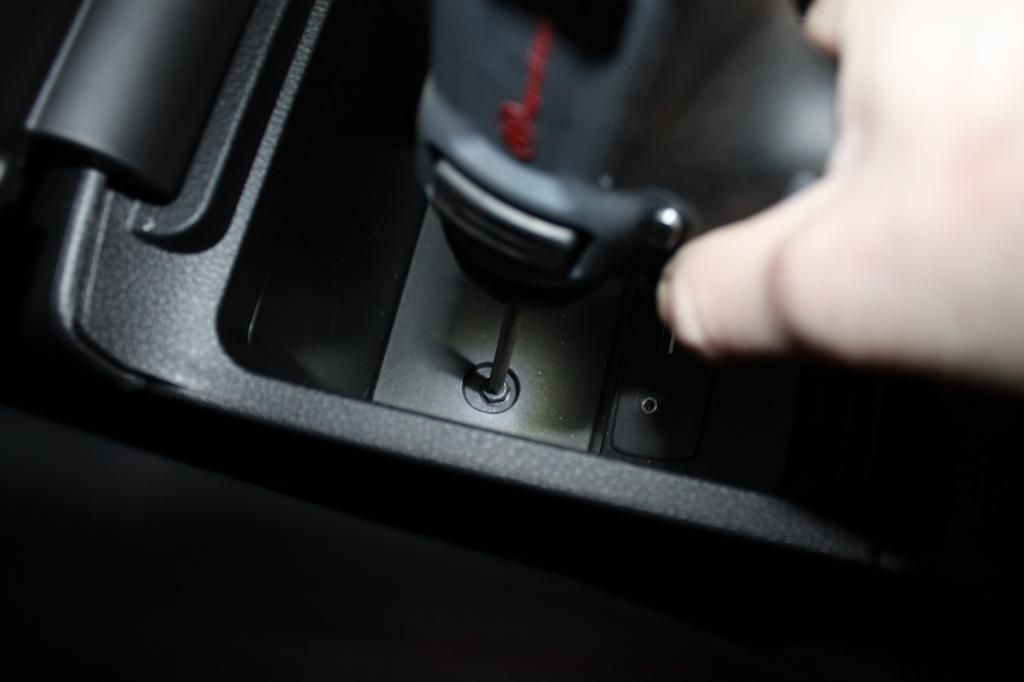
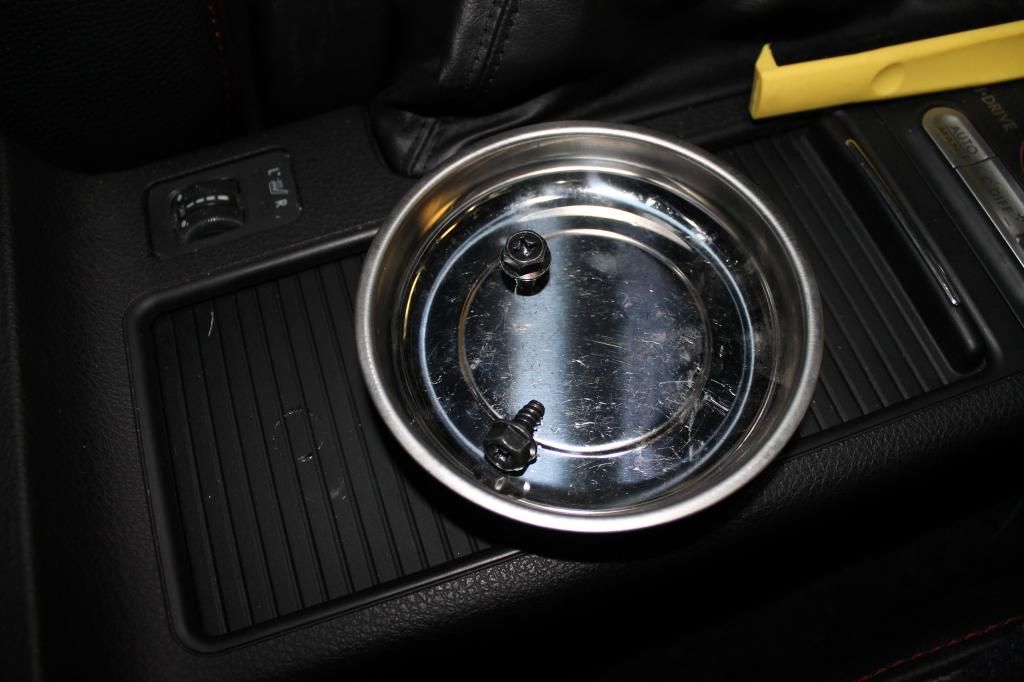
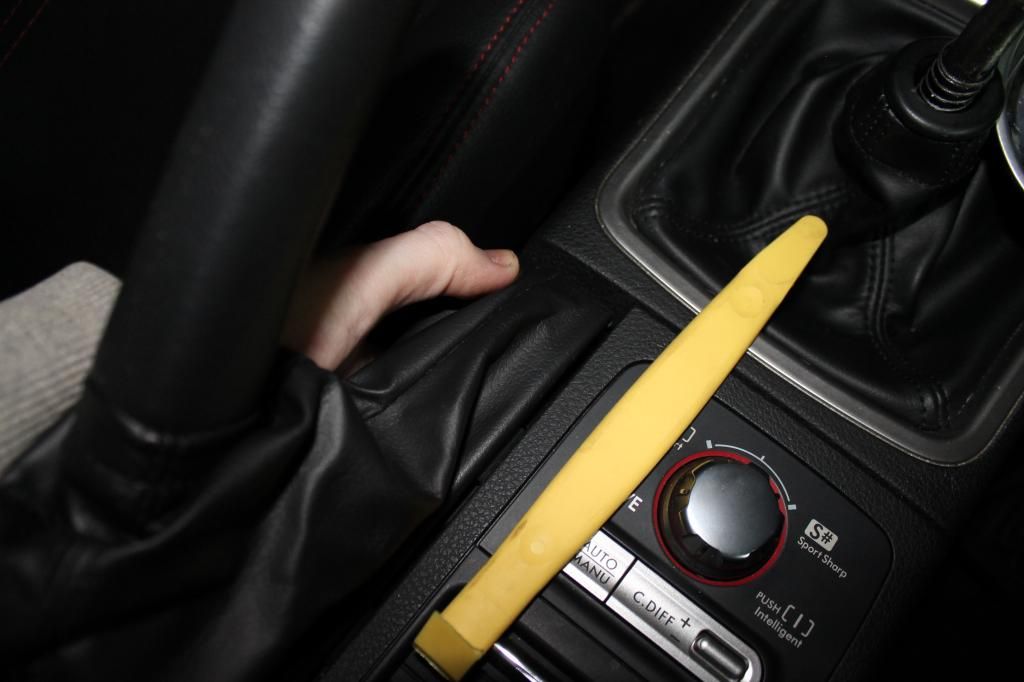
Now go over to your parking brake and remove the boot from its secured position. simply reach down in between the driver seat and center console and feel for the bottom of the boot and give it a slight tug upwards and that should be more than enough to unclip it from its holder.
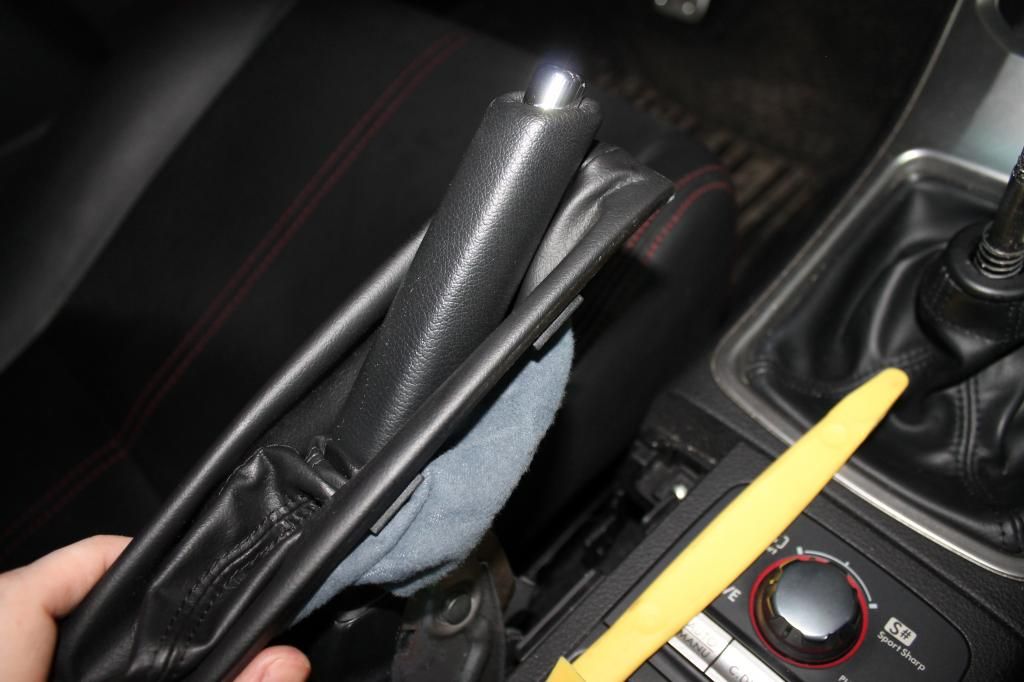
Now underneath the parking brake boot is a phillips head screw. Its silver and you shouldnt miss it, remove this and set it aside with the rest of the fasteners you have removed so far.
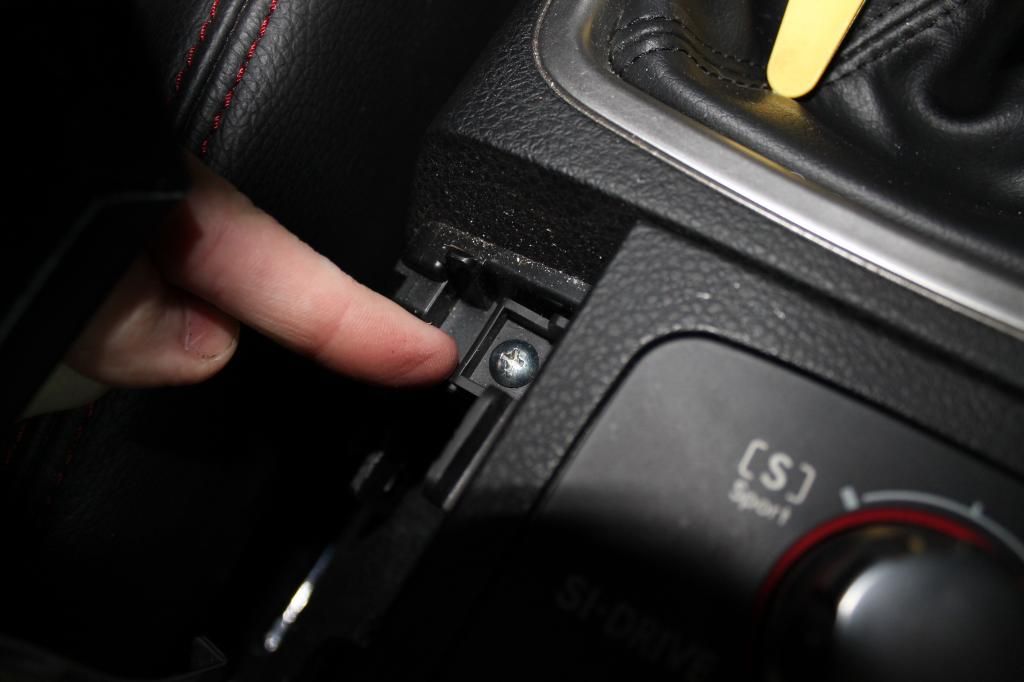
Now that you have removed that screw, you can pull up on the whole center console assembly ans shift it backwards to give you access to the shifter console assembly.
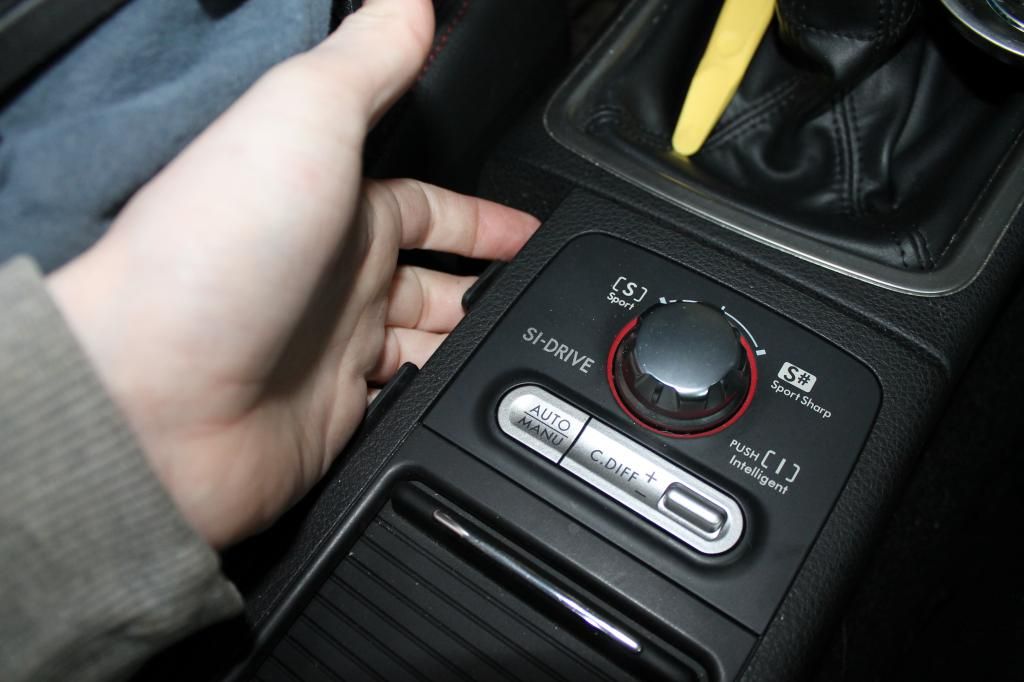
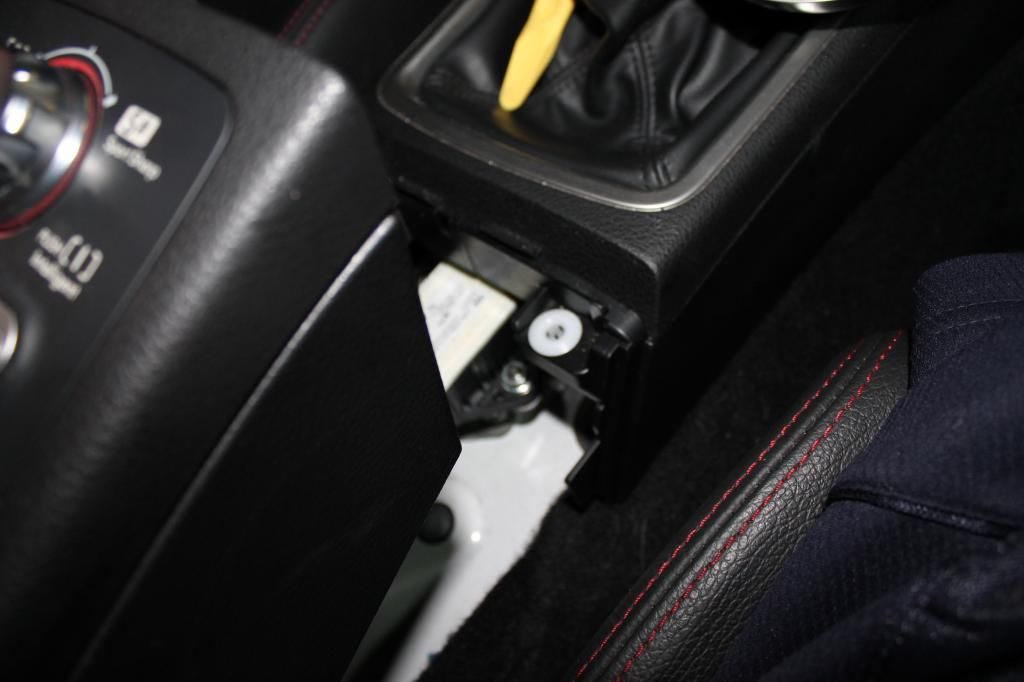
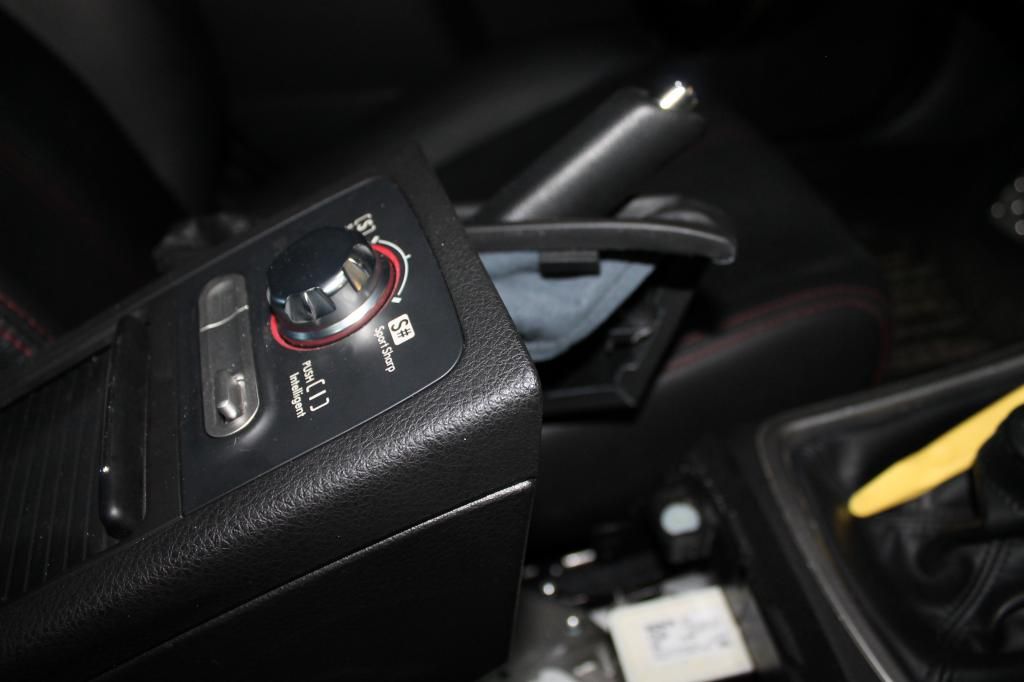
Now the shifter console assembly is just cliped into place and its a friction fit. Start with the rear of it by either gripping each corner and pulling up until it pops out or using your trim removal tools. Your trim removal tools will save your knuckles like no other. Every Subaru I seem to work on wrecks my knuckles like no other when it comes to working on interior pieces.
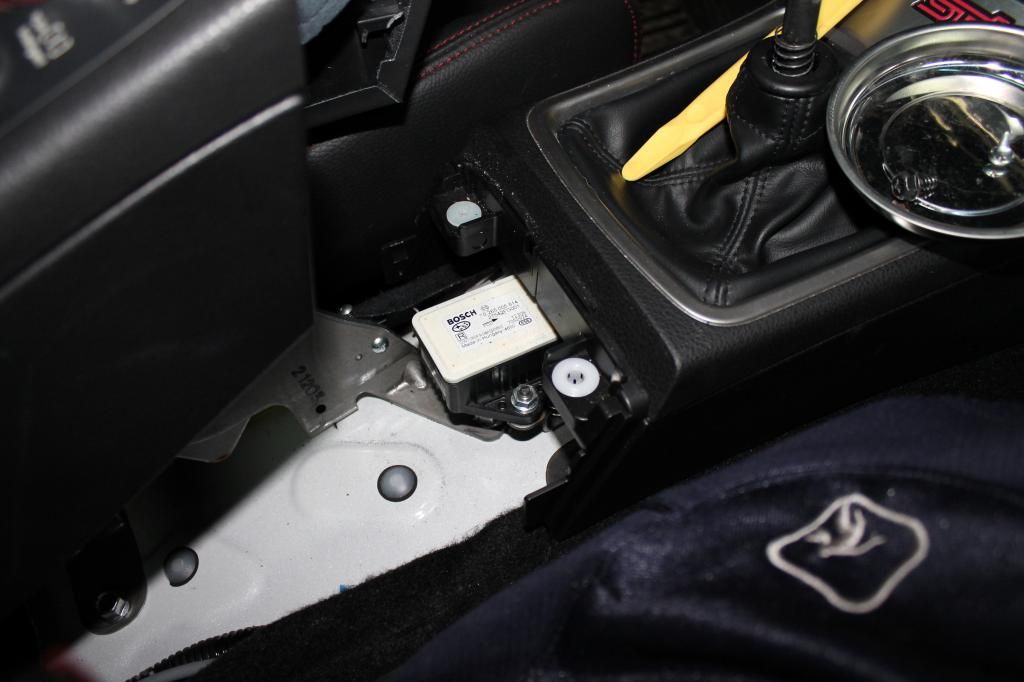
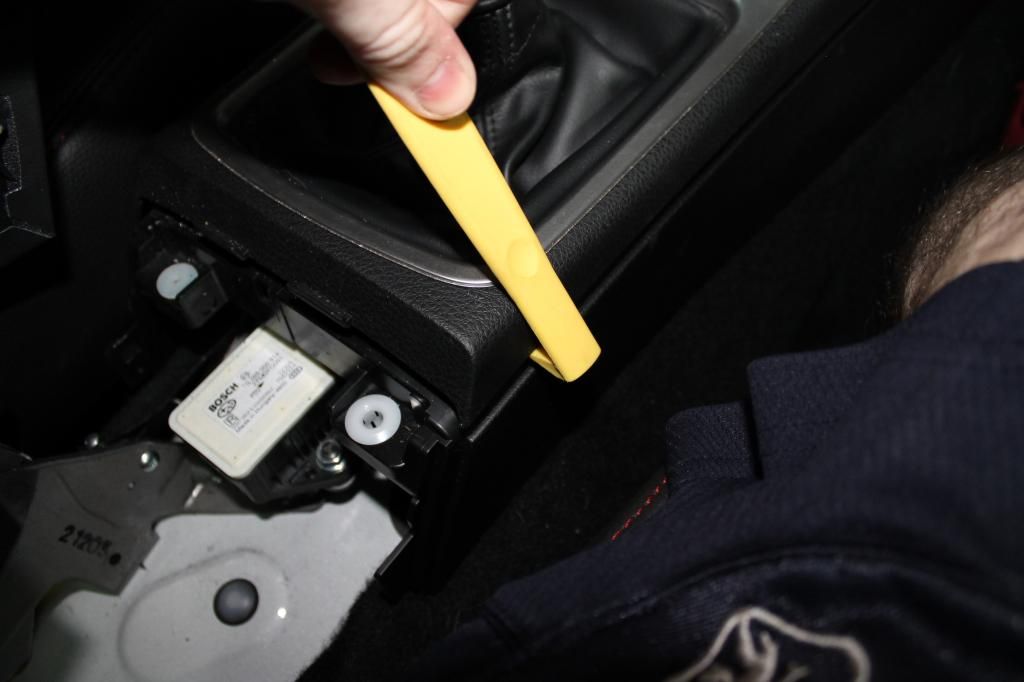
Now up front where the little storage tray section is under your HVAC controls are, pull that section back towards you, once again this is a friction fit piece and should pop right out with the right amount of leverage.
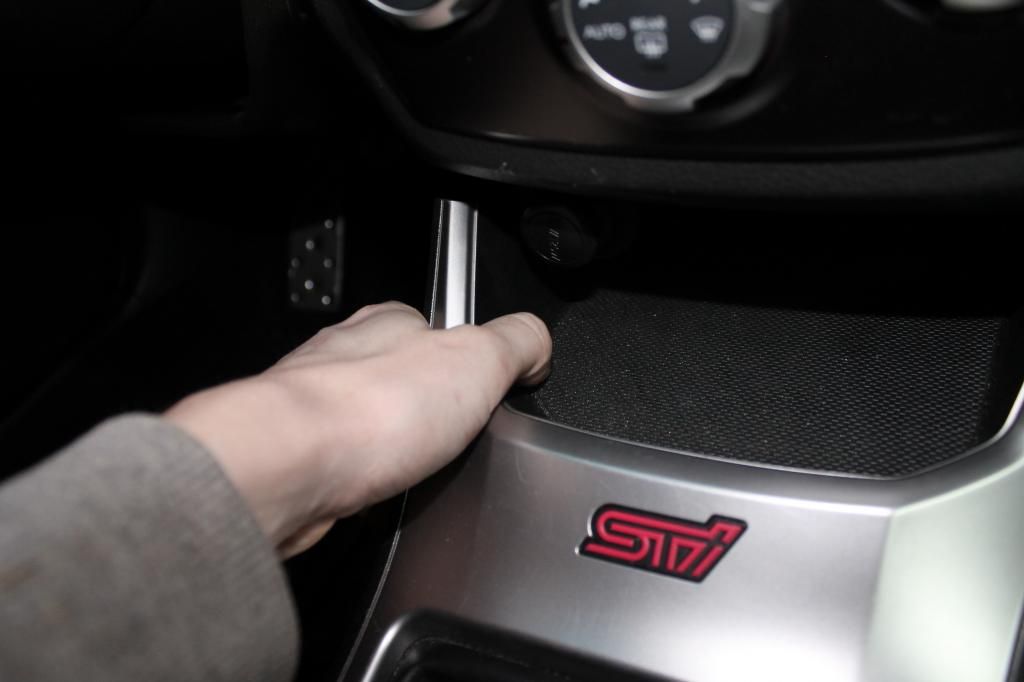
Now that those pieces are loose, slide the shift boot up over the black plastic coller piece, on the GD Chassis cars you have a snap button that you simply undo and the shifter console can then slide up and out of the way.
With the GR and GV, be mindful that there is a wire that is attached to give the "STi" logo its illumination when the headlights are on. Do not rip this wire out.
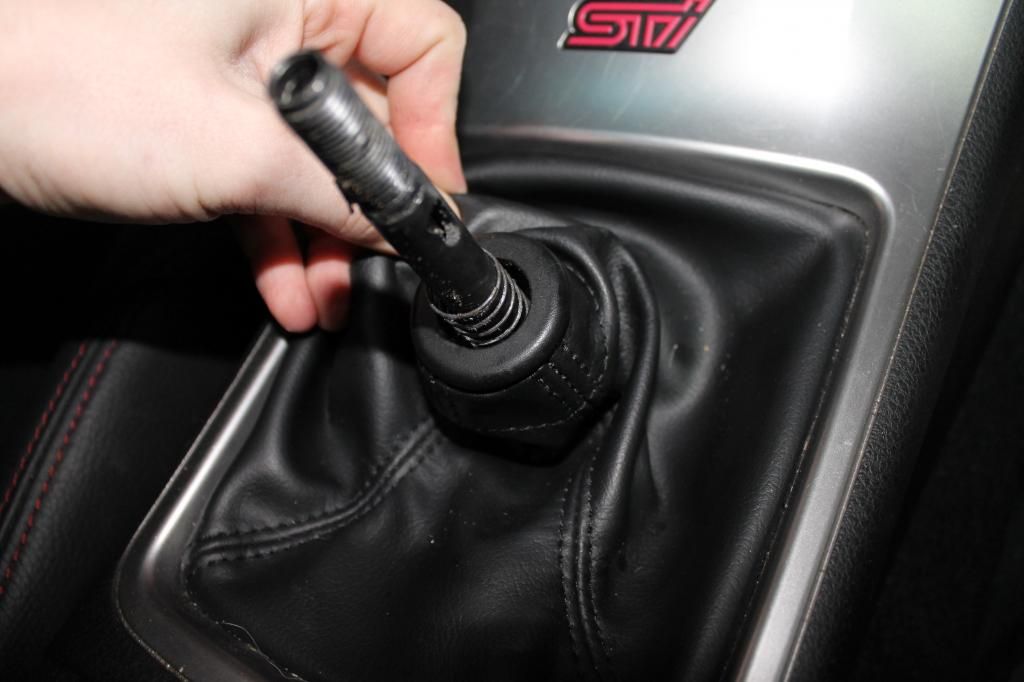
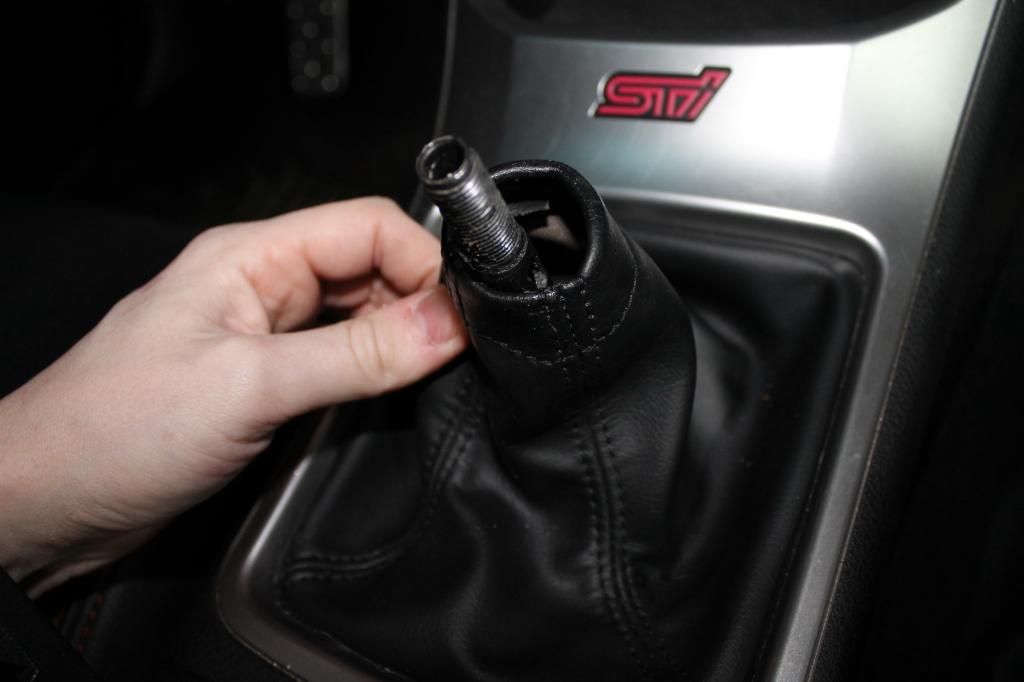
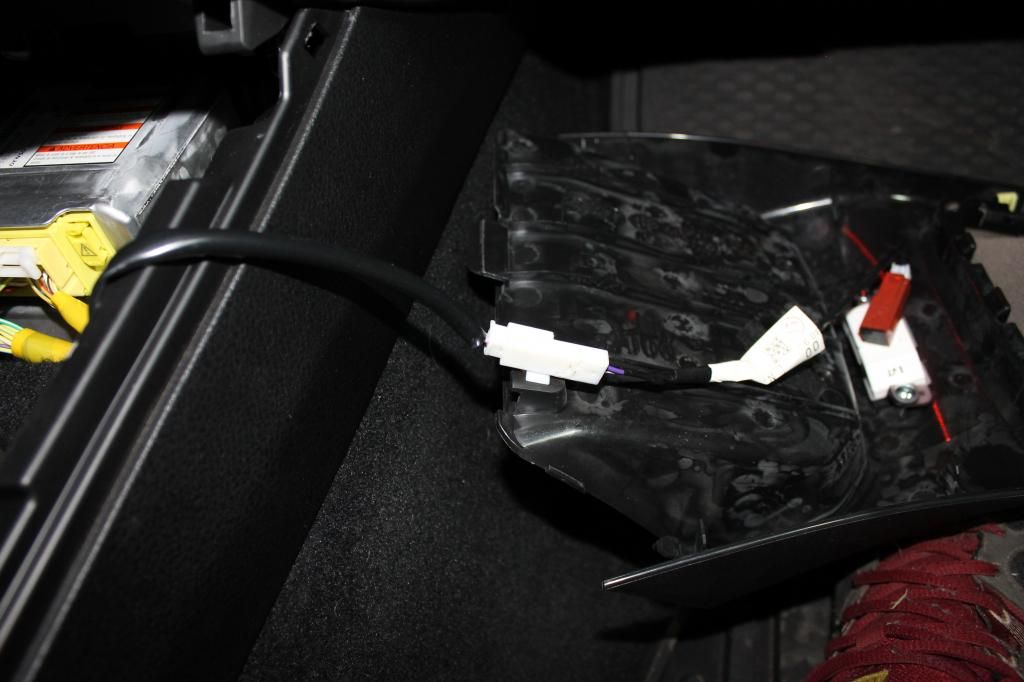
Moving on, now there is a rubber boot underneath the shifter console. Its held in place by two plastic nuts. Most people do not realize these are threaded and can be unscrewed. Take a Flat Head Screwdriver to start them, and then you can unscrew them the rest of the way by hand. Set these aside with the rest of your removed fasteners.
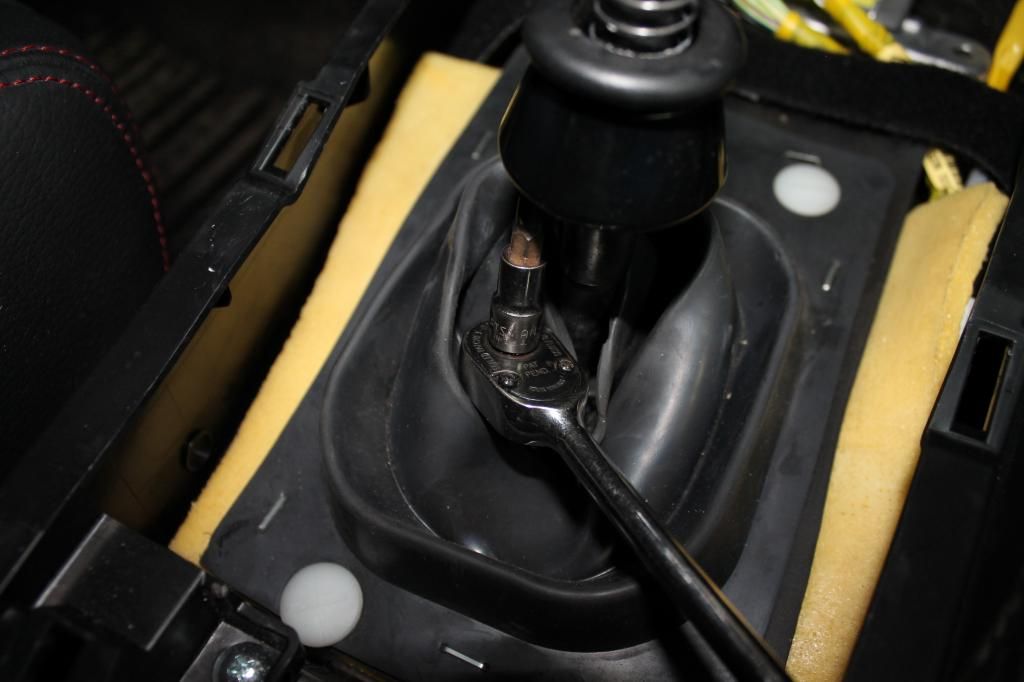
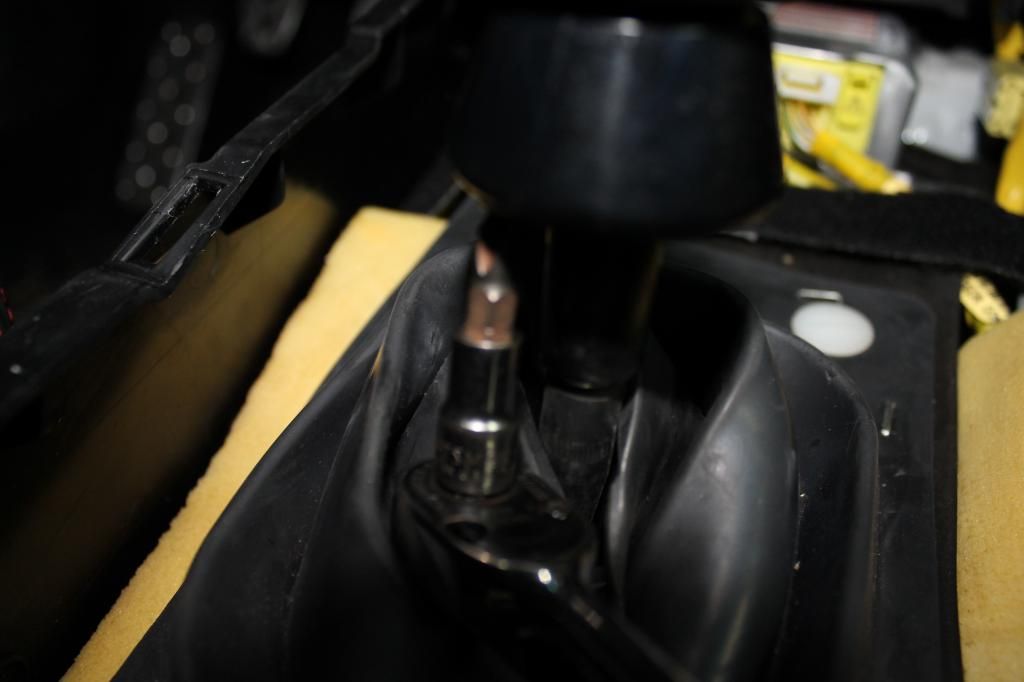
Now that rubber piece has been removed, you can see the inner workings of your shifter assembly and how it all functions.
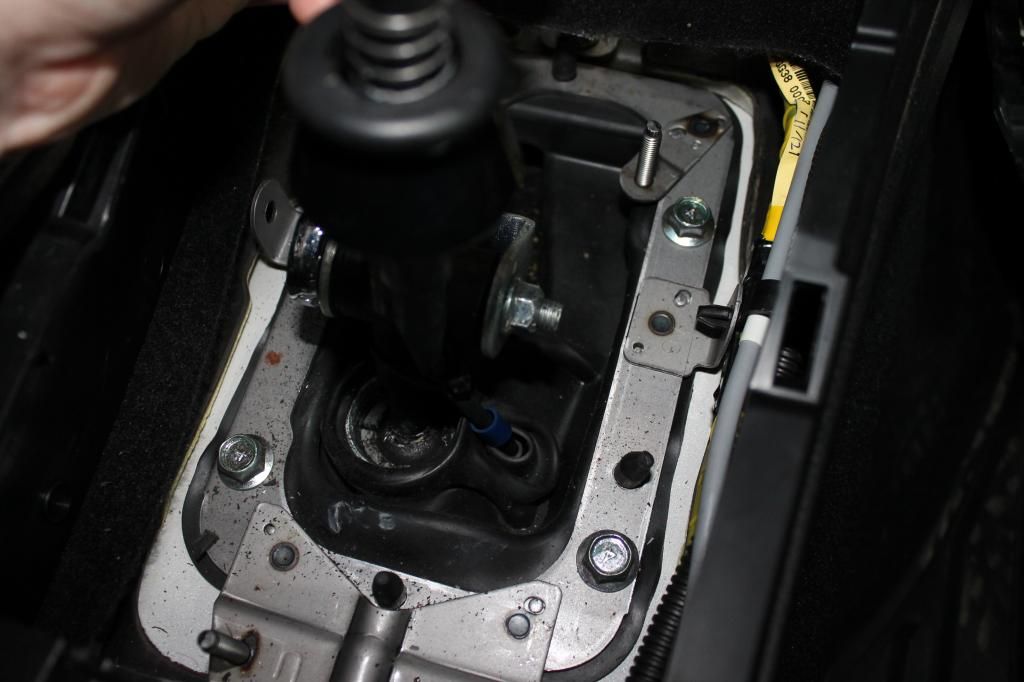
Remove the 12mm nut and bolt by using your two 12mm wrenches. Its a tight fit so a socket and ratchet may not fit into the confined space. Using a ratchet wrench will greatly speed the process up.
Use one wrench to hold the left side which is the bolt head side, and the other wrench to loosen the nut holding it in place.
Once the nut is removed and set aside, slide the bolt out, there is just enough room to slide it out and then set aside wth the rest of your fasteners
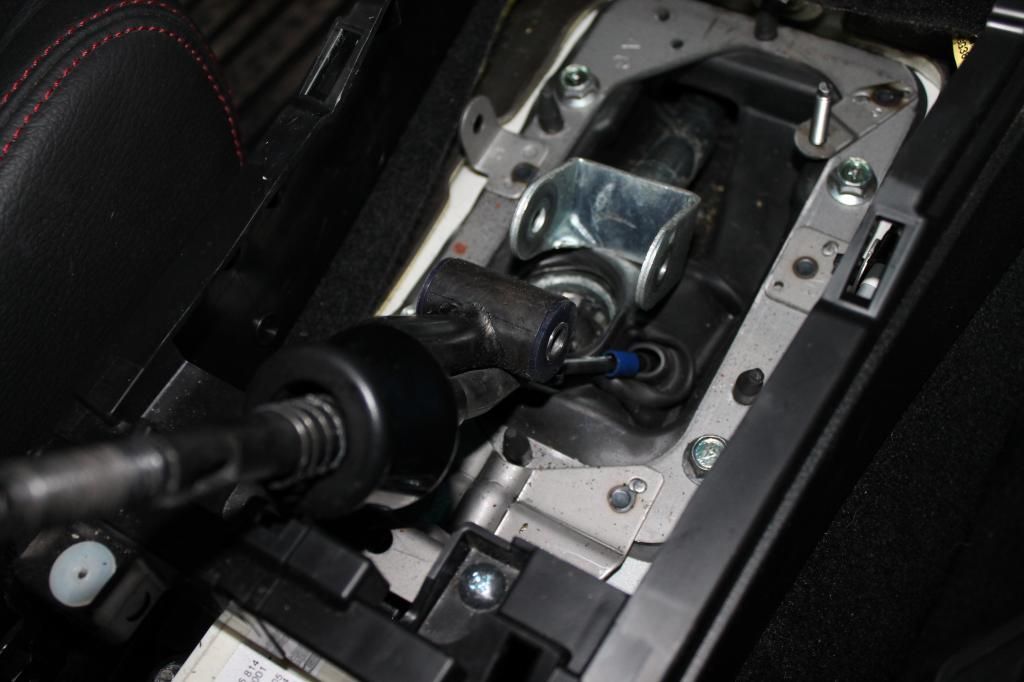
Now there is a cable tie holding the reverse lockout cable to the shift lever. Take your side cutters and snip that cable tie off.
Now you can either remove the place plastic piece that holds the shift boot inplace now, or on your workbench. Either way there are two small phillips head screws on the bottom that need to be removed and then the piece can just slide right off.
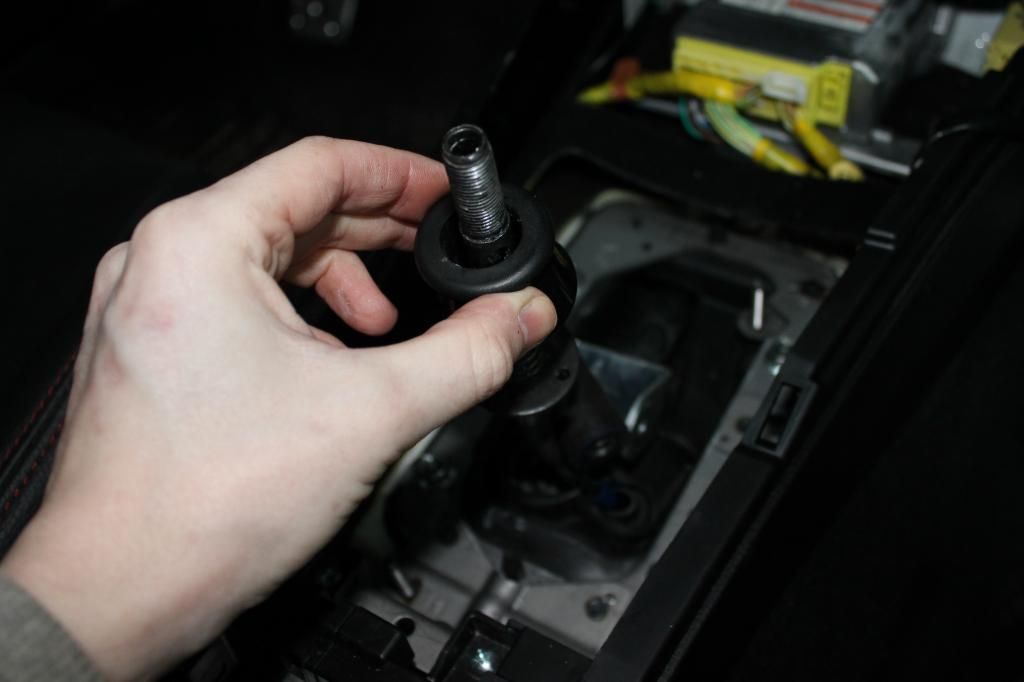
Now its time to remove the actual shifter assembly from the car itself.
If you look down there is a snap ring that is holding the shifter in place. This snap ring needs to be removed.
Now in order to do this, you really do need a pair of special snap ring pliers. Many people have tried using needle nose pliers in the past. The problem with this is that they dont fit into the snap ring holes very well and side of the pliers may fit snug while the other side doesnt. And what happens is when the snap ring is squeezed together, it actually bends the ring and that can possibly break the ring or even bend it which would make re installation a PITA. So do yourself a favor and get a pair of snap ring pliers.
Now snap rings are tricky SOB's and I tend to call them "Jesus Clips" because they end up frustrating you and you start saying things like "Jesus" or "Dammit" whatever your choice of cuss word is. Another reason I call them Jesus Clips is because sometimes they have a tendency to go flying which is usually the point you cover your face and go "JESUS!!!"
The trick to removing these is to take your snap ring pliers and apply downward force while squeezing the pliers together, it sometimes helps to have a small pocket screwdriver or 11th finger as I call them, or a small pick to help unseat the ring. Once unseated you can remove the pliers.
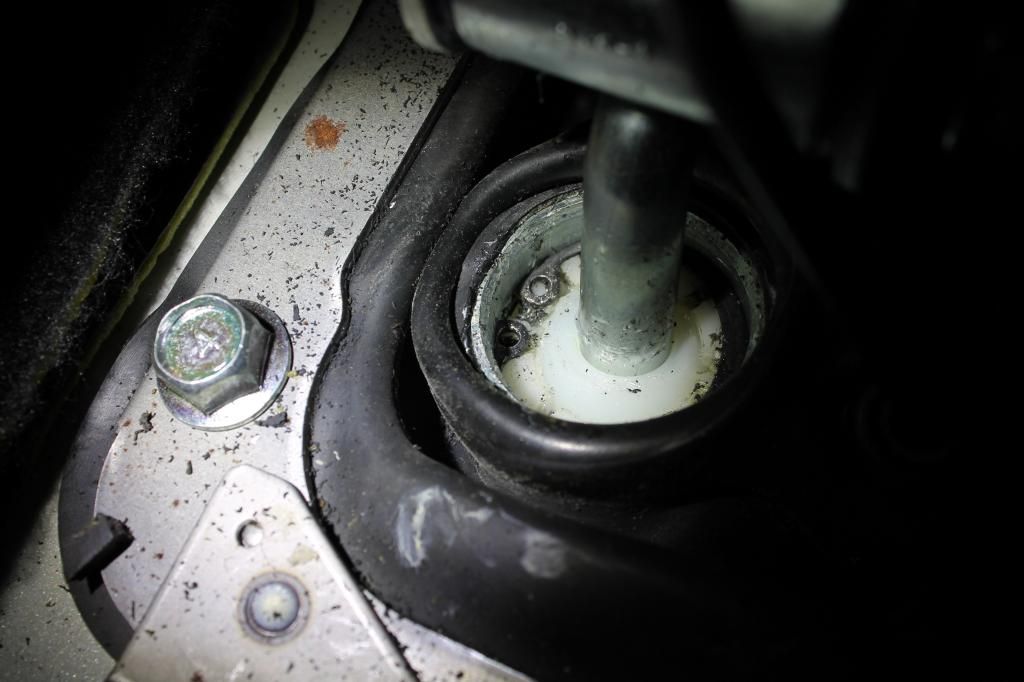
Now that you have removed the clip, grab ahold of the shifter and pull it up and out of the socket it is housed in. There is a white plastic bushing on the bottom of the shifter which has an O-Ring around it, so it can be a bit snug, a sharp pull should dislodge it. But do not force it, if you break that plastic bushing your going to be waiting a couple of days for Subaru to order the part and get it to you.
You will be transferring the white bushing and O-Ring to the shifter you will be installing into the car.
Remove the reverse lockout cable by pulling it out of the slot that its in.
Now its time to take the pieces and components youll be installing onto the shifter thats going into your car. These pieces are installed on all short throw shifters and stock replacement shifters.
As this car is getting a stock replacement shifter, the only difference will be the height and throw compared to a aftermarket short throw. The procedure is still the same.
Take your black plastic boot retainer and install it onto your new shifter, take the white pivot bushing and install that on the bottom being careful not to break it or split it in half. Take your snap ring and put it around the lever on the top of the white bushing. Now take a little bit of white lithium grease or silicone paste and apply it to the bottom of the pivot bushing. Take the metal and plastic bushings out of the center section where the bolt slides through and install them into your shifter.
Install into the car by the same method you used to remove it, but first insert the reverse lockout cable into the shifter. Sometimes it helps to take either your punch or a straight pick and insert it into the lockout cable hole once you have fed it up into the shifter to hold it in place.
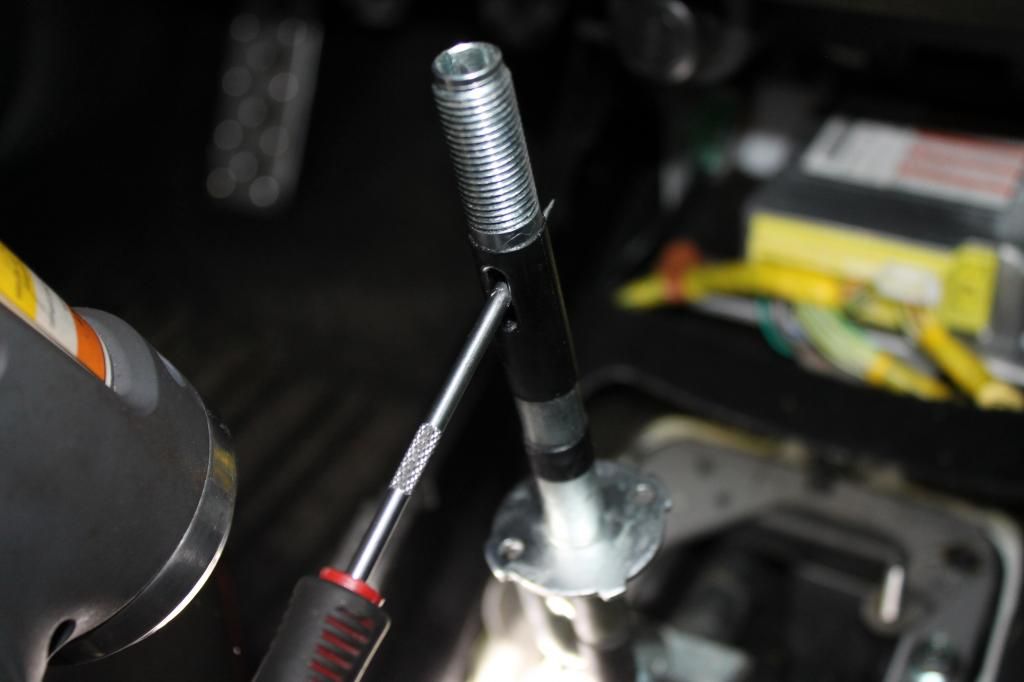
Install the snap ring, install the bolt and nut onto the linkage and install a new cable tie to hold the reverse lockout cable in place.
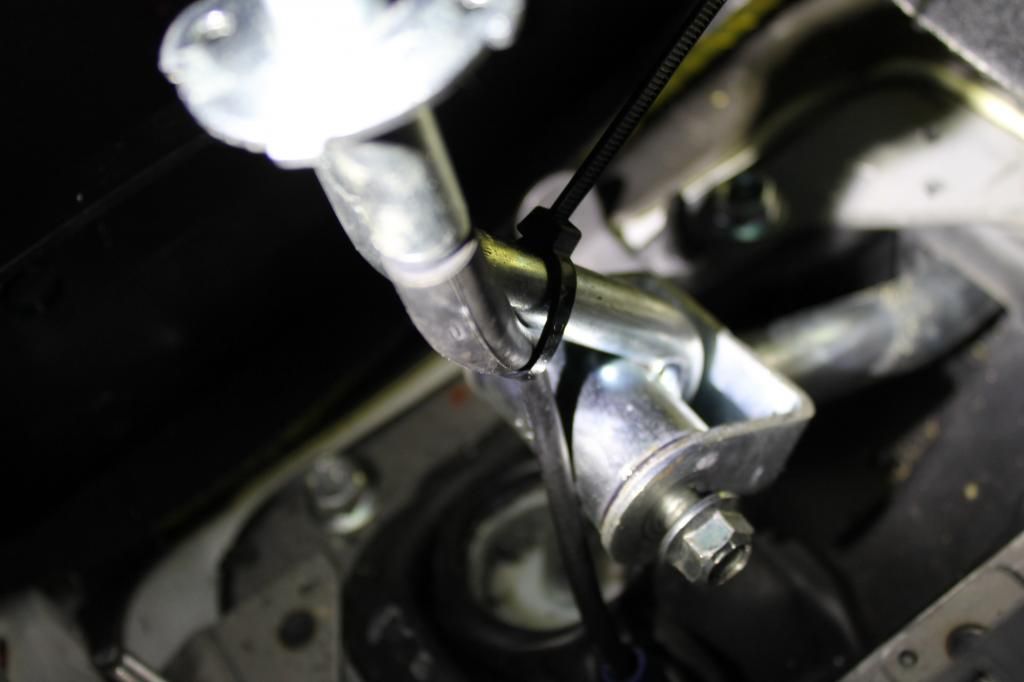
Install the rubber boot and the two plastic nuts.
Now here is where your going to have to get under your car. Safely jack up your car refer to this on how to accomplish this task http://igotasti.com/vBforum/showthread.php/8731-Jacking-your-car-up-for-beginners
Now your going to to need a flashlight or worklight of sorts in order to see what your doing. Get under the car and look on the drivers side for a small lever that the reverse lockout cable runs to. You need to take a prybar or screwdriver and actuate the arm towards the back of the car, Now take a small screwdriver and place the handle end up against the lever to hold it in place in the extended form. You are doing this so the reverse lockout cable is pulled up and accessible so you can install the roll pin.
Now slide the spring back onto the shifter, and now its time to install the lockout lever and the roll pin.
This in my opinion is the most frustrating part of the install, getting that damned roll pin back into the lockout lever and through the lockout cable.
There really isnt any special tool or trick to get this done, just luck and ALOT of patience. But once it gets started and through the cable its in place.
Once the roll pin is installed get your screwdriver from under your car thats holding the lever in place.
Now go back into the car and shift the car into all the gears including reverse to check that everything preforms correctly. It helps to turn the key to the "ON" position so when you shift into reverse the reverse lights come on.
If everything checks out, your free to button up the car the rest of the way.
Install everything from the shifter console, center console and parking brake boot in the reverse order of dis-assembly.
Thread your shift knob back on and let your car off the Jack Stands and take it for a test drive.
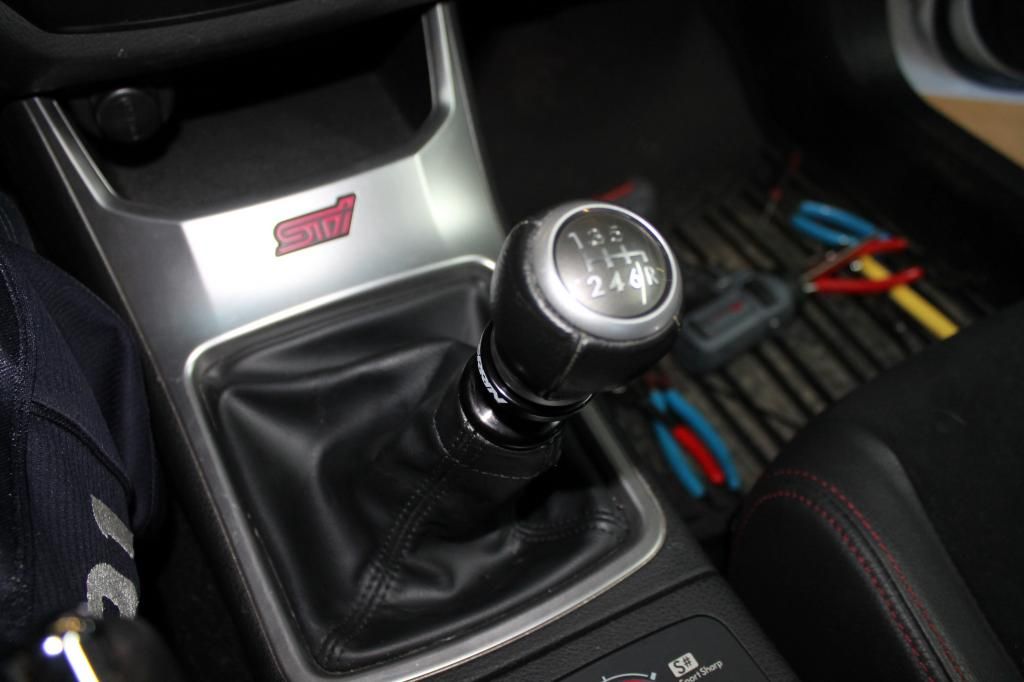
If you have installed a stock shifter, it should shift through the gears smoothly.
If you have installed a aftermarket short throw shifter, it should feel a little more notchy than stock. But still run through the gears just fine. You will also notice a much much shorter throw when shifting.
That's it your finished, you have just installed a shifter into your STi. Pat yourself on the back! And as always if you have any questions feel free to ask.
Happy Modding!
Regards, TK-421
Today we will be covering the installation procedure for installing the Shifter Assembly.
The Shifter Assembly Install can be used as a reference for installing either a Short Throw or Stock Replacement, I will cover both.
Alright as always lets go over the parts and tools you will need to accomplish this task at hand.
The Parts:
A Short Throw Shifter of your choice, recommended shifters are Kartboy, Cobb and TWM.
Silicone Paste and White Lithium Grease will also be needed to help lubricate the new parts.
On to Tools. As I have covered before, I do this sort of work for a living, and I have tools at my disposal that the average hobbist doesn't own, please keep that in mind.
Installing a shifter is pretty straight forward and doesn't require that many special tools and equipment to install. You'll be working with some very basic hand tools today.
The tools you will need include....
A Phillps Head Screwdriver
Two Flat Head Screwdrivers
A Pair of Side Cutters
A Pair of Internal Snap Ring Pliers, this maybe the only tool you may need to go out and purchase. You can pick a basic set up at your local hardware store or sears for under $20 bucks.
Two 12mm Wrenches
Floor Jack
Two Safety Stands
3/8 Flat Punch
Small Ball Peen Hammer
Optional Tools Include....
10mm Socket
1/4 Drive 12 inch Extension
1/4 Drive Ratchet
Cordless Screw Gun or Cordless Drill
12mm Ratcheting Wrench
Flashlight/Tasklight/Droplight, some form of Illumination
Magnetic Parts Tray
Trim Removal Tools or Bone Tools as called in Dealerships


Alright lets get to work.
Go into your car and start by twisting the shift knob counter clockwise to remove it from the shifter.


Now comes a tricky part.
Take your Punch and Hammer, your going to be removing the roll pin that holds the reverse lockout cable in place and allows the stock reverse lockout lever to actuate the cable.
Take the punch and hammer and carefully tap out the roll pin SLOWLY. If your NOT installing the Perrin Reverse lockout, YOU DO NOT WANT TO LOSE THE ROLL PIN!!!! It will put a damper in your mood like no other!!! This is one of the reasons I say to use a Magnetic Parts Tray. You can pick these things up on the cheap at places like Northern Tool and Harbor Freight.

Now you can remove the stock pieces. Which include the stock reverse lockout, a spring and a small rubber piece at the bottom of the shifter.


Now its time to take out your center console and armrest. This procedure is slightly different between certain years. This one is specific to the 2008 and up STi. To remove the center console in older years please consult a service manual if you are unsure on how to do that. The center consoles in these cars are not hard to remove and most of the process in all years is very straight forward and usually only have a couple of screws or they are just clipped into place.
To remove the center console in GR and GV chassis it is as follows
Open the center arm rest compartment, and remove all your crap that you have in there (Don't kid anyone, everyone stuff their crap in there)
Now remove the small piece of square carpet that Subaru felt necessary to include. Underneath that you will find two screws with 10mm bolt heads. You need to remove these.

Take your Phillips head screwdriver/Screw Gun/Drill or 10mm socket with long extension and ratchet and remove these and set them aside, I put these in the parts tray.


Now go over to your parking brake and remove the boot from its secured position. simply reach down in between the driver seat and center console and feel for the bottom of the boot and give it a slight tug upwards and that should be more than enough to unclip it from its holder.


Now underneath the parking brake boot is a phillips head screw. Its silver and you shouldnt miss it, remove this and set it aside with the rest of the fasteners you have removed so far.

Now that you have removed that screw, you can pull up on the whole center console assembly ans shift it backwards to give you access to the shifter console assembly.


Now the shifter console assembly is just cliped into place and its a friction fit. Start with the rear of it by either gripping each corner and pulling up until it pops out or using your trim removal tools. Your trim removal tools will save your knuckles like no other. Every Subaru I seem to work on wrecks my knuckles like no other when it comes to working on interior pieces.


Now up front where the little storage tray section is under your HVAC controls are, pull that section back towards you, once again this is a friction fit piece and should pop right out with the right amount of leverage.

Now that those pieces are loose, slide the shift boot up over the black plastic coller piece, on the GD Chassis cars you have a snap button that you simply undo and the shifter console can then slide up and out of the way.
With the GR and GV, be mindful that there is a wire that is attached to give the "STi" logo its illumination when the headlights are on. Do not rip this wire out.


Moving on, now there is a rubber boot underneath the shifter console. Its held in place by two plastic nuts. Most people do not realize these are threaded and can be unscrewed. Take a Flat Head Screwdriver to start them, and then you can unscrew them the rest of the way by hand. Set these aside with the rest of your removed fasteners.


Now that rubber piece has been removed, you can see the inner workings of your shifter assembly and how it all functions.

Remove the 12mm nut and bolt by using your two 12mm wrenches. Its a tight fit so a socket and ratchet may not fit into the confined space. Using a ratchet wrench will greatly speed the process up.
Use one wrench to hold the left side which is the bolt head side, and the other wrench to loosen the nut holding it in place.
Once the nut is removed and set aside, slide the bolt out, there is just enough room to slide it out and then set aside wth the rest of your fasteners

Now there is a cable tie holding the reverse lockout cable to the shift lever. Take your side cutters and snip that cable tie off.
Now you can either remove the place plastic piece that holds the shift boot inplace now, or on your workbench. Either way there are two small phillips head screws on the bottom that need to be removed and then the piece can just slide right off.

Now its time to remove the actual shifter assembly from the car itself.
If you look down there is a snap ring that is holding the shifter in place. This snap ring needs to be removed.
Now in order to do this, you really do need a pair of special snap ring pliers. Many people have tried using needle nose pliers in the past. The problem with this is that they dont fit into the snap ring holes very well and side of the pliers may fit snug while the other side doesnt. And what happens is when the snap ring is squeezed together, it actually bends the ring and that can possibly break the ring or even bend it which would make re installation a PITA. So do yourself a favor and get a pair of snap ring pliers.
Now snap rings are tricky SOB's and I tend to call them "Jesus Clips" because they end up frustrating you and you start saying things like "Jesus" or "Dammit" whatever your choice of cuss word is. Another reason I call them Jesus Clips is because sometimes they have a tendency to go flying which is usually the point you cover your face and go "JESUS!!!"
The trick to removing these is to take your snap ring pliers and apply downward force while squeezing the pliers together, it sometimes helps to have a small pocket screwdriver or 11th finger as I call them, or a small pick to help unseat the ring. Once unseated you can remove the pliers.

Now that you have removed the clip, grab ahold of the shifter and pull it up and out of the socket it is housed in. There is a white plastic bushing on the bottom of the shifter which has an O-Ring around it, so it can be a bit snug, a sharp pull should dislodge it. But do not force it, if you break that plastic bushing your going to be waiting a couple of days for Subaru to order the part and get it to you.
You will be transferring the white bushing and O-Ring to the shifter you will be installing into the car.
Remove the reverse lockout cable by pulling it out of the slot that its in.
Now its time to take the pieces and components youll be installing onto the shifter thats going into your car. These pieces are installed on all short throw shifters and stock replacement shifters.
As this car is getting a stock replacement shifter, the only difference will be the height and throw compared to a aftermarket short throw. The procedure is still the same.
Take your black plastic boot retainer and install it onto your new shifter, take the white pivot bushing and install that on the bottom being careful not to break it or split it in half. Take your snap ring and put it around the lever on the top of the white bushing. Now take a little bit of white lithium grease or silicone paste and apply it to the bottom of the pivot bushing. Take the metal and plastic bushings out of the center section where the bolt slides through and install them into your shifter.
Install into the car by the same method you used to remove it, but first insert the reverse lockout cable into the shifter. Sometimes it helps to take either your punch or a straight pick and insert it into the lockout cable hole once you have fed it up into the shifter to hold it in place.

Install the snap ring, install the bolt and nut onto the linkage and install a new cable tie to hold the reverse lockout cable in place.

Install the rubber boot and the two plastic nuts.
Now here is where your going to have to get under your car. Safely jack up your car refer to this on how to accomplish this task http://igotasti.com/vBforum/showthread.php/8731-Jacking-your-car-up-for-beginners
Now your going to to need a flashlight or worklight of sorts in order to see what your doing. Get under the car and look on the drivers side for a small lever that the reverse lockout cable runs to. You need to take a prybar or screwdriver and actuate the arm towards the back of the car, Now take a small screwdriver and place the handle end up against the lever to hold it in place in the extended form. You are doing this so the reverse lockout cable is pulled up and accessible so you can install the roll pin.
Now slide the spring back onto the shifter, and now its time to install the lockout lever and the roll pin.
This in my opinion is the most frustrating part of the install, getting that damned roll pin back into the lockout lever and through the lockout cable.
There really isnt any special tool or trick to get this done, just luck and ALOT of patience. But once it gets started and through the cable its in place.
Once the roll pin is installed get your screwdriver from under your car thats holding the lever in place.
Now go back into the car and shift the car into all the gears including reverse to check that everything preforms correctly. It helps to turn the key to the "ON" position so when you shift into reverse the reverse lights come on.
If everything checks out, your free to button up the car the rest of the way.
Install everything from the shifter console, center console and parking brake boot in the reverse order of dis-assembly.
Thread your shift knob back on and let your car off the Jack Stands and take it for a test drive.

If you have installed a stock shifter, it should shift through the gears smoothly.
If you have installed a aftermarket short throw shifter, it should feel a little more notchy than stock. But still run through the gears just fine. You will also notice a much much shorter throw when shifting.
That's it your finished, you have just installed a shifter into your STi. Pat yourself on the back! And as always if you have any questions feel free to ask.
Happy Modding!
Regards, TK-421


