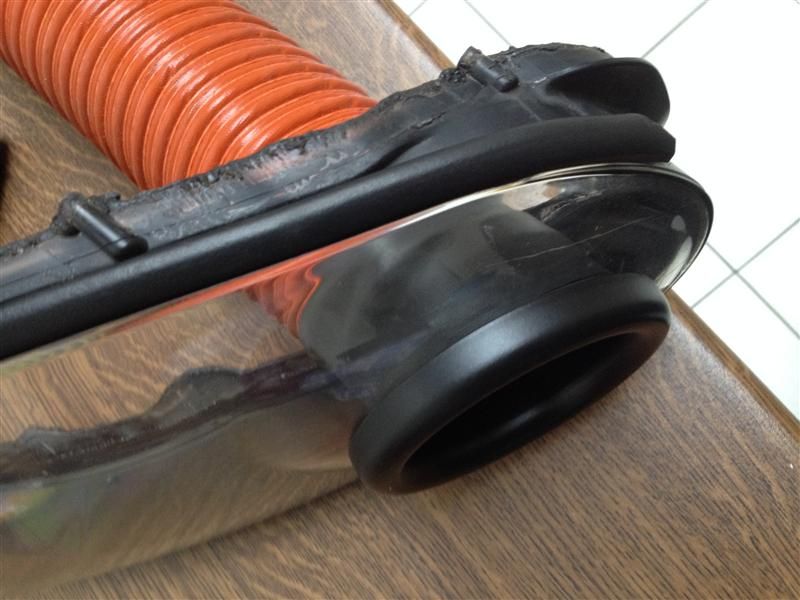
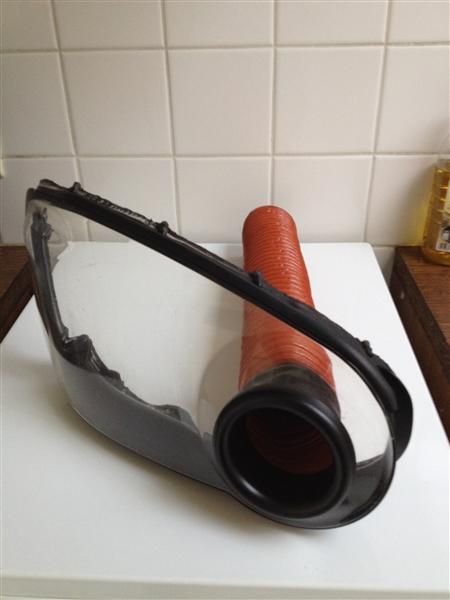
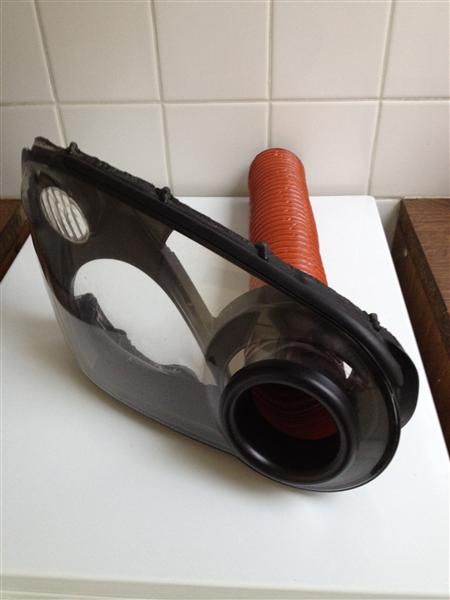
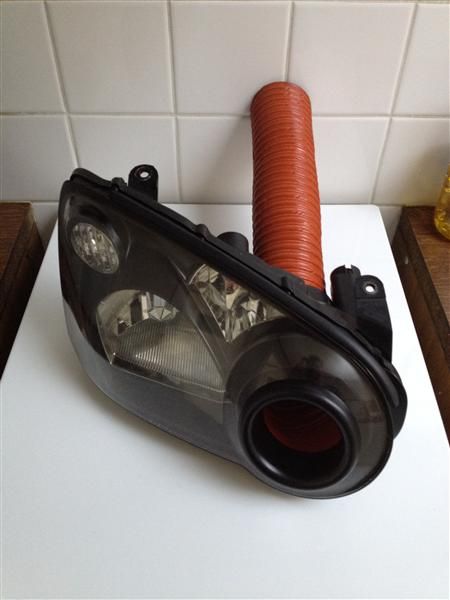
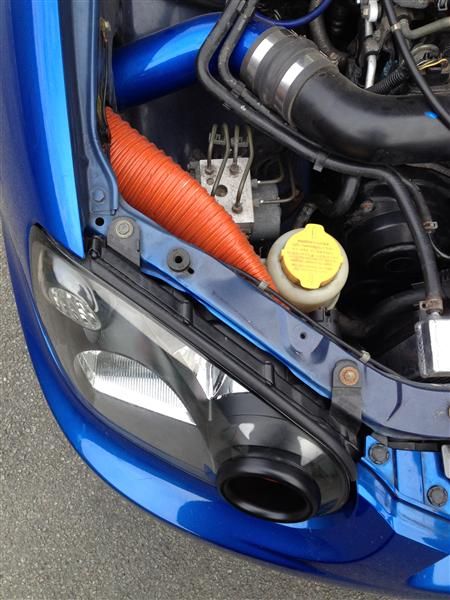
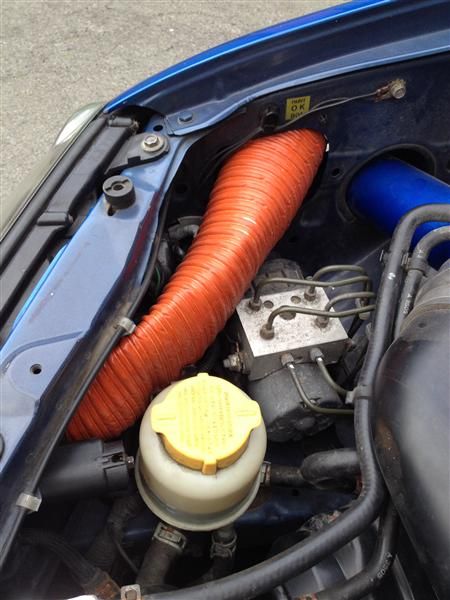
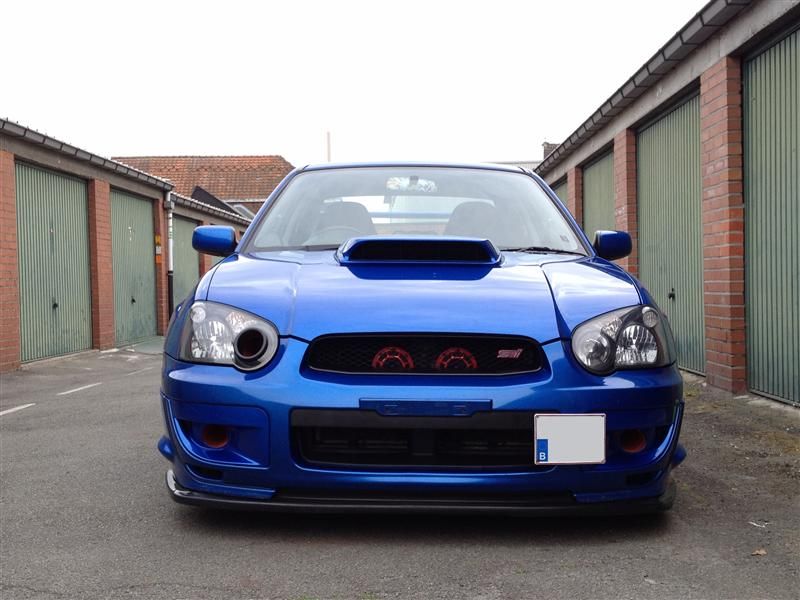
DIY 03-05 Impreza ?Blob-eye? Headlight Air Intake

Highlander395

New member
Since I haven't found a how to about this, I thought doing a write up while actually making one would be helpful to others as well :)

NOTE 1:
Before we start, this is at your own risk!! If it goes wrong, the headlight will be permanently damaged and become unusable!!! I advise you to get a spare headlight, that way you don't need to touch your original set.

NOTE 2:
It is possible there are other ways to do it, this was mine. Questions can (and will be) answered if necessary, opinions & comments are welcome. I'm a foreigner so if my English isn't always clear, please excuse me :p All measurements are made iaw the metric system. I will adjust the topic for both metric and imperial later on :)

NOTE 3:
This procedure is for a blob-eye headlight only, but most of it can be used as a guide for other headlights also. A bit of common sense and 2 right hands will do the rest.

NOTE 4:
This can only be used on cars that don't use the stock air box!! Mine has the air filter in the fender. If u do want this with the stock air box , you?ll have to figure out how to install it by yourself.

NOTE 5:
Keep in mind that the products and parts I used, perhaps aren't available in the US. There will be other similar products available in Home Depot which I don't know the name of :p

Required:
- spare right headlight
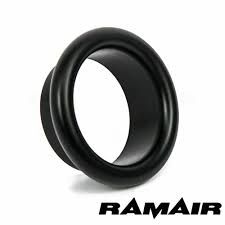
- air funnel (which fit 80mm hose, mine came from RAMAIR UK via Ebay)
download_zpsae7044a0.jpg


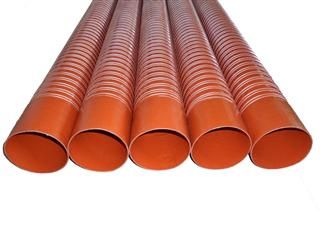
- 76mm (3") air duct hose (depending on where u want it to end, length required will be 250 - 750mm).
Buis_zpsd5e45533.jpg


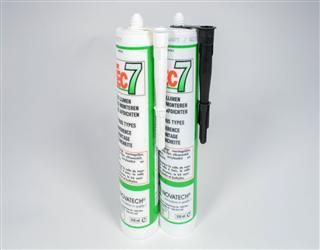
- sealing/adhesive (to make the headlight waterproof afterwards)
438imagethumb_1024x800Mobile_zps9ec673a9.jpg


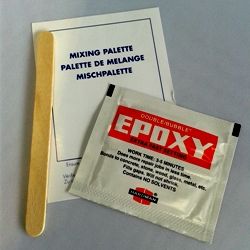
- double bubble epoxy
HardmanDBSachet_zpsed64e469.jpg


- half a pack of guts ;)


Tools:
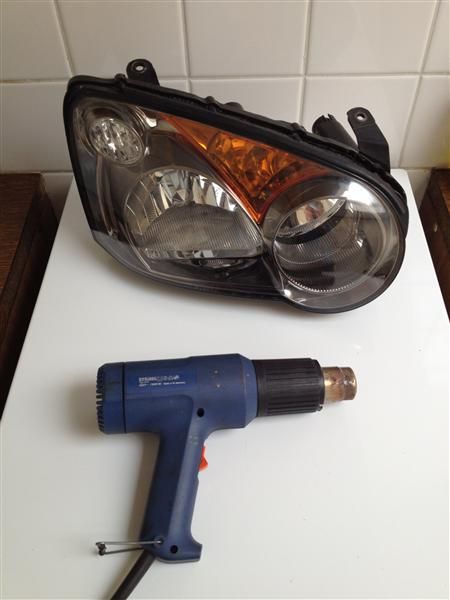
- heat gun
- screwdrivers
- dremel (cutting & sanding tool)
- sealing gun (or whatever it's called)
- heat shrink (at least 85mm diameter)
- masking tape
- pencil or something else to write with and chew on during work.


Time:
Depends on your own skills :) TAKE YOUR TIME IF U WANT A GOOD RESULT!!

IMPORTANT NOTE:
I'm not going to repeat every step that u have to testfit, adjust, trim, cut, testfit, adjust, trim, cut,.... After every step or after each time u adjust something, fit the hose and try to assemble the headlight!! This will make it obvious where U need to trim or adjust some more!! There will be things I forgot to mention, so don?t be a no brainer that follows my lead without knowing what you?re doing ;)
 

Highlander395

New member
PART 1. Headlight disassembly

1. Remove ALL bulbs, bulb covers and wiring

2. Remove headlight adjuster motor: loosen 3 long screws, unscrew the motor completely (8mm socket) and give it a good pull.

3. Remove the 8 screws securing the glass to the body.

4. The hard part: open the headlight.
Most people put on the oven and work their way around the headlight. I found that using a heat gun was way more easy AND safer than using an oven. While risking to melt the light in the oven, the heat gun will immediately tell u when to stop heating a spot! U will see the adhesive become "workable" after 15sec or so.
Go slow and heat 2-3inch at a time, pry the adhesive loose with a flat screwdriver or a knive. The adhesive will stay sticky all the time so it won't be a problem if u really take your time. At a certain point, all u have left to do is just pull both sides apart.
IMG_0678Custom_zpsa2afb66a.jpg


I opened it in less than 15min and it was the first time I ever did one :)

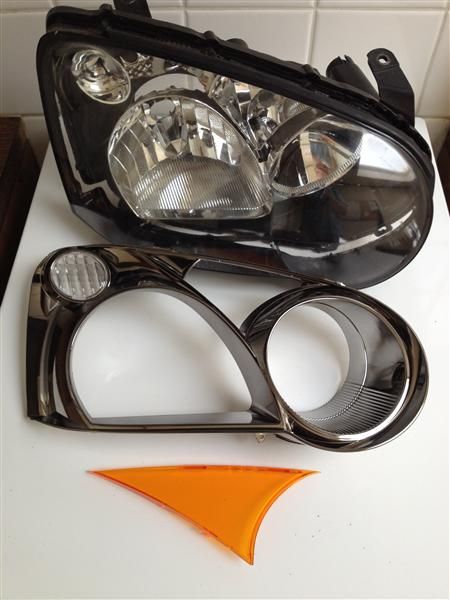
5.Put the back part of the headlight aside and take the glass. Remove the one screw securing the chrome bezel in the glass and remove it as well.
IMG_0680Custom_zps6c71adbf.jpg


There's 3 options u can do with the bezel:
a. Leave it that way (neeeiihh :p)
b. De-tango
c. De-tango and spray paint it black.
I chose option 3, since my current headlights were done the same way.
I suppose there are enough tutorials online for 2 and 3, so i'm going to focus on the air funnel thingy!

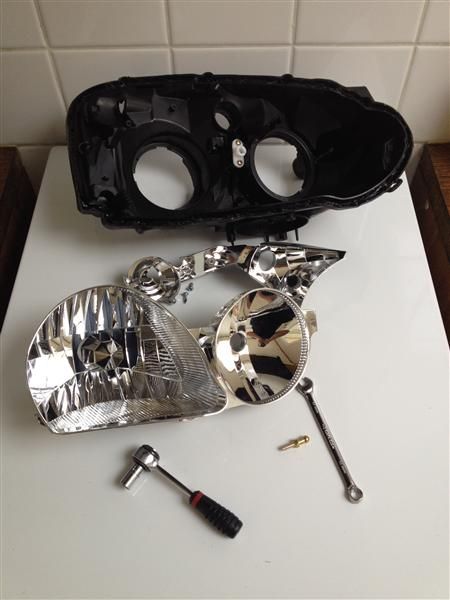
6. Take the headlight housing and remove the 3 screws holding the top chrome bezel in place. Lift it out of the casing and put it aside. You can continue without removing this, but it's safer if it's out of the way.

7. As for the reflector, undo the one screw holding the reflector in the middle. Use an 8mm wrench and unscrew it for easy removal. On the right side (facing the casing), there's an adjuster on the back. Unscrew completely and the reflector will fall out of the housing, just like that, nothing difficult about it :).
IMG_0718Custom_zps0916db2f.jpg
 

Highlander395

New member
Part 2 & 3

PART 2. Cutting the hole in the glass:

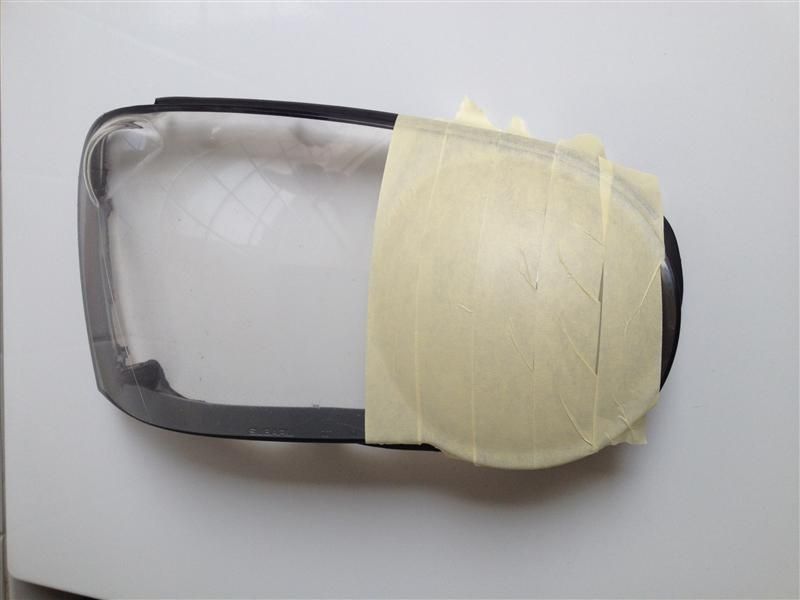
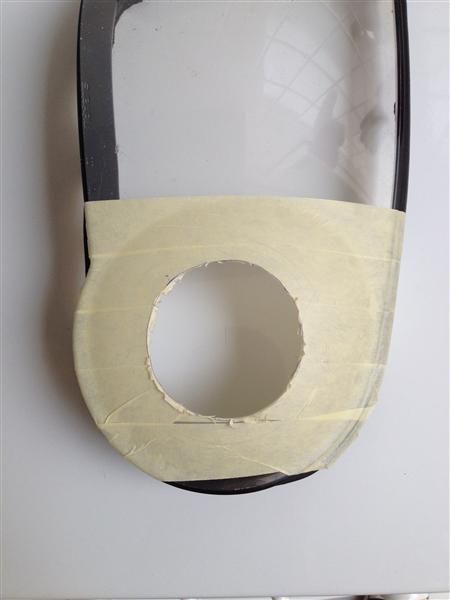
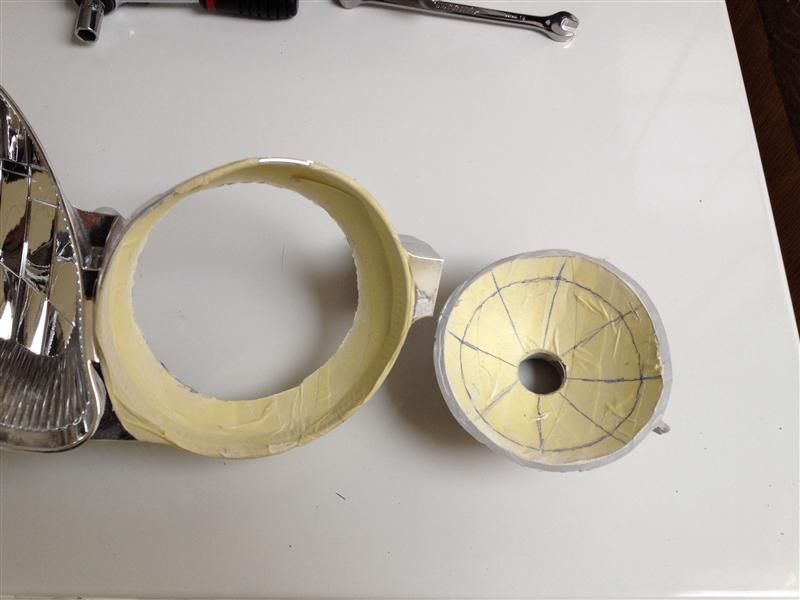
1. Mask the part of the headlight where the hole needs to be drilled. I did this to protect the glass in case I slipped with the dremel. It's also very handy to draw on.
IMG_0685Custom_zps3060e038.jpg


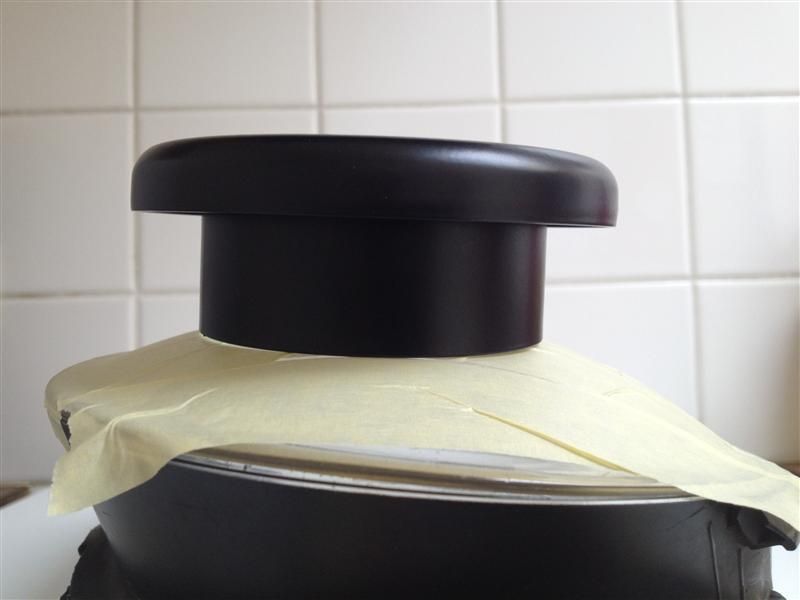
2. Place the funnel on the headlight and find the spot where it has the least amount of space between funnel and glass. Move it around and u'll see what i mean.
IMG_0686Custom_zps255859bb.jpg


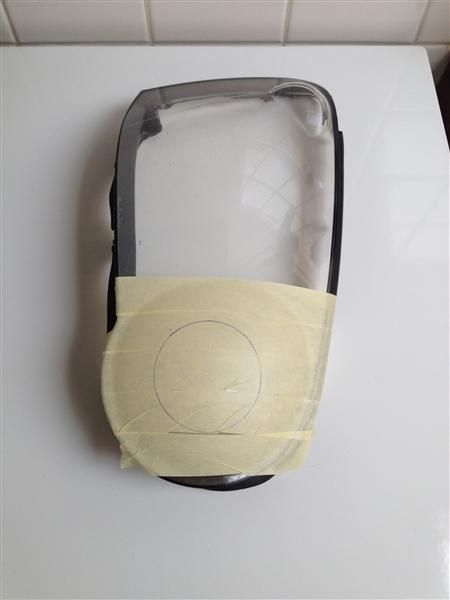
3. Mark the position on the masking tape
IMG_0688Custom_zpsf86b6869.jpg


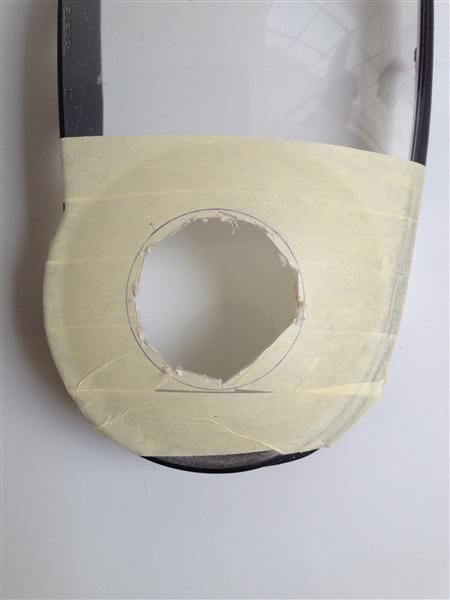
4. Cut the circle, starting with a square and sanding it all down until it becomes a circle
IMG_0689Custom_zpsd7cd199e.jpg

IMG_0690Custom_zpsa44348ec.jpg


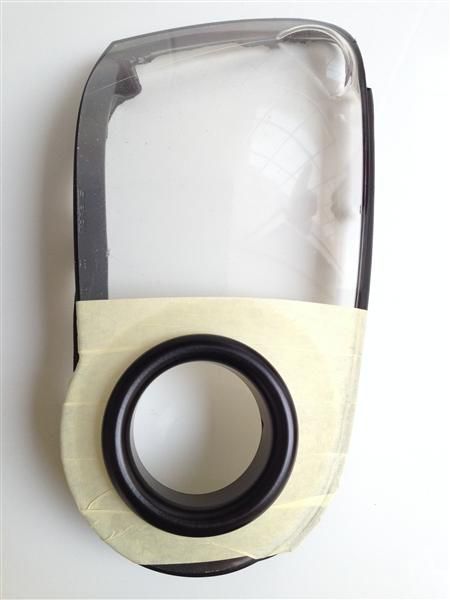
5. Test fit your funnel into the hole and adjust if necessary until it's satisfactory to your needs. I grinded down the funnel a bit as well to get an almost perfect fit.
IMG_0691Custom_zps991d130d.jpg

IMG_0743Custom_zpsd4281e68.jpg


PART 3. Cutting the reflector:

1. Prepare the reflector with masking tape the same way u did on the glass.

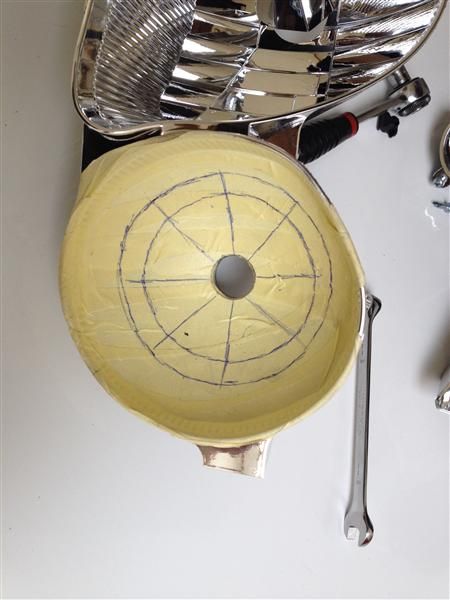
2. Here comes the tricky part. Starting from the hole in the center, measure 4-5cm all around to get a perfect circle. (I did 4cm, 4.5-5mm will be better).
IMG_0719Custom_zpsb5d4b573.jpg


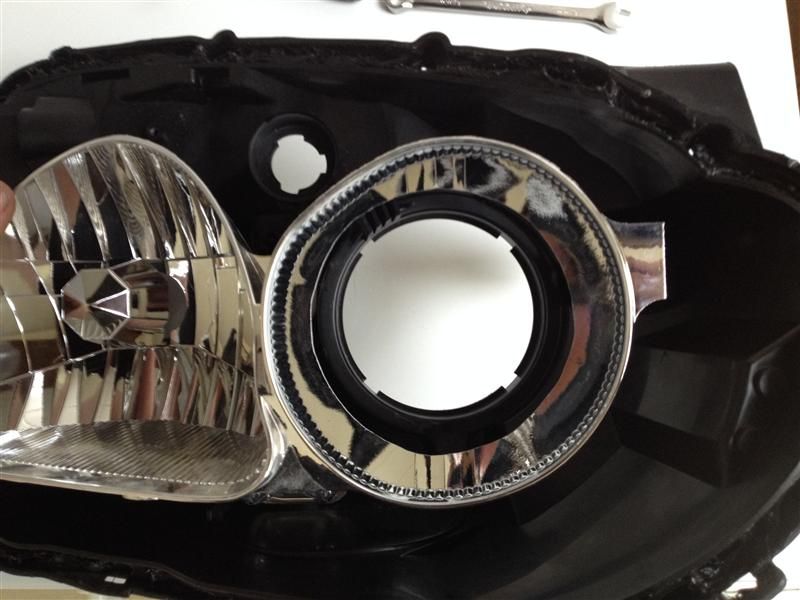
3. Cut the circle and sand it down to get a smooth surface. Be aware, the reflector is about 3-4mm thick. Be careful when approaching the attachment points.
IMG_0720Custom_zpsc39f5eff.jpg


4. Testfit the hose and adjust if needed. Make sure it's not a snug fit, you have to be able to move it a bit in the hole. If the hose sits to tight, u won't be able to adjust the headlight anymore.

5. If u reposition the reflector in the casing, u will see both holes matching each other :)
IMG_0721Custom_zpsf6251e09.jpg


So far so good, take a break, grab a beer! Part 4 is the PITA :)
 

Highlander395

New member
PART 4. Trimming & assembly of the headlight

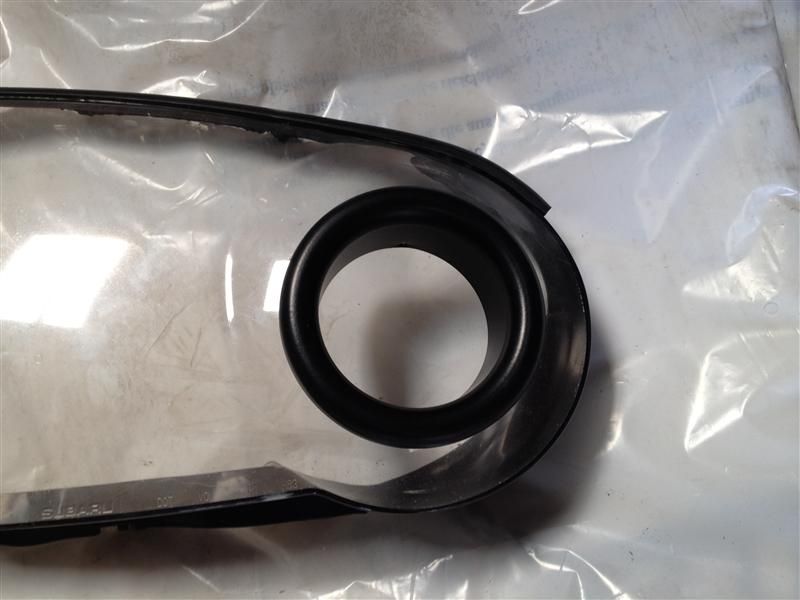
1. Start by installing the funnel into the glass. Once in position, put a tape across to keep it in place.
IMG_0742Custom_zps289252c4.jpg


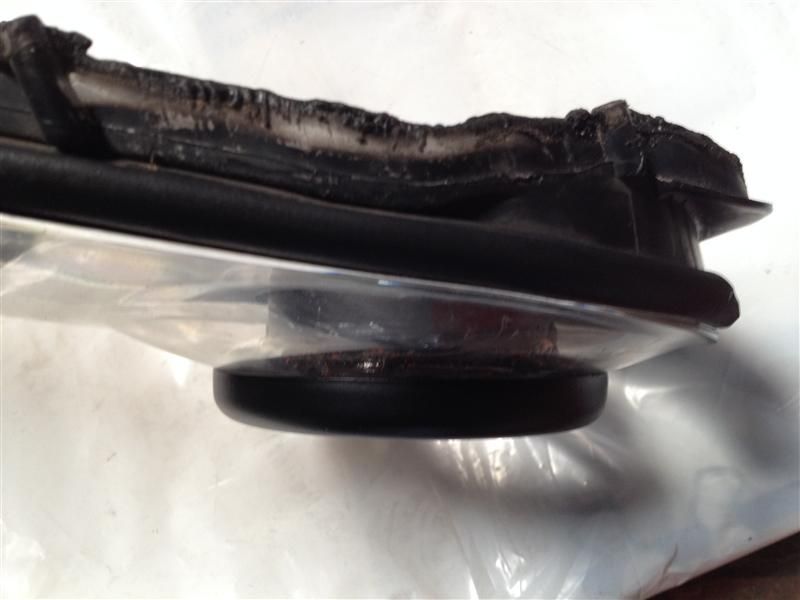
On the inside, use the sealing to 'glue' both parts to each other, making sure there's a smooth layer all around the funnel. This will make sure there's no water infiltration via the funnel into the headlight. It also keeps the funnel glued in place.

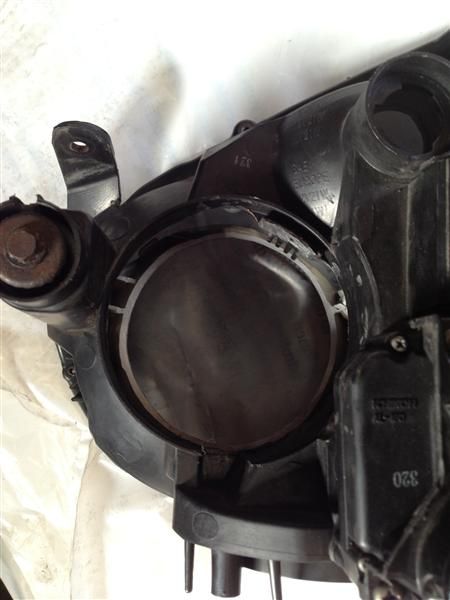
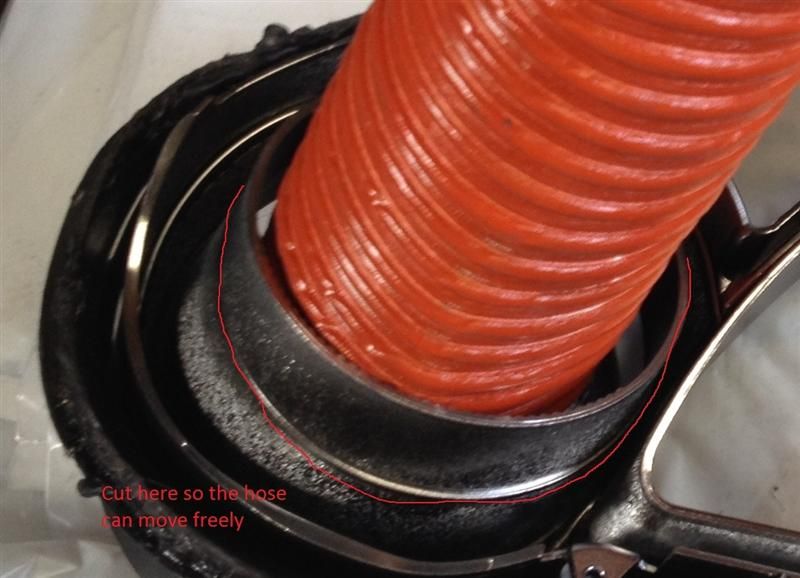
2. Depending on the size tubing u will be using (76 or 80mm), u might want to sand down the edges of the hole in the casing. I tried 80mm and it wouldn't fit without removing some material. I ended up using 76mm so the hole was big enough after the sanding.
IMG_0739Custom_zps8d2a75c4.jpg


3. Do the same with the chrome (or painted) bezel. The hose has to make a slight bend in the bezel so u have to remove about 1" of material to make it pass.
IMG_0741Custom_zps0ae432e0.jpg


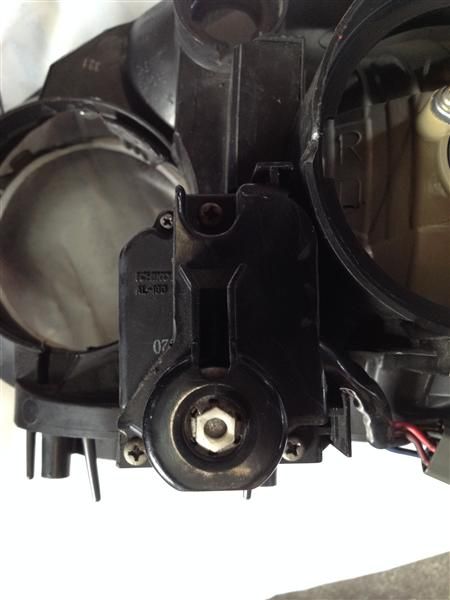
4. The adjuster motor has a cover, this needs to be trimmed also to allow the hose to pass.
IMG_0740Custom_zpsb15ce0ae.jpg


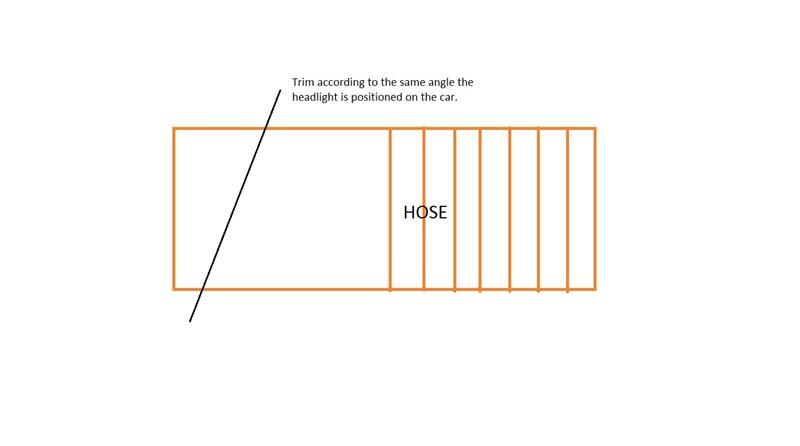
5. Cut the hose so it has a 'natural' angle for easy installation on the funnel. I did this to have 1 bend less in the hose which makes reassembly a bit easier.
U have to do this to see what I mean. Can't really explain it with pictures.
NaamloosCustom_zps9bbe42c0.jpg


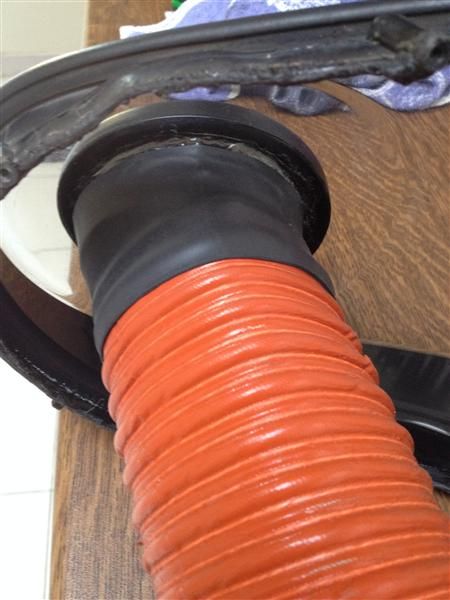
6. After the sealing has dried, it's time to install the hose on the funnel. To prevent water from entering the headlight, put a layer of epoxy on the end of the funnel and position the hose. Make no mistake in direction because u can't correct afterwards!!
While the epoxy is still drying, put the heat shrink around the hose and shrink with the heat gun. While doing this, keep an eye on the position of the hose at all times!!!
IMG_0748Custom_zps9bcc6961.jpg

IMG_0749Custom_zps341dab7a.jpg

IMG_0751Custom_zpsc00fab36.jpg
 

Highlander395

New member
As from here, it's all in the trial and trimming!!

Before final assembly, make sure all parts fit together without problem. If u are happy with your work, clean every part with some brake cleaner or other degreaser, then continue.

1. Put the bezel back in place and secure with the one screw.
IMG_0752Custom_zpsd0d3a2a4.jpg


2. Guide the hose trough the hole in the casing and position the glass against the casing, making sure the reflector can still be adjusted.

3. With the heatgun, warm the adhesive all around the light and press the glass and casing together. Don't go to fast or push too hard!

4. After a first round of warming up the adhesive, put back the 8 screws all around the headlight. Don't force them in their hole!!
Warm the adhesive enough and press the glass further into position, then tighten the screws one by one and restart doing this untill the screws are completely in position.
IMG_0753Custom_zps229c5d2d.jpg


5. Let the headlight cool down before reinstalling the bulbs.

6. Reinstall the bulbs.
 

Highlander395

New member
PART 5. Installation on the car

1. Remove your right headlight. Start by removing the front grill, then the 3 screw holding the headlight in place.
I'm assuming that, if you are following this how to, U already know how to remove a headlight, so no detailed directions here.

2. Before installing the 'new' headlight, press the hose together to make it oval. This is necessary because the steering fluid reservoir is in the way.

3. Carefully position the headlight into place, guiding the hose to the fender (or directing to the air filter).

4. Secure the screws and reinstall the front grill.

5. Have the headlight adjusted at your local workshop.

If all went well, it should look like this:
IMG_0756Custom_zps46de795b.jpg

IMG_0757Custom_zps96219e70.jpg

IMG_0760Custom_zps6edf397a.jpg


Congratz on your badass modification ;)
 

Alin

Diehard Car Enthusiast!
Wow. Thank you so much for this! This should be a sticky since you cant find it anywhere else!!! :bigtup: amazing job!

Looks amazing!

You should test to see how much it affects intake temps!!!

How long did it take to complete the entire process?
 

IGOTASTi

System Operator
Staff member
Amazing!

Thread has been stuck.
 

Highlander395

New member
Amazing!

Thread has been stuck.

Thanks :cool:

You should test to see how much it affects intake temps!!!

How long did it take to complete the entire process?

1. As far as i know it wont affect iat.. Gonna do some research on that matter ;) What i do know is that my air filter now gets 'fresh' air instead of using the ambient air in the fender. It will be cooler yes, but i don't have the know how to see it would help lower the intake temp :(

2. Took me several days to do it. Did it while doing other stuff so can't exactly calculate the exact duration. I think it can be done in 2 days (if you let the sealing/glue dry overnight).
 

ZackUSAF82

New member
Awesome job man, great write-up! Thanks for taking the time to put it together! :tup::tup::tup::tup::tup::tup::tup::tup:
 

eric.marsh

New member
Thats pretty awesome dude, unfortunately i live in an area where the rain is almost biblical... lol. Their is no way i could run this set up.
 
Top