Flatout Suspension
On Vacation
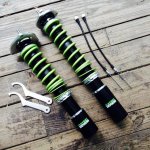
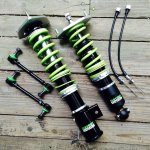
You bought some coilovers and you immediately took them out of the box, you took a picture of them to show your friends...and lets be honest, you probably checked all the filters on the instagram app to make sure they look just artsy enough. Then, you installed them. Well, now what? Bolting them on is easy, its just a few nuts and bolts per corner. More than likely your suspension system came with a piece of paper that says "Leave the spring preload at 0 and use the lower mount to set ride height." So you unlock the mount and you thread it as far as it'll go. You drop the car off the jack stands (or scissor jack if you're a dare devil). Your friend Dave comes over and helps you lift the car up so you can slide the jack out from under your car. You're pleased. Then fast forward a little bit...your car rubs at full lock, your car handles pretty crappy (you have no droop so your tire is lifting on hard turns and you only have 75% of your available grip), your car understeers and everyone in the back gets car sick after 4 miles. You did it wrong.
Set aside a few hours, and lets go back and do this right....
Go outside and get your car on 4 jackstands (place them in strong areas of the frame, but in the same pattern so we don't flex anything.) Take the wheels off. I'll wait....
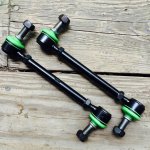
Ok, next thing you want to do is remove the sway bars endlinks. We want to be able to move the corners independently lower mounts.
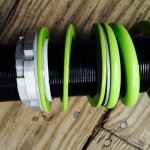
Now, Unbolt the lower mounts from the hub (or rear LCA). Keep the assembly bolted in up top...I want you to remove the lower mount, the two locking collars and the spring perch and spring. At this point, you should have a top mount, bump stop and shock cartridge installed just hanging.
Next you want to put your lower mount back on. Don't worry about the ring, its not needed. Thread it on and bolt it back onto the hub/ LCA. You will also want to put your wheel back on. Just thread on a few lugs, finger tight.
Ok, we are going to set up your bump travel. Place a floor jack under the hub and start raising it...the tire should move up and up and up. Stop as soon as the bumpstop hits (you'll know, the car will start to raise off the jackstand). If your tire hits, lower the jackstand and turn the shock body counterclockwise so you get about 1" of length (adding droop - overall length to the assembly). Try it again. Keep doing this until the bumpstop contacts the upper mount without the tire touching ANYTHING. Once you get that, add about an inch to the droop to allow for tire deflection. You should only need to do one side (left-front/ left-rear) just set your lower mount at the same height on the opposite side.
Now, mark your spot for the lower mount, you have to take it off and reassemble at this point. I usually measure the top of the threaded cartridge to the top of the lower mount. You can measure, use a paint pen, whatever; just don't lose your setting point.
Ok, reassemble everything. Get the spring perch just tight enough to where the spring can't move up or down. This is a zero preload setting. Go ahead and bolt everything back on, suspension...wheels, etc. Torque the lugs, etc.
Go drive. Just a short drive; go around the block and settle the suspension.
Now, the fun part...because that last part was a blast, right!?
Crawl under your car. Measure the length of each spring. Both sides. Write that down.
Now, raise the car and take the wheels off. Measure the free length of your springs.
So at this point (just examples) you should have:
LF 8" /7.25"
RF 8"/7.50"
LR 8"/7.250"
RR 8"/7.50"
(Free length/ compressed under weight)
So you have a difference of .5-.75" between free length and under the weight of the car. You need to add that difference into the preload. On your left front with a .75" difference, add 3/4 of an inch. Easy.
Your measurements maybe came out more like 1" to 1.25"...it doesn't matter. Just add it back in.
Set all the spring perches and go put it all back together. Torque the lugs and go drive.
Your car is either sitting too high for your tastes or too low. Lets say its too high. You want to drop and inch...split the difference, drop the preload 1/2" and the droop (lower mount) 1/2". Just be sure and split the difference.
In closing this is just the initial set up. You still want to go and get a corner weight (if performance is your thing) or you want to keep going lower. Just use the formula above and don't try to do it all at once. Little by little.
On McPhearson, ideally you want the control arms parallel to the ground. Give it a slight rake (rear 1" heigher). I like to use the pinch weld to measure...just use the furthest ends.
Hope this helps....after all of this effort, you should have a better ride (well, depending on shocks and matching spring rates)...
*There's so many ways to set up a car, rally cars are different than track cars...so take this with a grain of salt...this is a pretty generalized procedure.
http://www.flatoutsuspension.com


