[FONT="]Disclaimer:[/FONT]
[FONT="]You do this mod at your own risk, if you haven't attempted or finished anything of similar difficulty then get it done by a shop.[/FONT]
[FONT="] [/FONT]
[FONT="] [/FONT]
[FONT="]Parts Needed:[/FONT]
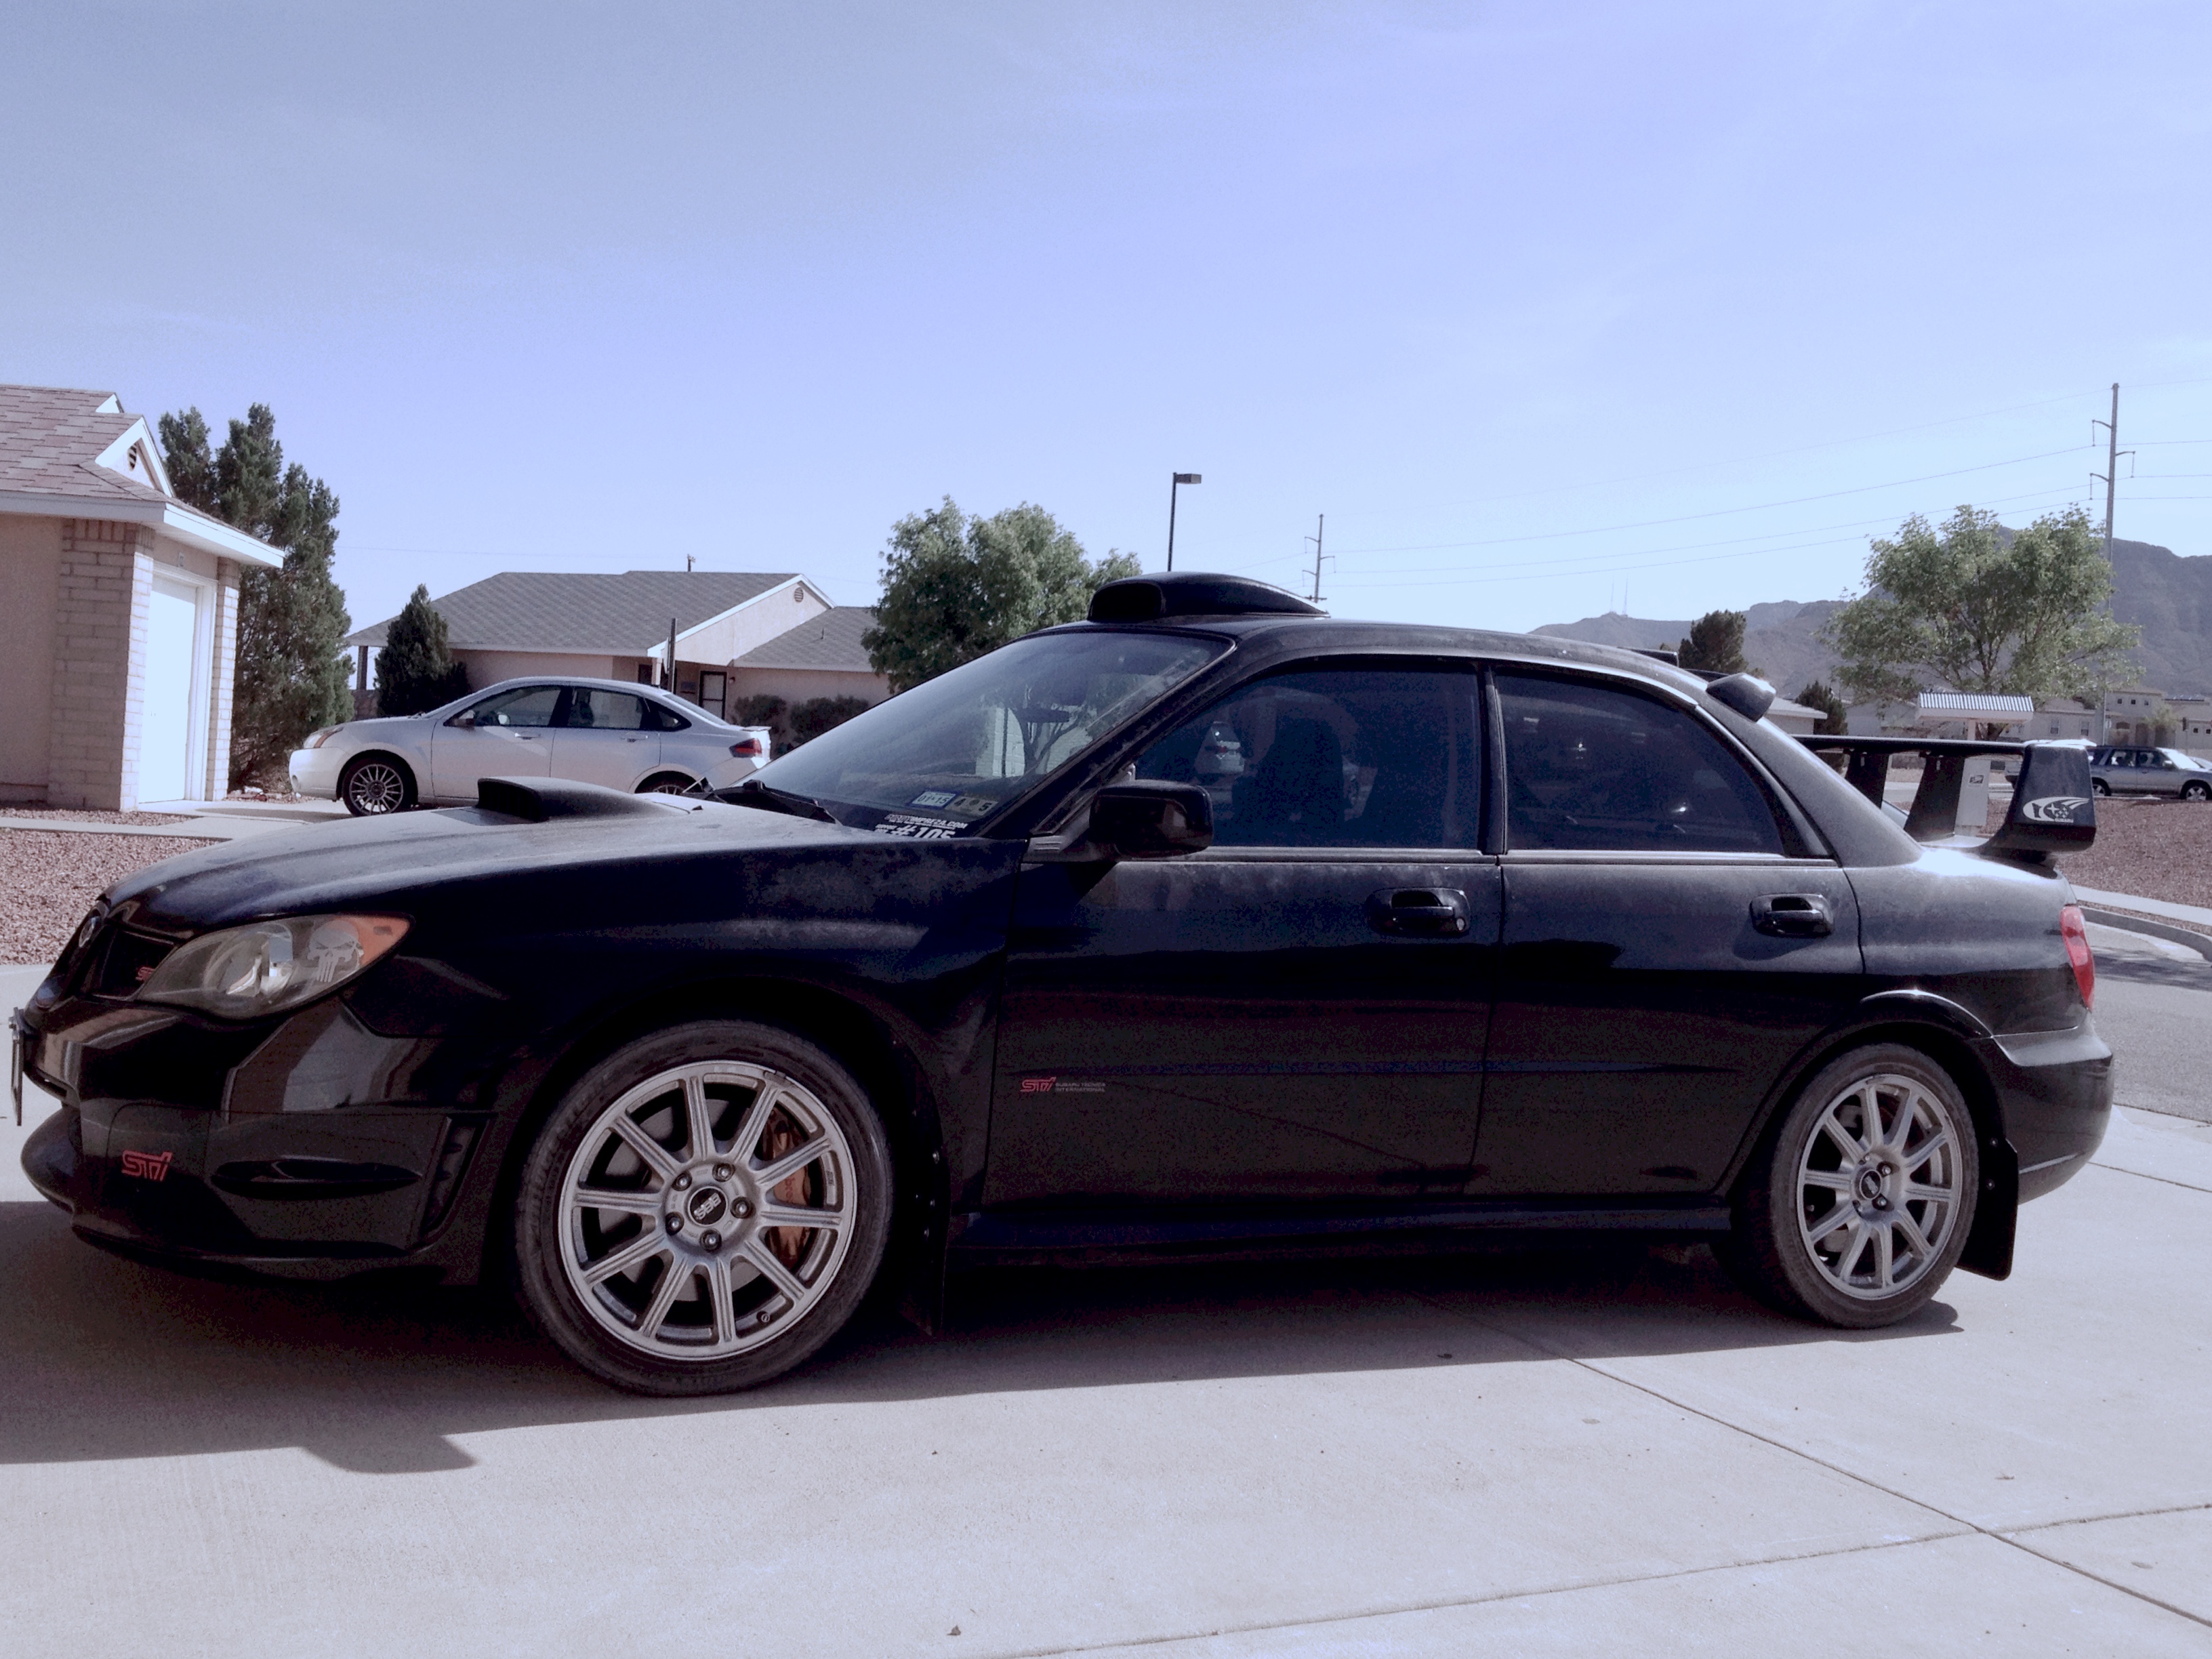
[FONT="]-Roof vent (got mine from a semi-truck parts place, it's just a side vent used on semis; LINK to the site/page I bought from; I bought vent ?D?)[/FONT]
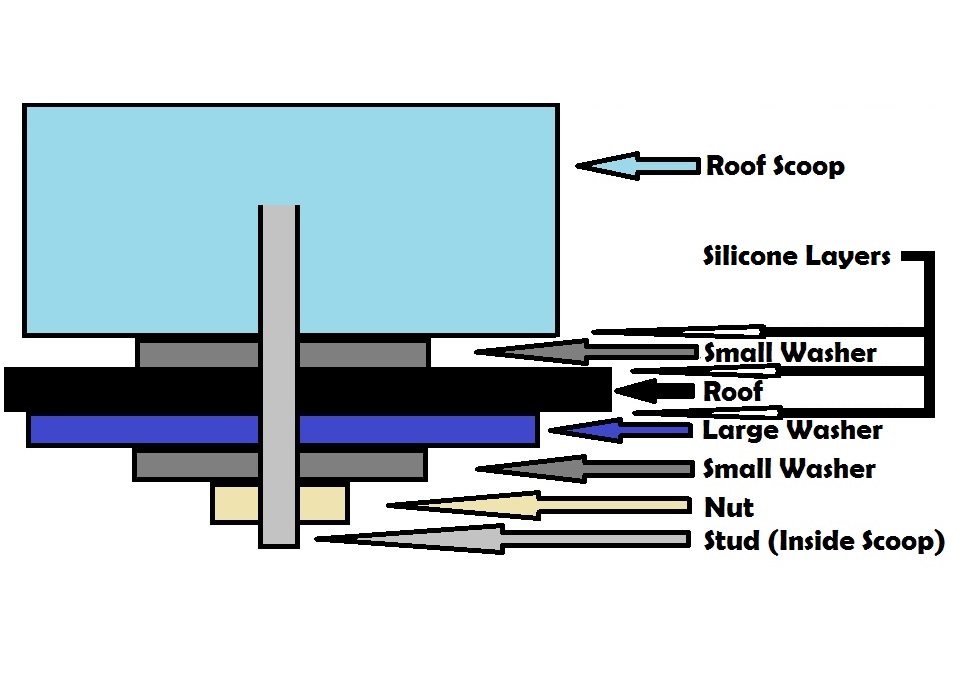
[FONT="]-Some sort of caulk or JB Weld (has to be good for outdoor use, for obvious reasons (I used silicone based caulk from Lowe?s, an indoor/outdoor useable and paintable type from the paint and glues area; aisle 3 or 4 IIRC))[/FONT]
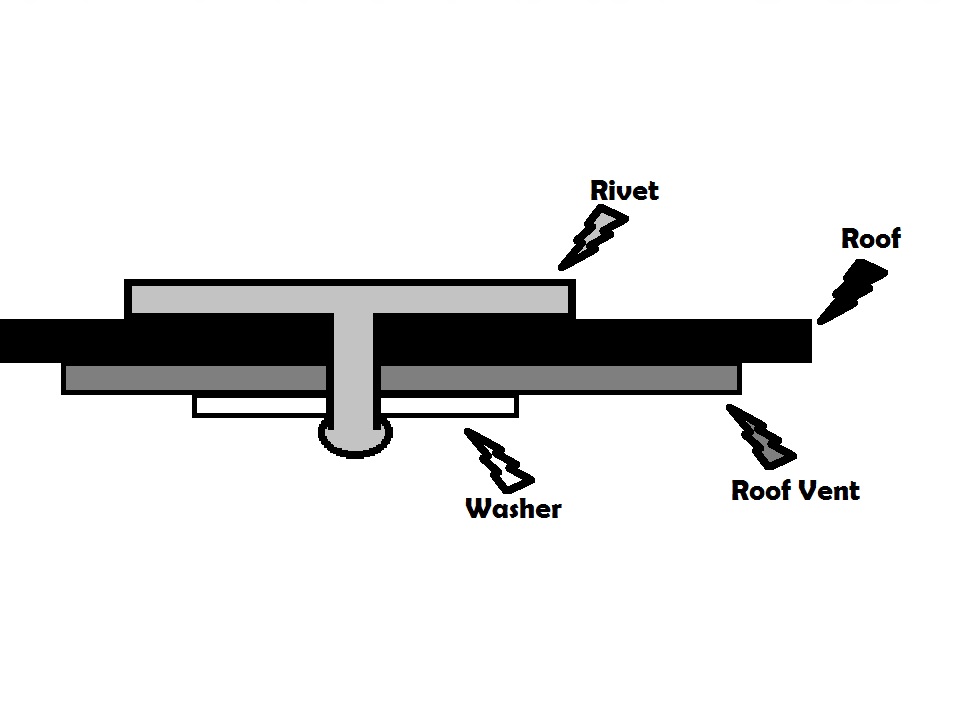
[FONT="]-Rivets (I used Aluminum 3/16? diameter, wide domed blind rivets for .126-.25? material from McMaster-Carr: Part # 97447A325)[/FONT]
[FONT="]-Rivet gun[/FONT]
[FONT="]-Small washers (extra backing material for the rivets)[/FONT]
[FONT="]-Drills (metal cutting bits)[/FONT]
[FONT="]-Drill Motor[/FONT]
[FONT="]-Metal cutting tool (i.e. air powered or electric rotary saw small enough to cut the size needed)[/FONT]
[FONT="]-Sewing tape measure[/FONT]
[FONT="]-Straight edge/ruler[/FONT]
[FONT="]-Sander or Dremel style tool (used to file down the edges for a cleaner install)[/FONT]
[FONT="]-Tape (for protecting the paint on your roof and for marking your measurements)[/FONT]
[FONT="]-An extra set of hands or some sort of pole to hold the vent up when riveting it in place[/FONT]
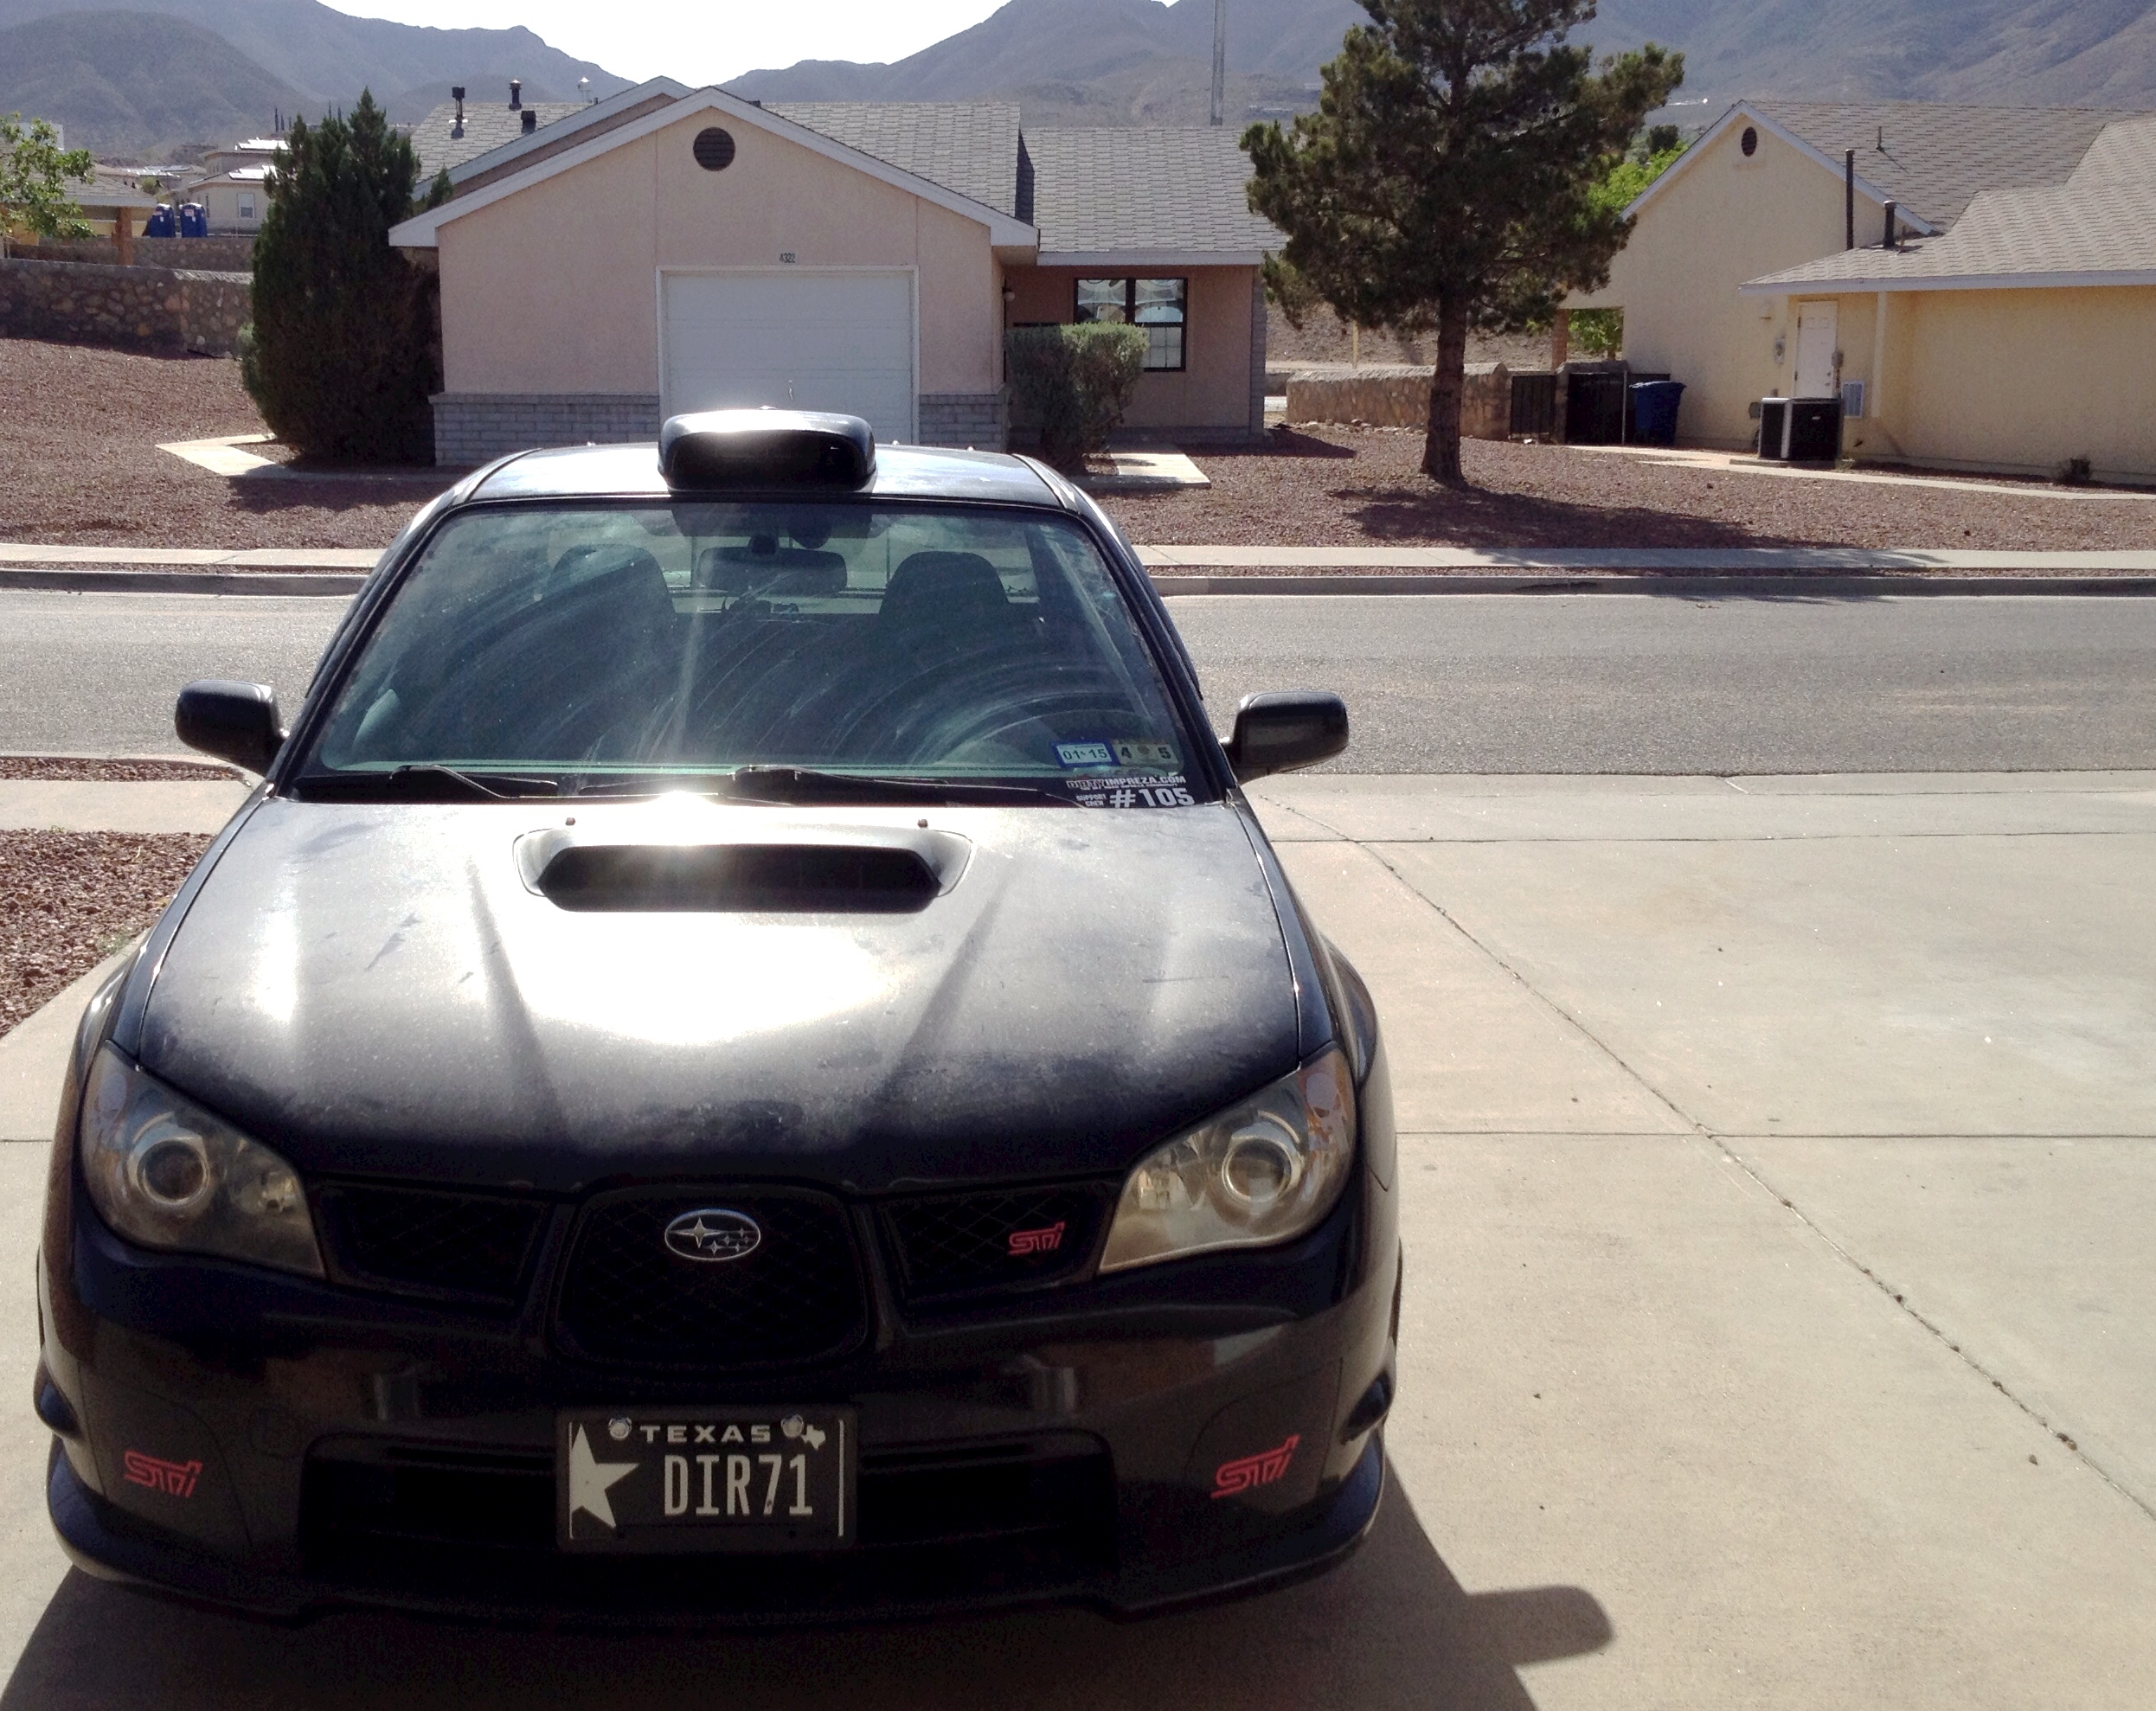
[FONT="]-Roof scoop (optional: I bought one from an ebay shop that has studs for a hard install, wouldn?t recommend a stick on variation for this job. Here is a LINK to the eBay shop?s webpage)[/FONT]
[FONT="] [/FONT]
[FONT="] [/FONT]
[FONT="]Steps:[/FONT]
[FONT="]1: Strip out headliner (if you can't figure this out, stop while you're ahead, this job is too complex for you since you will be soon cutting a hole in your roof).[/FONT]
[FONT="] [/FONT]
[FONT="]2: Tape over the area of the roof where you want the vent, make the taped space substantially larger than the vent (my taped area was about 12" deep by 20" wide looking from the nose of the car).[/FONT]
[FONT="] [/FONT]
[FONT="]3: I suggest covering up the rest of the car with a sheet or something similar to catch the bits of metal removed and keep them from sitting in gaps and rusting away. Along the same lines put another sheet or blanket inside the car to catch metal bits that fall in.[/FONT]
[FONT="] [/FONT]
[FONT="]4: Measure the opening needed to put the vent through, use the size of the lid, not the whole vent component.[/FONT]
[FONT="] [/FONT]
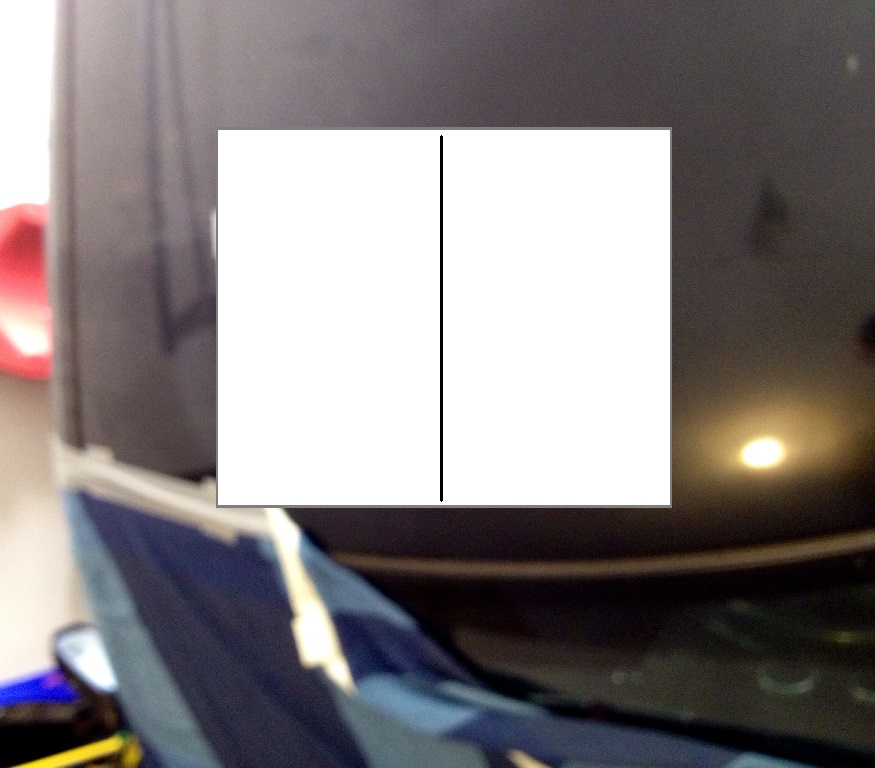
[FONT="]5: Find the center line of your roof (side to side in 2 points) and then draw a line between these 2 points using the straight edge/ruler. At the same time decide how far back you want your vent (look inside for anything that will prevent it from being too far forward), I placed mine 8" from the front of the roof due to the dome/map light being in the way of farther forward.[/FONT]
[FONT="]
 [/FONT]
[FONT="] [/FONT]
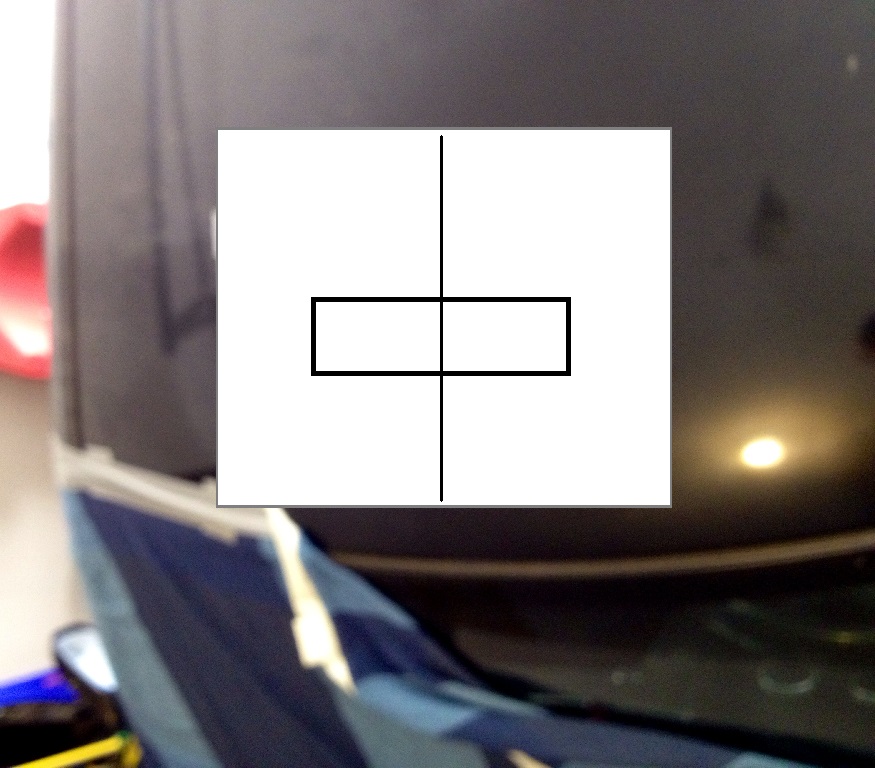
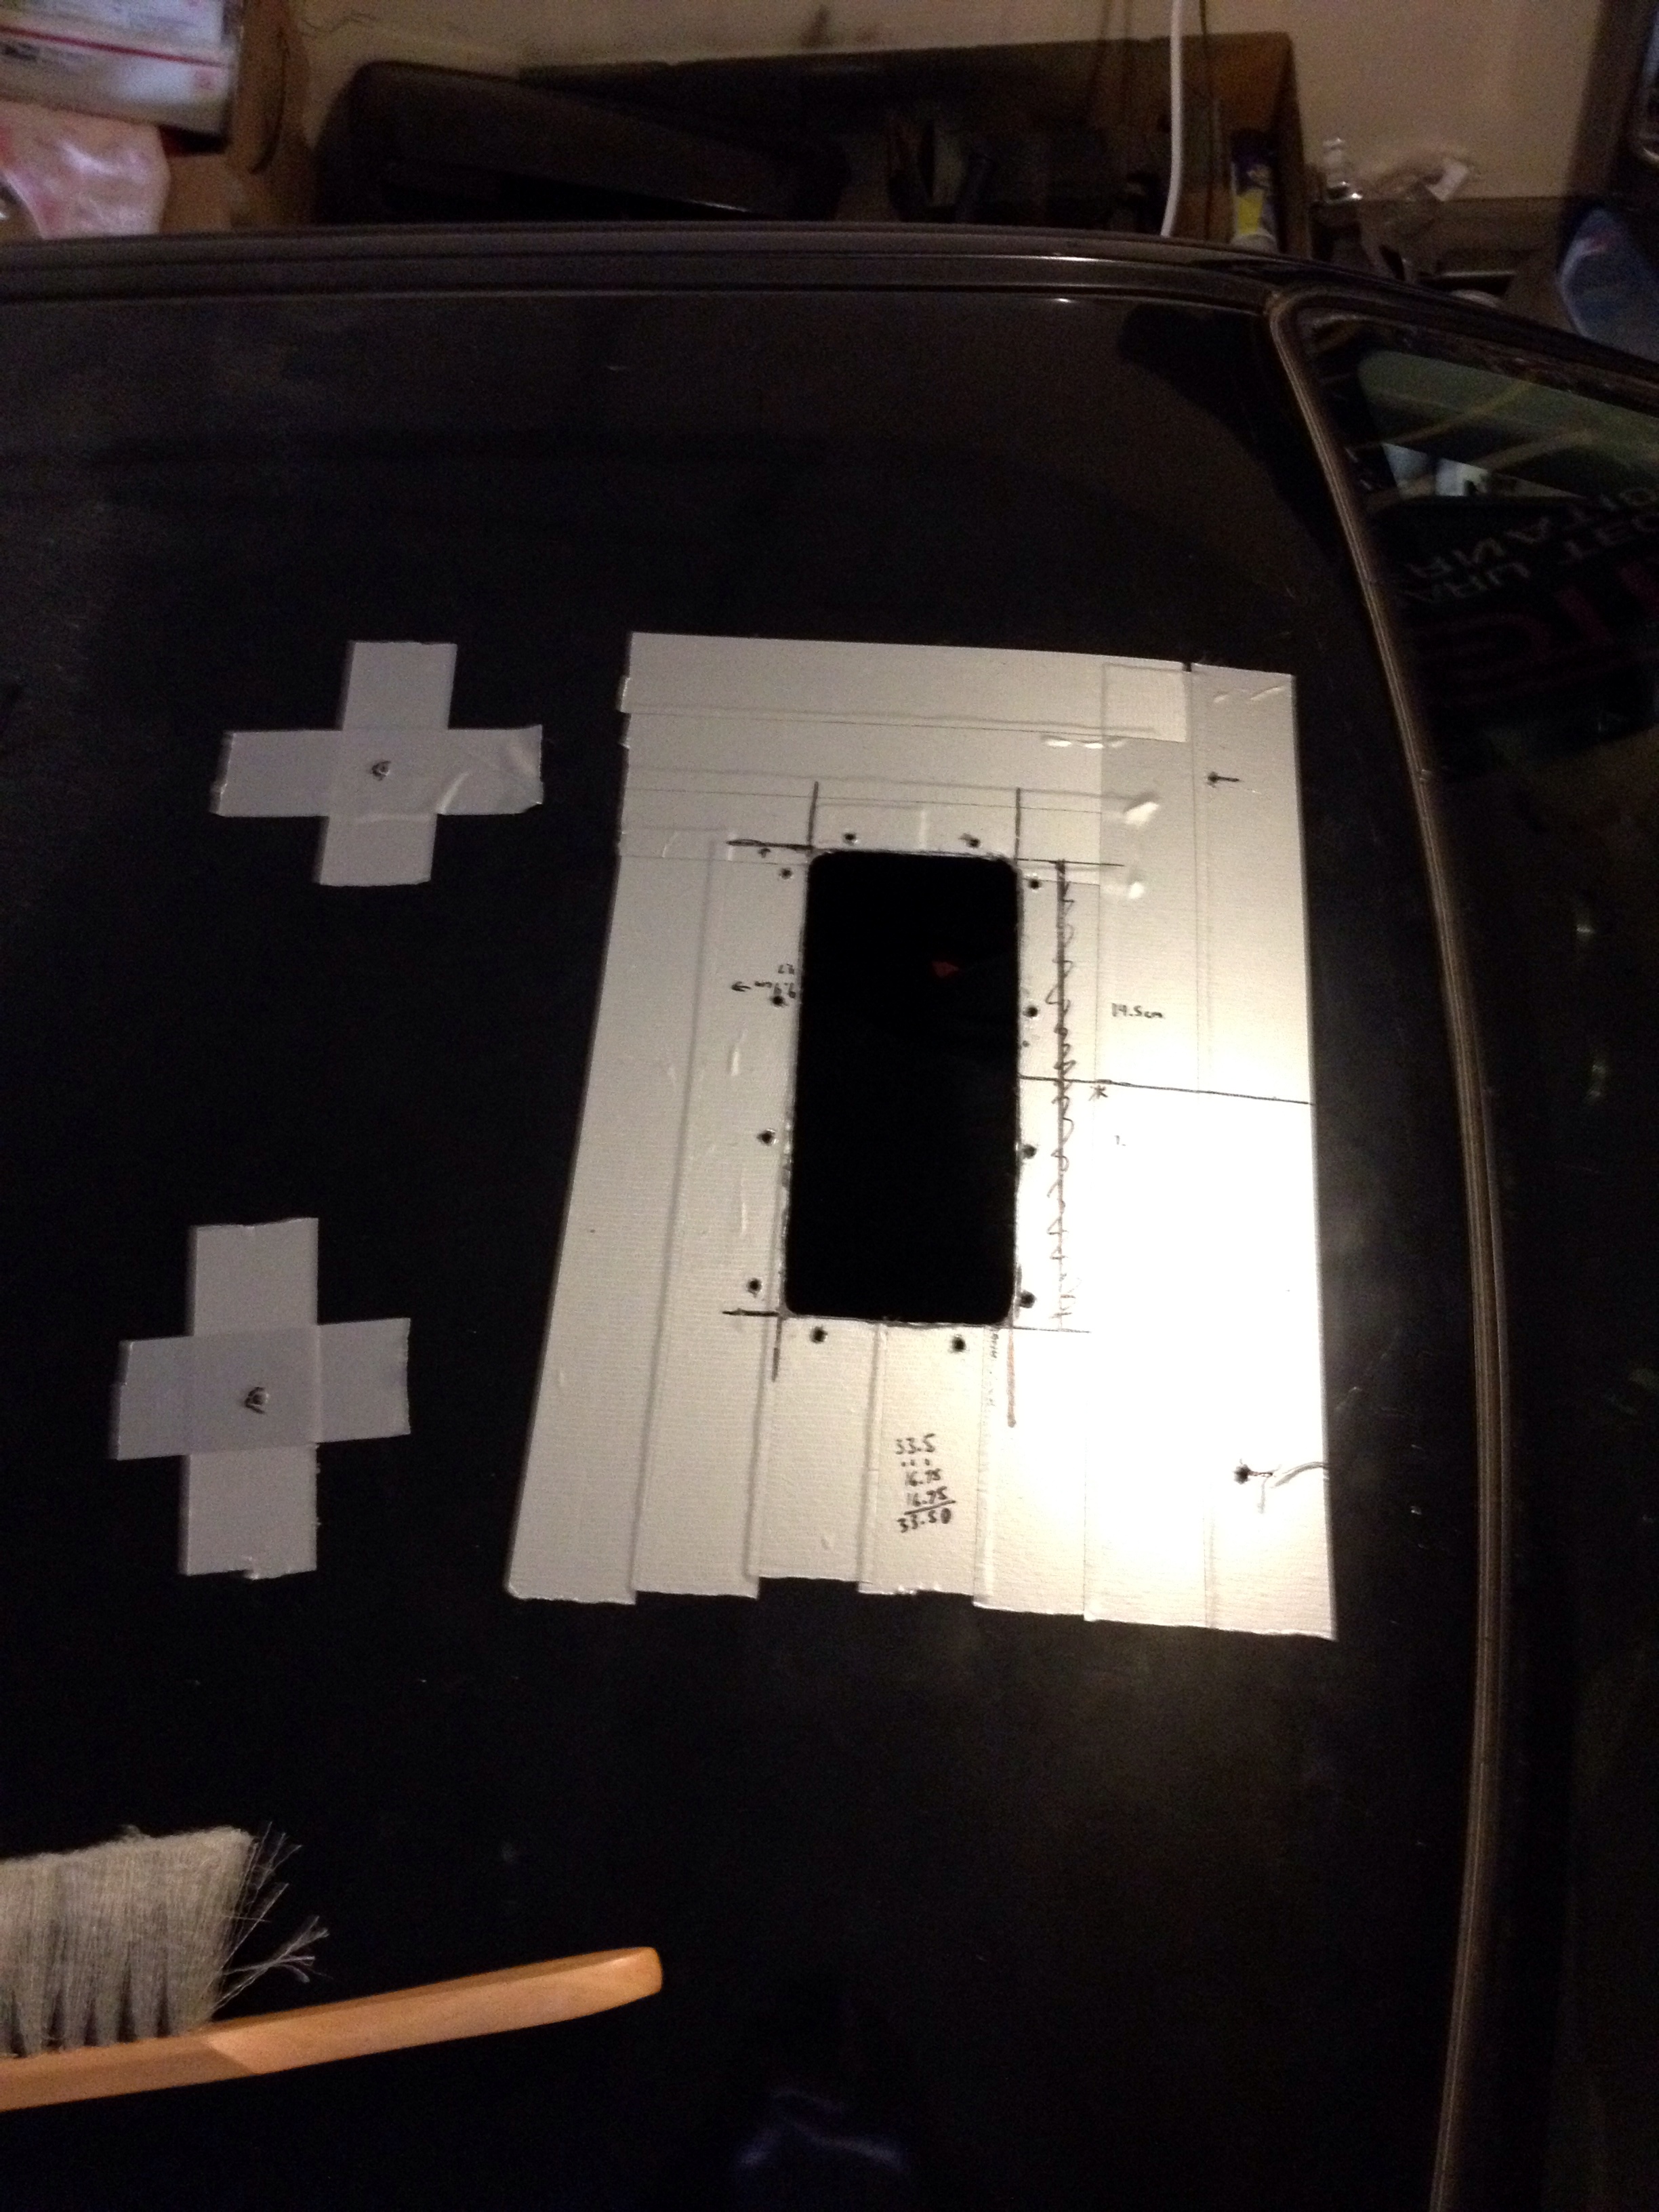
[FONT="]6: Transfer the measurements of the opening needed onto the taped section of the roof. I marked off the 8" back point in the center and then made my marks to the left and right of center (marks were made at a distance away from center of half the width of the hole needed) at an equal distance back from the front window on each side.[/FONT]
[FONT="] [/FONT]
[FONT="]7: Follow suit with the rest of the lines for the vent opening.[/FONT]
[FONT="] [/FONT]
[FONT="]6/7 Alternate: Make a stencil of the opening needed and then use it to make the markings on the roof.[/FONT]
[FONT="]
 [/FONT]
[FONT="] [/FONT]
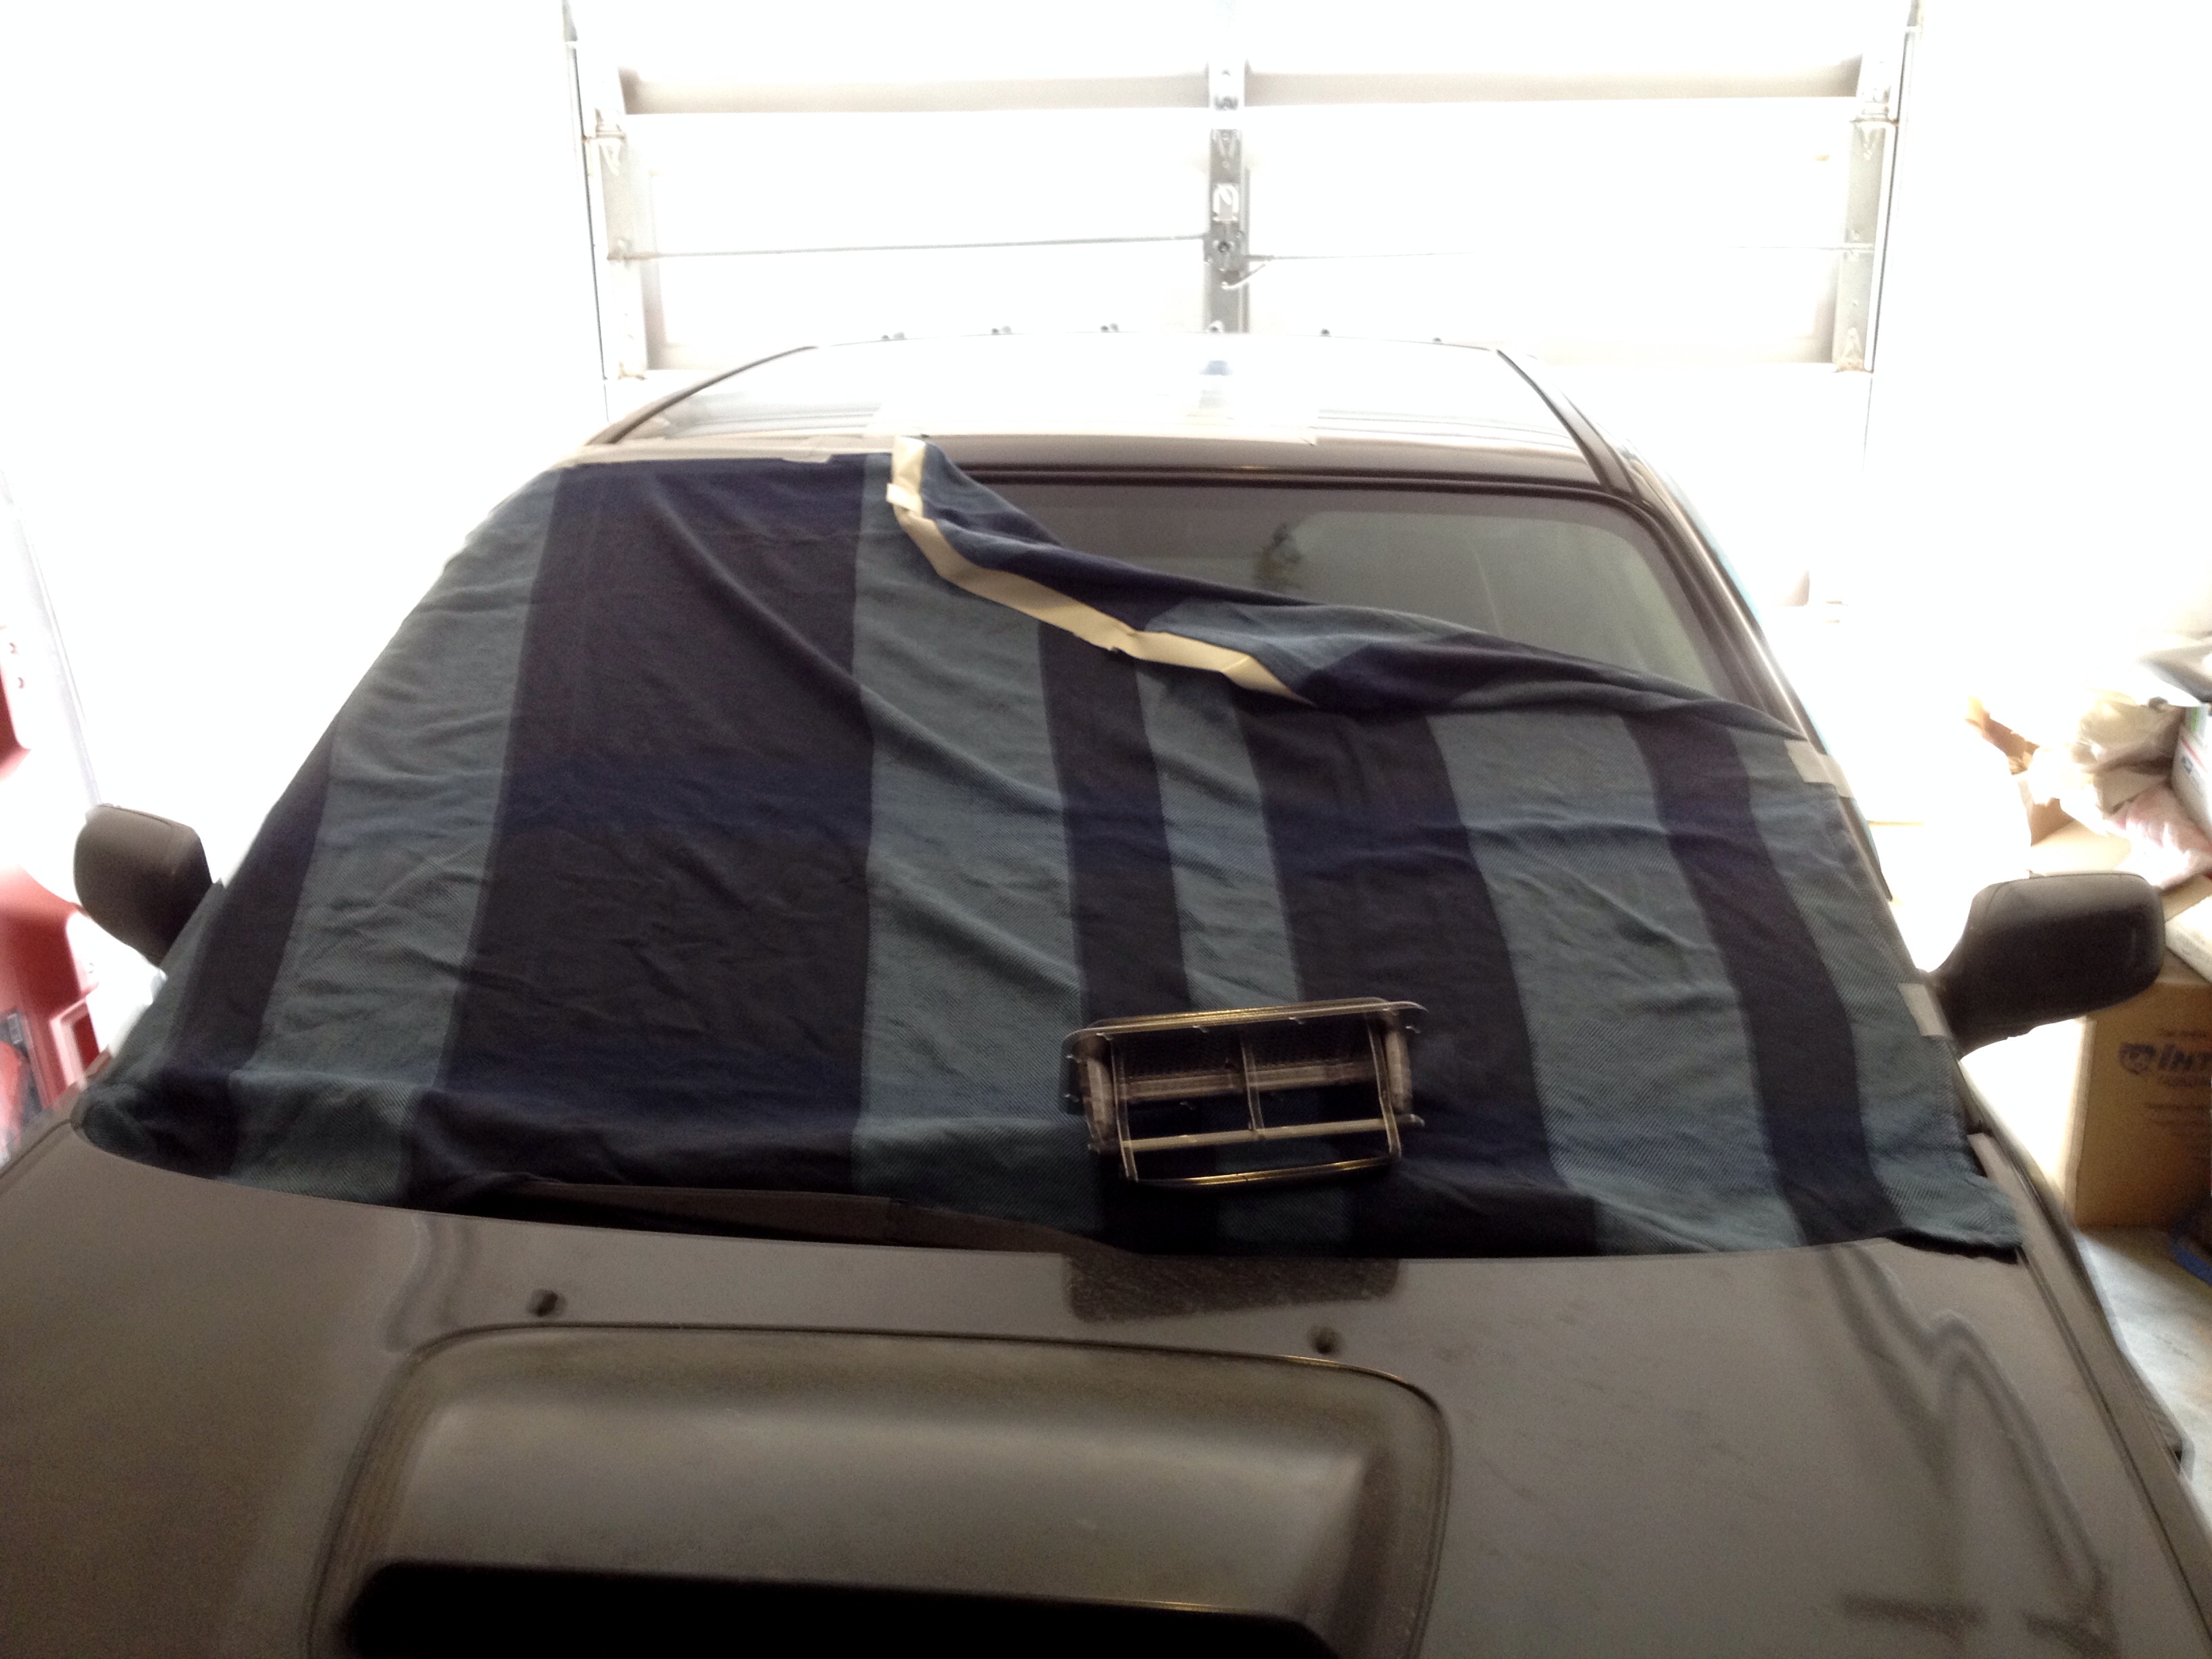
[FONT="]8: Cover up your front window to protect it from sparks from cutting, the sparks have been known to pit glass.[/FONT]
[FONT="]
 [/FONT]
[FONT="] [/FONT]
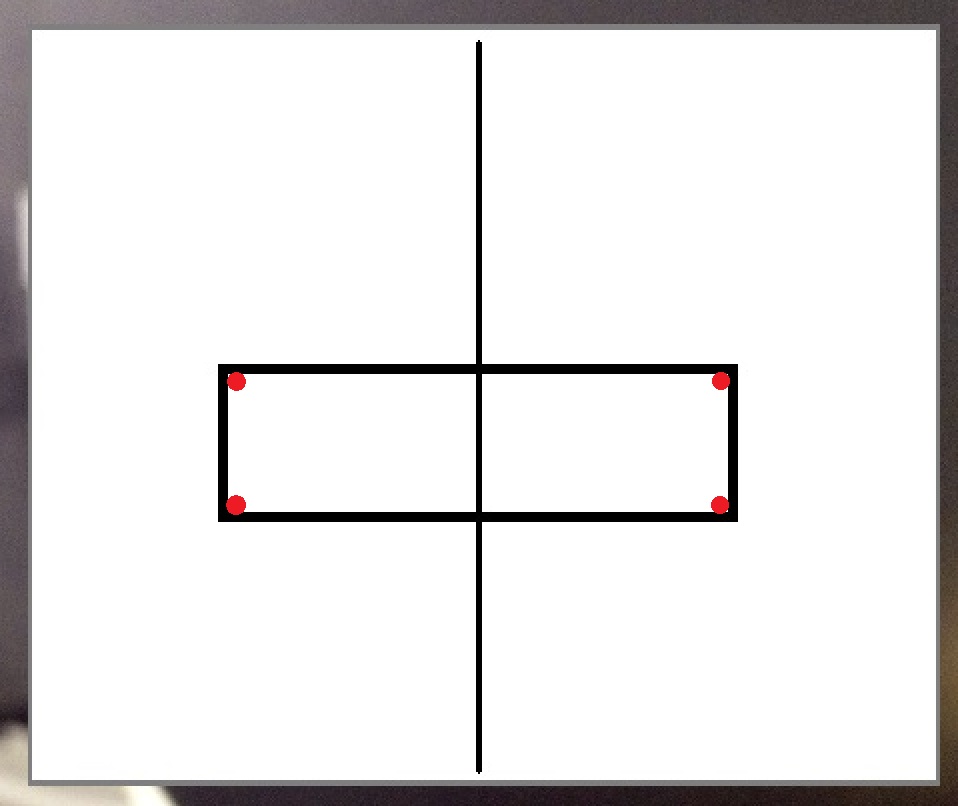
[FONT="]9: Drill corner holes inside your vent diagram. I made a mark 1cm in from each corner at a 45* angle and drilled a pilot hole at these points. Followed up the pilot hole with incrementally larger pilot holes and finished with a 1/2" drill bit to get the rounded corners.[/FONT]
[FONT="]
 [/FONT]
[FONT="] [/FONT]
[FONT="]10: Cut the hole for your vent. Keep test fitting the vent, if you made the hole to small, until it fits thought the hole.[/FONT]
[FONT="]*NOTE* You can be anal about the way this turns out or not, if you're anal you may be able to get the vent to hold in place with just JB Weld and friction and not have to rivet, I don't trust JB weld enough to go that route so I made the hole slightly larger and riveted the vent in place[/FONT]
[FONT="]
 [/FONT]
[FONT="] [/FONT]
[FONT="]11: Mark the locations for the rivet holes and then drill pilot holes in the center of these points. Follow up with a larger drill that is sized properly to the rivets you are using. Ensure that all the rivets line up in at the same time and that you remove the protective tape (from Step 2) before moving on to the next step.[/FONT]
[FONT="]*NOTE* Ensure your helper is ready to help, whether it?s a person or a pole, I recommend a person as they can hold up the washers and the vent while you use the rivet gun.[/FONT]
[FONT="]*NOTE* I did Steps 18 & 19 at this time. Second picture has rivets in all the holes to show them better.[/FONT]
[FONT="]
 [/FONT]
[FONT="]
 [/FONT]
[FONT="]
 [/FONT]
[FONT="]You do this mod at your own risk, if you haven't attempted or finished anything of similar difficulty then get it done by a shop.[/FONT]
[FONT="] [/FONT]
[FONT="] [/FONT]
[FONT="]Parts Needed:[/FONT]
[FONT="]-Roof vent (got mine from a semi-truck parts place, it's just a side vent used on semis; LINK to the site/page I bought from; I bought vent ?D?)[/FONT]
[FONT="]-Some sort of caulk or JB Weld (has to be good for outdoor use, for obvious reasons (I used silicone based caulk from Lowe?s, an indoor/outdoor useable and paintable type from the paint and glues area; aisle 3 or 4 IIRC))[/FONT]
[FONT="]-Rivets (I used Aluminum 3/16? diameter, wide domed blind rivets for .126-.25? material from McMaster-Carr: Part # 97447A325)[/FONT]
[FONT="]-Rivet gun[/FONT]
[FONT="]-Small washers (extra backing material for the rivets)[/FONT]
[FONT="]-Drills (metal cutting bits)[/FONT]
[FONT="]-Drill Motor[/FONT]
[FONT="]-Metal cutting tool (i.e. air powered or electric rotary saw small enough to cut the size needed)[/FONT]
[FONT="]-Sewing tape measure[/FONT]
[FONT="]-Straight edge/ruler[/FONT]
[FONT="]-Sander or Dremel style tool (used to file down the edges for a cleaner install)[/FONT]
[FONT="]-Tape (for protecting the paint on your roof and for marking your measurements)[/FONT]
[FONT="]-An extra set of hands or some sort of pole to hold the vent up when riveting it in place[/FONT]
[FONT="]-Roof scoop (optional: I bought one from an ebay shop that has studs for a hard install, wouldn?t recommend a stick on variation for this job. Here is a LINK to the eBay shop?s webpage)[/FONT]
[FONT="] [/FONT]
[FONT="] [/FONT]
[FONT="]Steps:[/FONT]
[FONT="]1: Strip out headliner (if you can't figure this out, stop while you're ahead, this job is too complex for you since you will be soon cutting a hole in your roof).[/FONT]
[FONT="] [/FONT]
[FONT="]2: Tape over the area of the roof where you want the vent, make the taped space substantially larger than the vent (my taped area was about 12" deep by 20" wide looking from the nose of the car).[/FONT]
[FONT="] [/FONT]
[FONT="]3: I suggest covering up the rest of the car with a sheet or something similar to catch the bits of metal removed and keep them from sitting in gaps and rusting away. Along the same lines put another sheet or blanket inside the car to catch metal bits that fall in.[/FONT]
[FONT="] [/FONT]
[FONT="]4: Measure the opening needed to put the vent through, use the size of the lid, not the whole vent component.[/FONT]
[FONT="] [/FONT]
[FONT="]5: Find the center line of your roof (side to side in 2 points) and then draw a line between these 2 points using the straight edge/ruler. At the same time decide how far back you want your vent (look inside for anything that will prevent it from being too far forward), I placed mine 8" from the front of the roof due to the dome/map light being in the way of farther forward.[/FONT]
[FONT="]
[FONT="] [/FONT]
[FONT="]6: Transfer the measurements of the opening needed onto the taped section of the roof. I marked off the 8" back point in the center and then made my marks to the left and right of center (marks were made at a distance away from center of half the width of the hole needed) at an equal distance back from the front window on each side.[/FONT]
[FONT="] [/FONT]
[FONT="]7: Follow suit with the rest of the lines for the vent opening.[/FONT]
[FONT="] [/FONT]
[FONT="]6/7 Alternate: Make a stencil of the opening needed and then use it to make the markings on the roof.[/FONT]
[FONT="]
[FONT="] [/FONT]
[FONT="]8: Cover up your front window to protect it from sparks from cutting, the sparks have been known to pit glass.[/FONT]
[FONT="]
[FONT="] [/FONT]
[FONT="]9: Drill corner holes inside your vent diagram. I made a mark 1cm in from each corner at a 45* angle and drilled a pilot hole at these points. Followed up the pilot hole with incrementally larger pilot holes and finished with a 1/2" drill bit to get the rounded corners.[/FONT]
[FONT="]
[FONT="] [/FONT]
[FONT="]10: Cut the hole for your vent. Keep test fitting the vent, if you made the hole to small, until it fits thought the hole.[/FONT]
[FONT="]*NOTE* You can be anal about the way this turns out or not, if you're anal you may be able to get the vent to hold in place with just JB Weld and friction and not have to rivet, I don't trust JB weld enough to go that route so I made the hole slightly larger and riveted the vent in place[/FONT]
[FONT="]
[FONT="] [/FONT]
[FONT="]11: Mark the locations for the rivet holes and then drill pilot holes in the center of these points. Follow up with a larger drill that is sized properly to the rivets you are using. Ensure that all the rivets line up in at the same time and that you remove the protective tape (from Step 2) before moving on to the next step.[/FONT]
[FONT="]*NOTE* Ensure your helper is ready to help, whether it?s a person or a pole, I recommend a person as they can hold up the washers and the vent while you use the rivet gun.[/FONT]
[FONT="]*NOTE* I did Steps 18 & 19 at this time. Second picture has rivets in all the holes to show them better.[/FONT]
[FONT="]
[FONT="]
[FONT="]
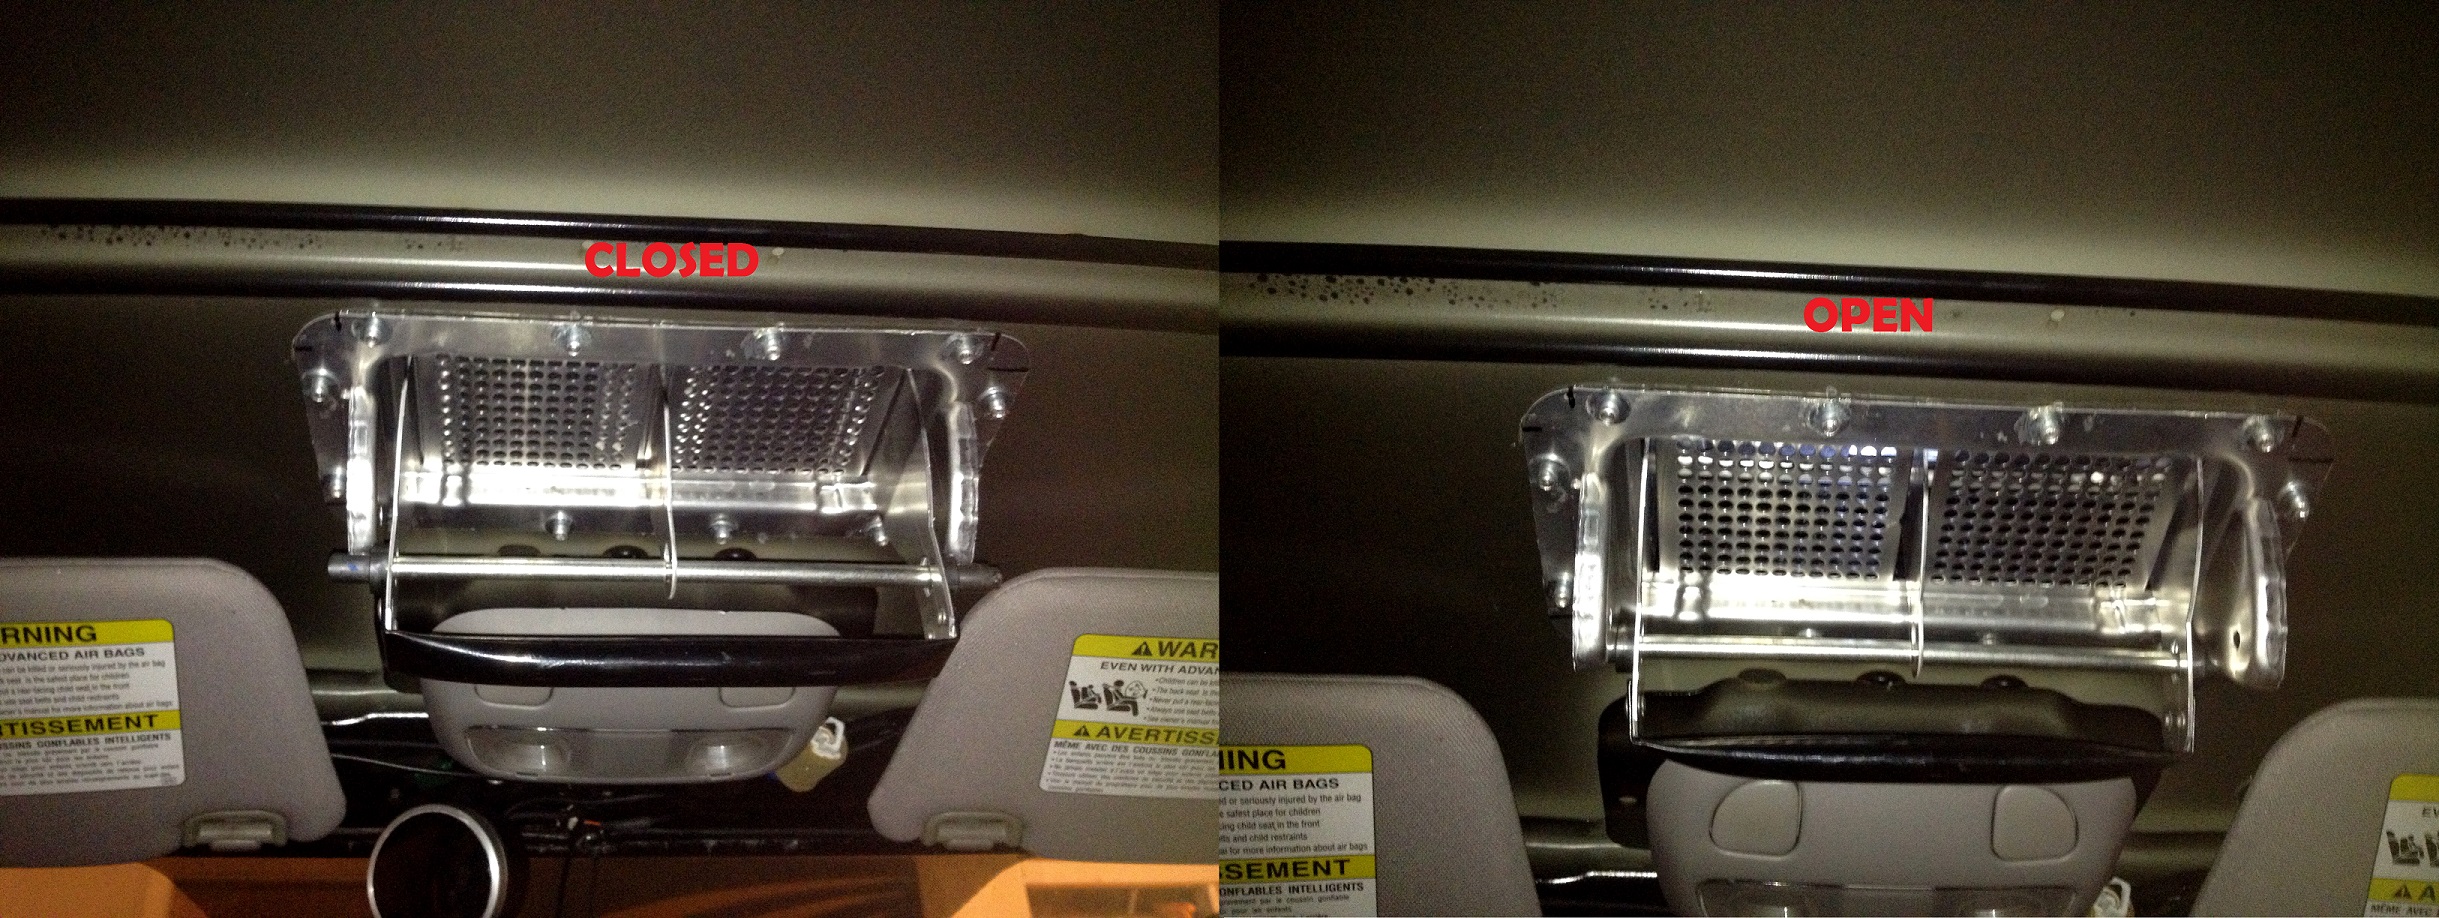
") Inside just looks like a cheese grater mounted in the roof with an odd handle location.
Inside just looks like a cheese grater mounted in the roof with an odd handle location.