GD Ashlyn - Mike's EFI Logics-built '04 STI...an autocross warrior.

BadlandsRacer

New member
Pictures coming, they're coming. I got a set of Gorilla lugs, JJ. They seem pretty nice, and less expensive than the popular brands (Muteki, Volk, etc).

FLAT4, I wouldn't really call it a turbo failure, as it wasn't the turbo's fault. The shimmed oil pump, ultra-low coolant temps (Gimmick Motorsports' garbage thermostat) and sub-zero temps caused oil pressure high enough to push past the turbo seals. Blouch rebuilt the turbo with new seals/bearings at no cost, and I switched back to an OEM thermostat, and synthetic oil. Runs fine now.
 

IGOTASTi

System Operator
Staff member
Awesome, can't wait to see them pictures! I also can't wait to have the IGOTASTi calendar of the year for STi of the month. All winners will be in the calendar, but shhh don't tell no one, lol.
 

BadlandsRacer

New member
^^^ Well then. We'll just hold on to that mental picture. Time for an awesome update!

18 February 2011: GrimmSpeed master cylinder brace, oil in the intercooler, Defi oil pressure gauge now works, Defi boost gauge does NOT work, and WHEEL PICTURES!!

Well. Last night was a great night. The plan was to install my GrimmSpeed master cylinder brace, my new oil pressure sensor for my Defi gauge, and check out the possibility of oil in my intercooler. At about 6pm I headed up to Performance Plus Automotive to meet up with Brock, Pat, Corbin, and Tyler. Our friend Joe (with a badass Spec C tribute '06 STi) came down from Minot to join us, and shortly after, my fiancee showed up with my DSLR and 4 Little Caesar's meal deals. It was to be a good night.

The most important thing was the intercooler. So, into the shop, and off with the piping. We results were marginally impressive:

1238y.jpg


1218iu.jpg


1199bl.jpg


Brock was the one to remove the silicone connector from the pipe and IC core. His arm took the brunt of the assault, though I was also standing underneath at the time and caught some on the head.

1194m.jpg


1198f.jpg


The oil was thick and sludgy, and everywhere. The pipe leading off the turbo, the intercooler core itself, the pipe leading off the core, the pipe leading to the throttle body. The inside of the turbo was dry (as it should be with the turbo being brand new), but the rest of the system was pretty contaminated. Luckily, I'd noticed the oily connector when I swapped thermostats and kept the car out of boost after the new turbo was installed.

The intercooler core was propped against a wall to drain for awhile, and I sprayed down the inside of the IC piping and all the silicone connectors with brake cleaner. The connectors were wiped down thoroughly inside and out with shop rags, and Tyler and I ran water through the hard pipes and left them to drain. We then sprayed them out with air and wiped them down to minimize any water contamination.

1205g.jpg


1212g.jpg


With that step taken care of, and while the intercooler core was draining, it was time to install the GrimmSpeed master cylinder brace, which I picked up courtesy of Apex Performance. This piece is quite nice. The welds are sturdy, the CNC laser cutting gives it a very clean, finished look, and the included hardware is all great. My only qualms: I think washers need to be included with the hardware, and the instructions need to be a little more specific regarding brackets that are removed. However, despite this, the instructions are VERY thorough, with color pictures that really help...and the additional specifics could be achieved by just using larger pictures. I'm pretty confident that someone who has no idea what they're doing (like me :lol: ) could get this thing installed with no hang-ups. Installation requires the quick disconnect of some fuel lines and the removal of a single bracket before you slide the brace up and under to line up with mounting locations on the strut tower. Here are some pics, with Corbin I removing my titanium strut brace before started being creepy behind my wing:

1215f.jpg


1239c.jpg


1241f.jpg


1224i.jpg


1234aw.jpg


And all finished:

1251dk.jpg


1253q.jpg


My thoughts on the GrimmSpeed master cylinder brace: This is a great bang-for-the-buck product to improve your braking, and the quality is top-notch. My pedal now feels nice and tight, and I'm not even using SS brake lines yet. Braking feedback and response was significantly improved during the little playing I did on my way home.

Next, we all did some thorough hunting for my oil pressure sensor. It was located underneath the throttle body, slightly off toward the passenger side. The new sensor was installed, and the oil pressure gauge now works just fine. Thankfully, I will now know my actual oil pressure, which seems to be pretty steady between 80 and 100psi depending on how much throttle I'm giving.

1289x.jpg


1290i.jpg


Next, Brock and Tyler took the drained intercooler core and gently ran some water through it to clean out any additional oil residue. It was left to drain for awhile, then sprayed through with air like the pipes, before it was reinstalled. Now confident that there is no oil contamination in the intake, I'm more secure in giving my car a little throttle...though as long as ambient temps are down in the single digits or lower, I'll be avoiding that just to ensure the longevity of the motor.

1297x.jpg


1301ur.jpg


Finally, you asked for them, you got them.

Wheels pictures: Enkei PF01 in matte black 17x8 with blue Gorilla tuner lugs

If my car wasn't so dirty, you'd have better pictures. As it is, though, I don't think they're too bad, and we can thank my fiancee for these.

1242m.jpg


1231j.jpg


1260x.jpg


And that is that! I want to give a very special thanks my friends at Performance Plus Automotive, to Joe B. for driving an hour and a half to help out, and to my fiancee for picking up the pizza and taking some epic pictures. As far as Performance Plus, the guys are 100% friendly and knowledgeable. If you're local to central ND, and you need anything from regular maintenance to aftermarket installs to a motor build, check them out. I guarantee they will get you taken care of the right way. :tup:

Finally, I want to give some insight to my future plans: I have the prototype header to install as soon as the GReddy up-pipe arrives from Swaintech, as well as BC Racing coilovers, Whiteline roll center adjust kit, a few Whiteline bushings, and the Braille carbon fiber battery to do before spring. I'd also like to do something innovative with as far as a replacement hood scoop goes, and I'll have some new sponsors to reveal very soon here. Updates shall continue!

Before I disappear to go eat more pizza and watch Criminal Minds with my fam, take a look at my Defi-boost-gauge-no-worky video and tell me if you've got any ideas what we should check in order to get this fixed.

http://www.youtube.com/watch?v=095mjAMypbs
 

BadlandsRacer

New member
Digging your new rims. I'd like to see some further out shots whenever you start taking more, been considering these rims in a nice wide size.

I love these wheels, no lie. And the lug nuts just complete the look. I'll take some more pictures ASAP...when the weather clears up and I get my front bumper back on. Unless you're not looking for anything special and artsy...then I have a few I just snapped real quick outside my garage.

do you have a AOS? i plan on getting one this year

Yes, definitely. I use the Crawford Performance V2 AOS. Heated unit, which is really nice in good old ND's subzero temps.
 

IGOTASTi

System Operator
Staff member
I really like the look of your wheels. Very nice and the lugs do set them off. Great job and looked like lots of fun with the crew. :thumbsup:
 

BadlandsRacer

New member
Figured I'd post up a couple pictures of all the stuff I've got that needs to be installed.

Braille Racing STI-edition carbon fiber battery

1318f.jpg


Swaintech-coated GReddy up-pipe

1317c.jpg


Something in the box

1321x.jpg


Alright, what's the crazy guy got under the packing peanuts?!

1057j.jpg


And lastly...ultra-secret prototype header

prototypeheader.jpg


...I know. I'm a bastard. :lol:
 

BadlandsRacer

New member
So, this is quite overdue. Sami and I are settled in our new house, and I had a pretty fun drill this weekend. But you guys don't care about any of that. I know what you REALLY care about!

28 February 2011: Litespeed Performance header install (along with GReddy up-pipe & TurboXS RFL exhaust)

That's right, the header is made by IWSTI native vendor, Litespeed Performance! Once again, this is an UEL header designed to increase midrange power without sacrificing low-end response on smaller turbo cars (like my 18g-XT). It will outflow a PnP exhaust manifold, and weighs an astonishing 17 lbs lighter than the stock manifold. Joey Lisano will also be testing one of these headers, and providing some hard dyno data...can't wait for that!

In the meantime, I did a 4th gear pull using the dyno feature of the Cobb AccessPort, with the intention of comparing those once EFI Logics had touched up my tune. Some things are delaying the tune, but hopefully I'll get my data up before Joey's, just so I can try to be cooler than his awesome reviews.

Finally, here's the long awaited story, complete with pictures, and a neat little video.

First, pictures of the header upon its arrival at our old apartment, along with a refresher shot of the Swaintech-coated GReddy up-pipe:

header1jz.jpg


header2.jpg


header3.jpg


Performance Plus Automotive graciously volunteered shop space and a lift for this project, and thankfully, I had the guys there to double check my work and help point me in the right direction from time to time, as this was the biggest thing I've attempted on my car. Not gonna lie, the PPA guys and their shop are both awesome. If you're local, and you need some work done, hit them up for sure.

And let's get started! Here's another shot of the Swaintech-coated header and up-pipe, and the GrimmSpeed gaskets used:

1061m.jpg


gsgaskets.jpg


Up-pipe to up-pipe comparison:

1065de.jpg


1066r.jpg


Take note: when installing your own up-pipe, you WILL hate this bolt (the one in the center of the picture). It's basically tucked into the turbo in such a way that it had to be loosened and tightened with a wrench.

1072.jpg


Header and up-pipe installed! My, that White Lightning coating looks great.

1074a.jpg


1077.jpg


Now, this is what came in the packing peanuts...TurboXS RFL!

1089.jpg


1088b.jpg


txs1.jpg


txs2.jpg


txs3.jpg


But what's this? It's not done?! What are we doing to the downpipe?!

1080ge.jpg


Why...wrapping it of course!! As long as it was removed, why not?! Brock gave it some finishing paint to preserve the heatwrap and make the downpipe look MUCH better.

1079a.jpg


1082q.jpg


1099v.jpg


Now for an awesome video:


Well, that's that. Between the header and the TXS exhaust, the car sounds awesome. Deep and throaty, and I really dig the angled titanium tip. Now I can't wait for the tune so I can give some driveability opinions, finish my 'how the sound changed' video, and most importantly, look at some datalogs to see how boost changed. But wait, what happened?!!?


icoff1.jpg


icoff2.jpg


...where's the intercooler going?!
 
Last edited by a moderator:

IGOTASTi

System Operator
Staff member
Awesome! I also fixed the video. :)
 

BadlandsRacer

New member
Thanks for fixing that JJ! I didn't adjust it when I copy/pasted over here. :lol:

Yeah, Jared, it's getting coated with a black thermal dispersant paint....for free! :D
 

HolyCrapItsFast

Drinks beer!
This thing is turning out to be one bad azz car. I like what you are doing to it!
 

BadlandsRacer

New member
Alright so, been awhile since my last real update. I know folks are patiently waiting. And this time, I have a lot to say. I apologize for the length. I mean it. It's LONG. :D

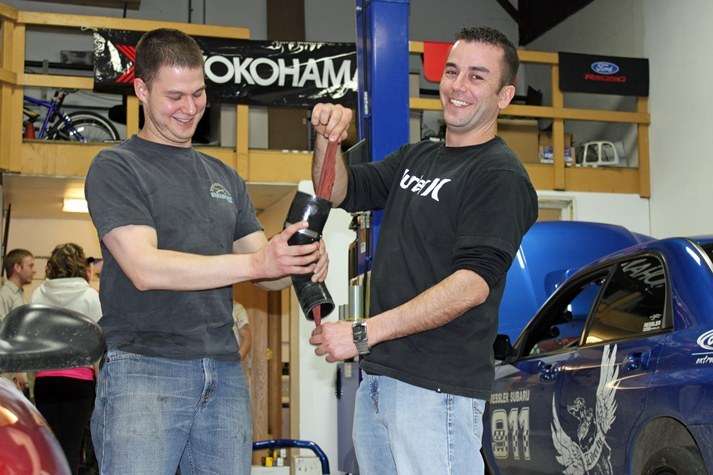
New Sponsor: GrimmSpeed

GrimmSpeed. Do I really need to give them an introduction? I mean, come on. They've been in the Subaru game for what, around 8 years? And do I need to talk about their products? We all know these guys have the best electronic boost control solenoid out there. We all know they have an excellent PnP manifold setup. We all know about their EWG up-pipe, their gaskets, their phenolic spacers, their awesome brake master cylinder brace, their air/oil separator, their gold BBS wheel paint, etc, right? If you don't, get with the program, because these guys are seriously awesome. I have never had anything but top notch customer service from them.

I have been running GrimmSpeed products on my car for awhile now...their 8mm phenolic spacers, their boost control solenoid, and their master cylinder brace. Now I'll have the pleasure of helping to promote this awesome company's products and services. So before I get the party started, let's cover the facts:

A) GrimmSpeed, 8+ years in Subaru performance, has some very high-quality, innovative products for our cars, plus awesome customer service
B) You can reach GrimmSpeed at their website, www.grimmspeed.com, or by calling 612-379-0000 (call on a weekend just to hear the voicemail, it's worth it :D)
C) GrimmSpeed is also available on the forums or via instant messenger (GrimmSpd on AIM)

My car will be a showcase for a number of GrimmSpeed products/services in addition to those I've already been sporting. Before I go over them and post some pictures, there's one more loose end...


New Sponsor: JNA Performance

JNA Performance you may be slightly less familiar with. They're a performance retailer and forum vendor that sells a number of aftermarket brands, but what I really want to focus on is some of their own products.

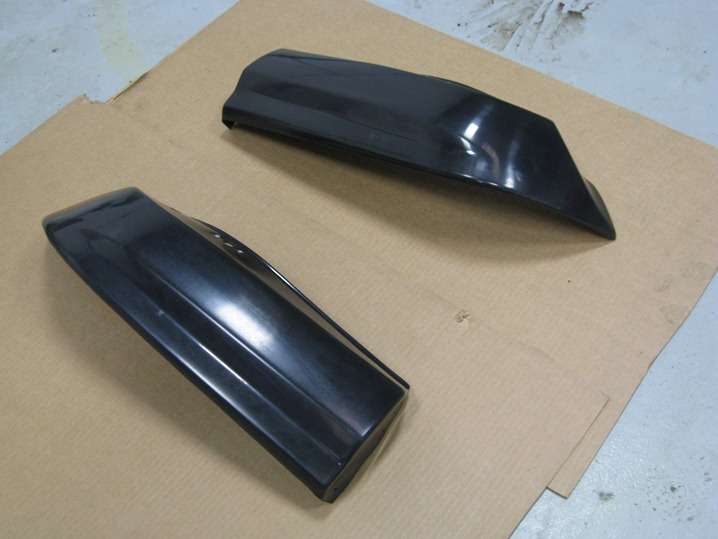
If you didn't know, JNA manufacturers polyurethane V-Limited style lip replicas (like mine), JDM-style rain visors, a vent clip for your Cobb AccessPort, and JDM-style rear spats. It was the spats I was particularly interested in, so that's what they sent me to review...but don't overlook the fact that they have some other awesome products, and great brands...check them out at www.jnaperformance.com.

Without further ado, this is what I've been up to!!

2149e.jpg


2154y.jpg


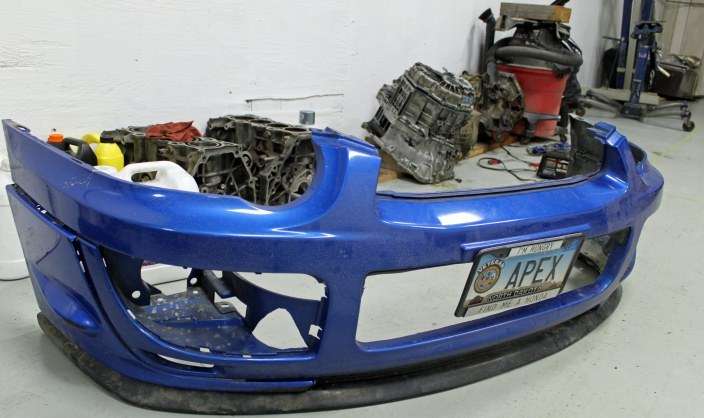
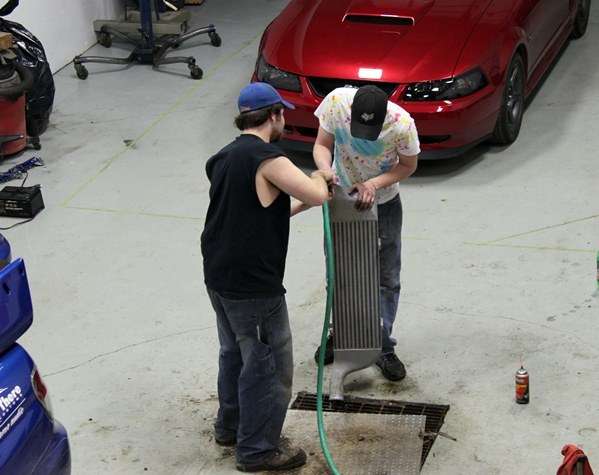
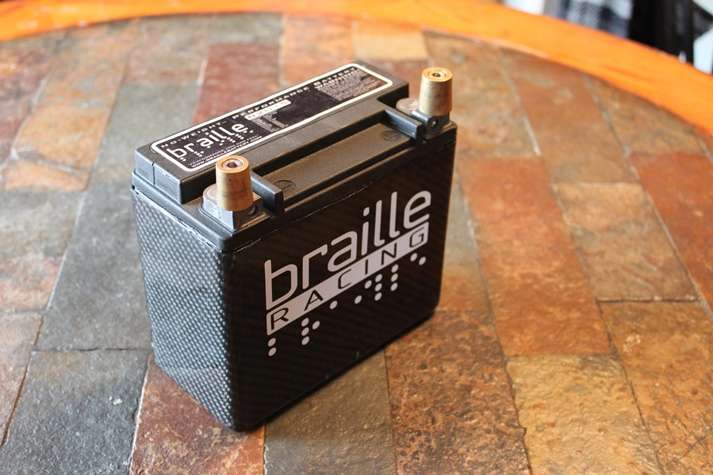
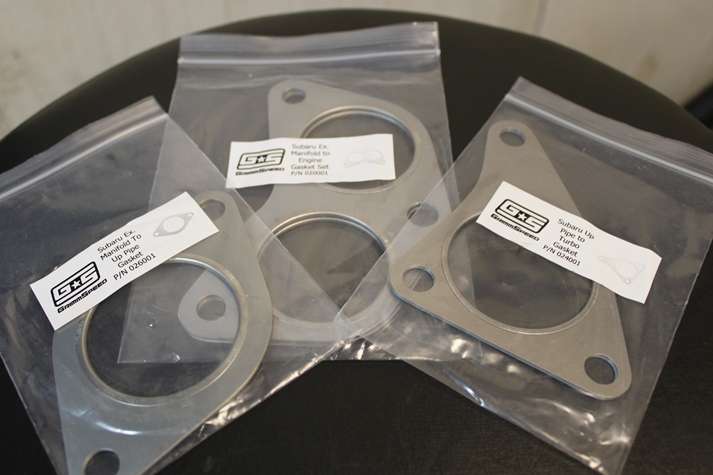
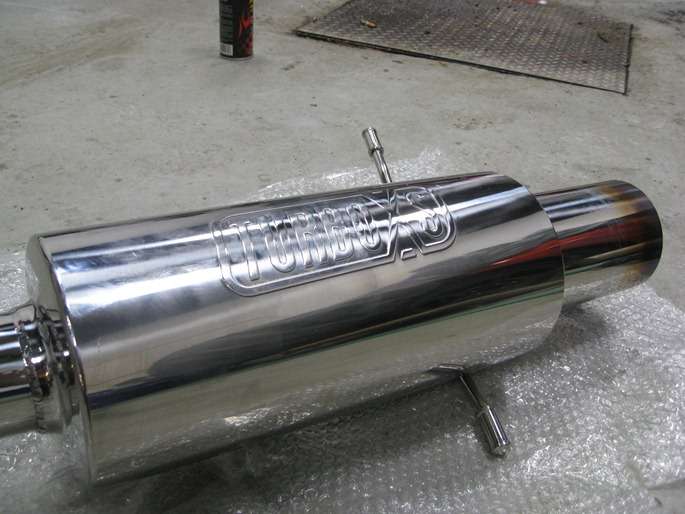
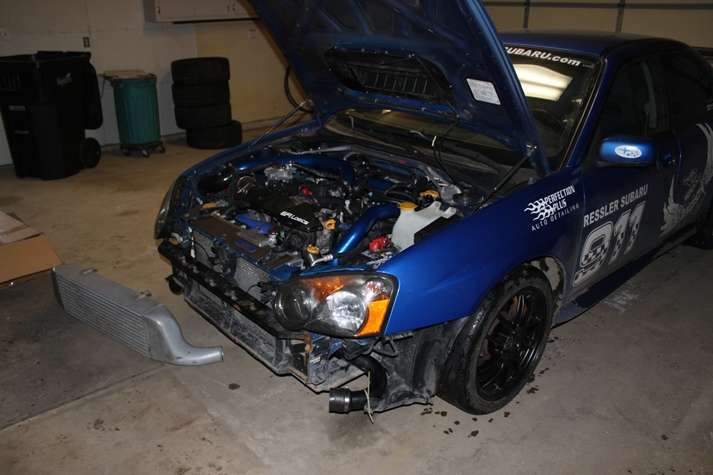
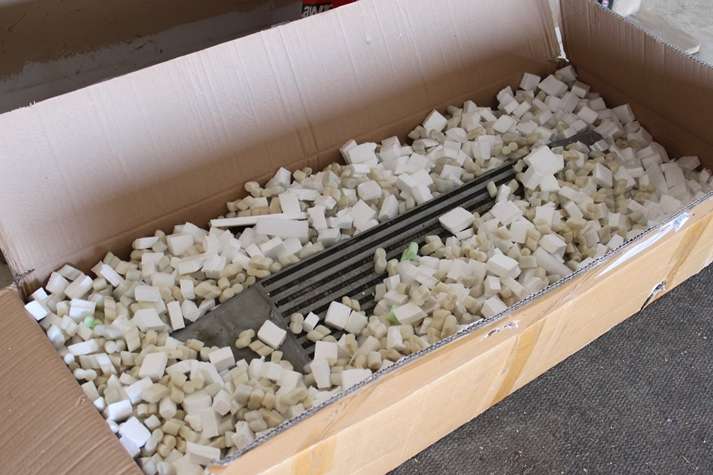
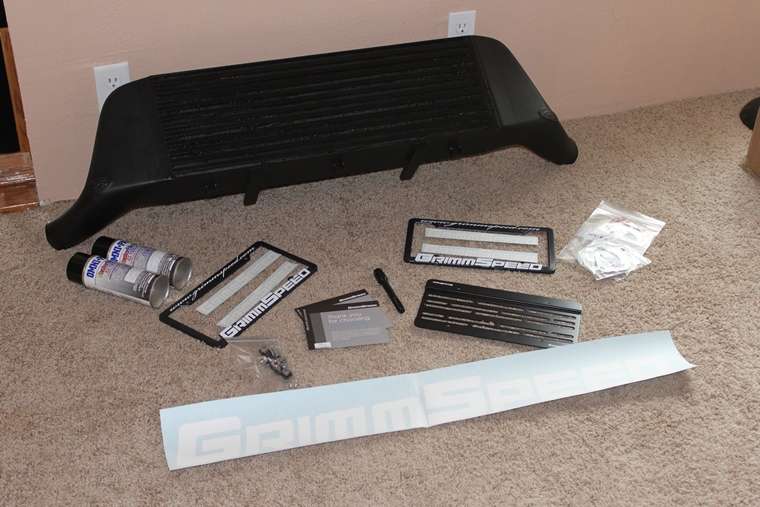
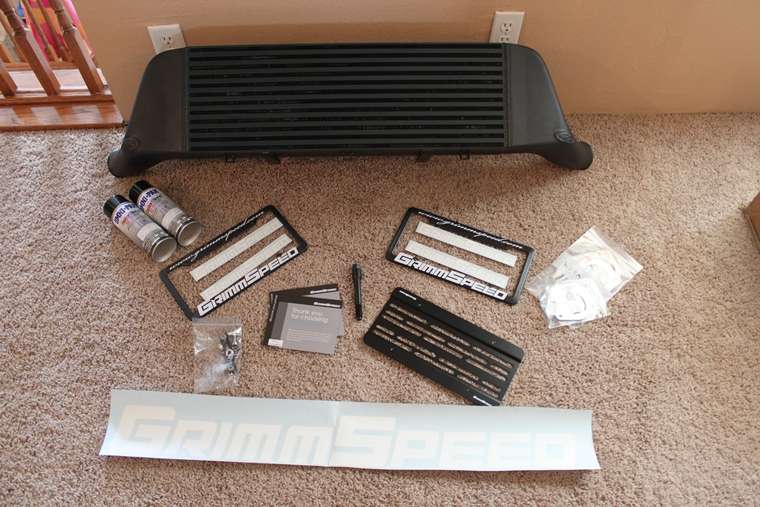
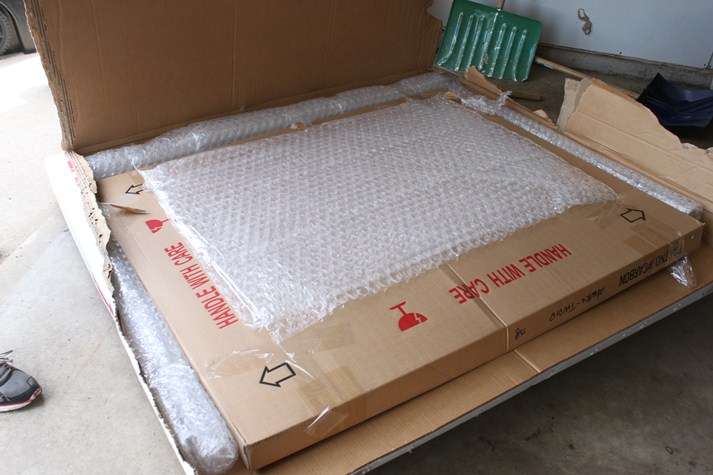
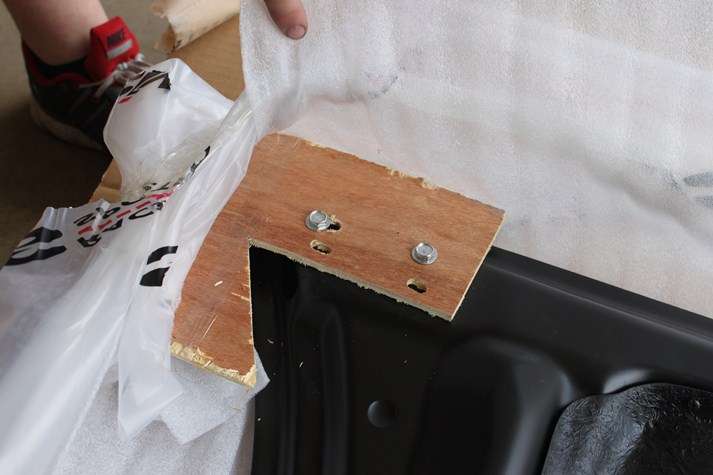
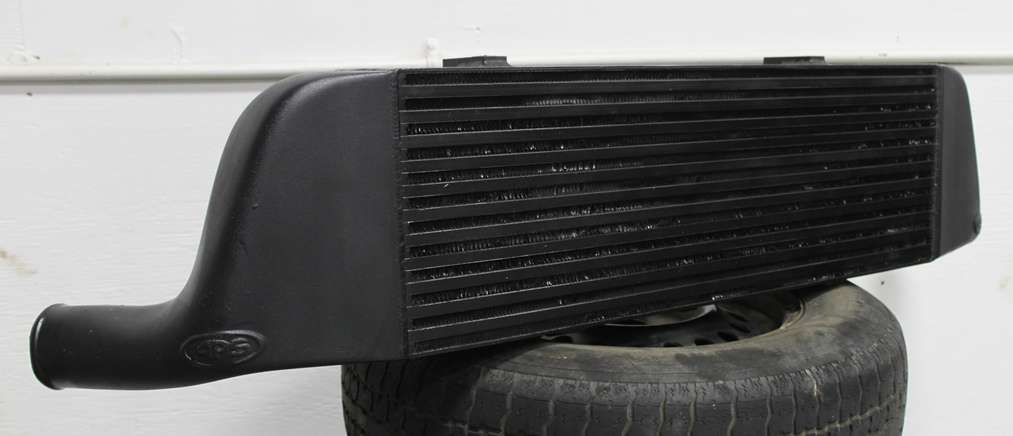
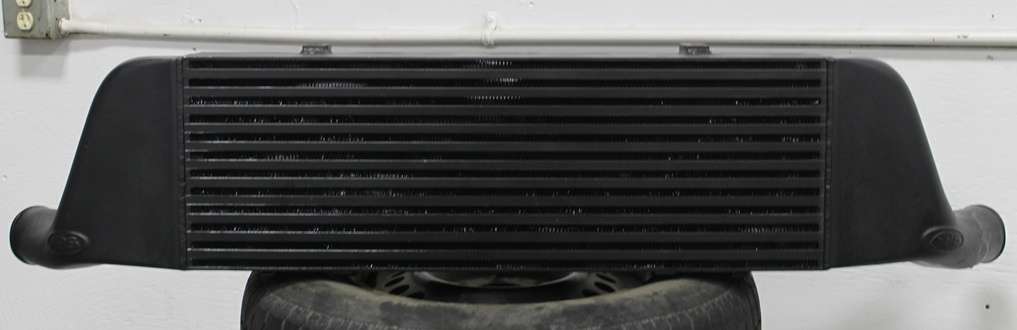
The first shipment from GrimmSpeed contained lots of goodies! Also, my intercooler is back, yay, hooray! (Okay, so it got back forever ago. Leave me be.) The intercooler got a healthy dose of GrimmSpeed's black thermal dispersant paint across the core, and the endtanks received their thermal BARRIER paint. This should definitely help keep the intercooler...well, cooler on those hot autocross days. Also included in my goodie package was GrimmSpeed's new front license plate relocation kit. This kit mounts to your factory front tow hook location to move the intercooler out of the flow path of a FMIC. However, since the APS front mount has its own support beam...I don't have a factory tow hook location. :lol: I'm still trying to figure out how I'm going to install this. Also, some gaskets I'd be needing in the near future, and two cans of their World Rally Blue rattlecan paint. Hmm, wonder what that's for...

2156.jpg


2157nv.jpg


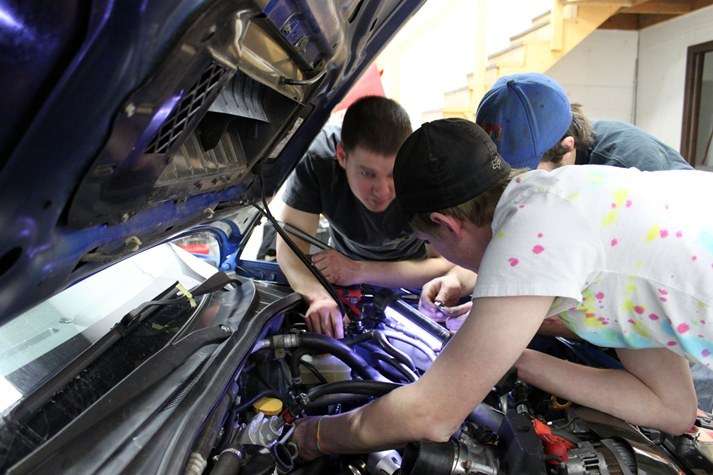
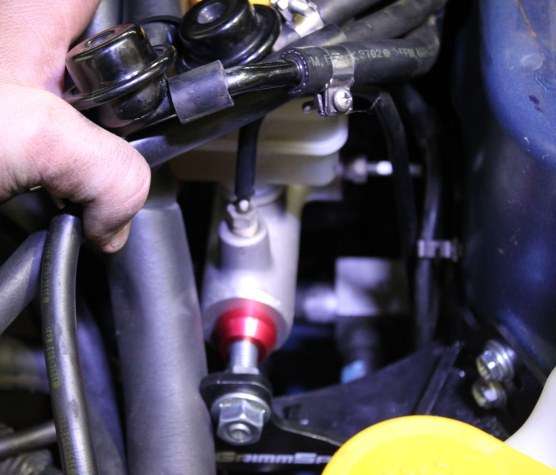
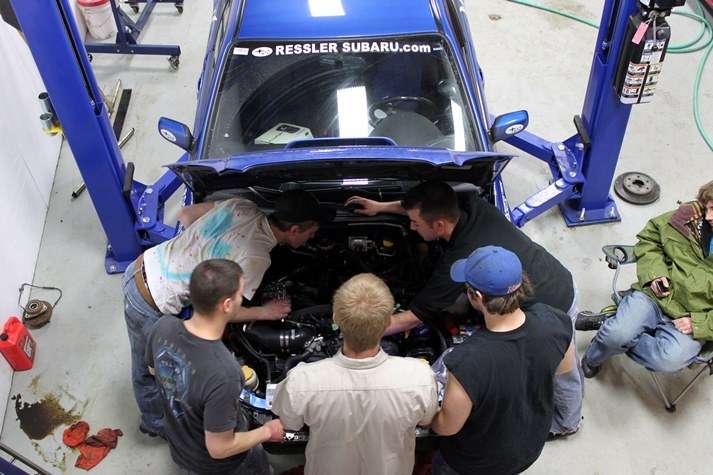
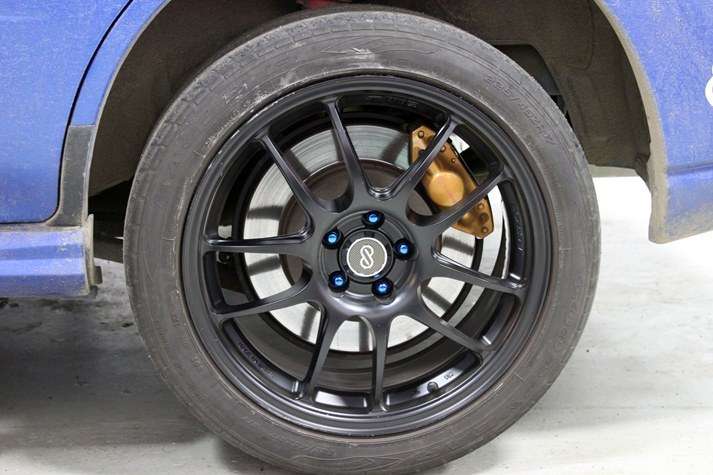
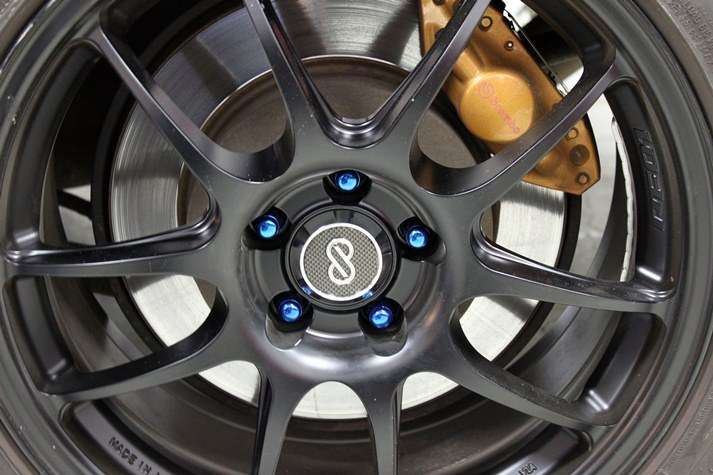
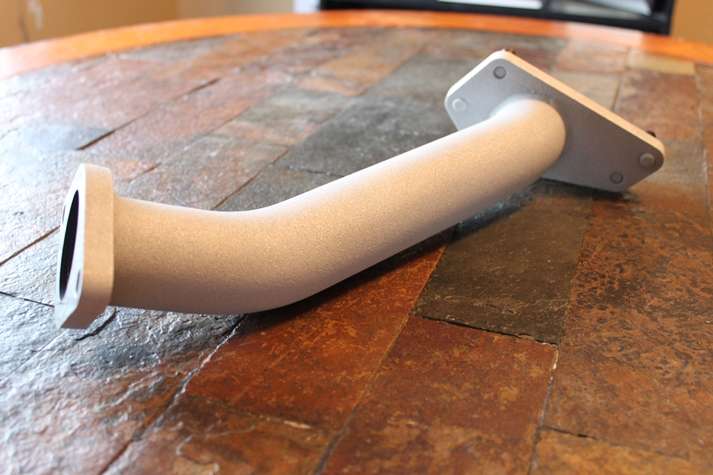
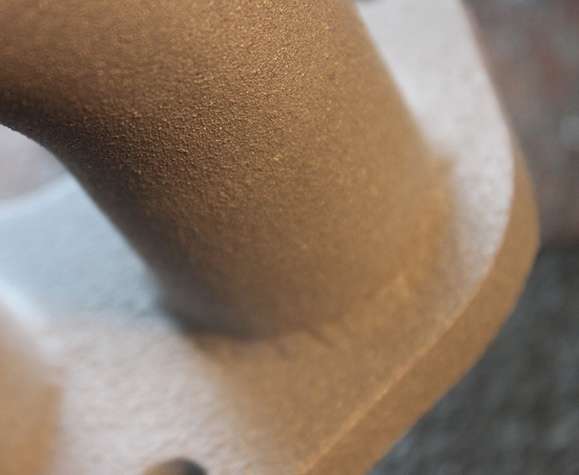
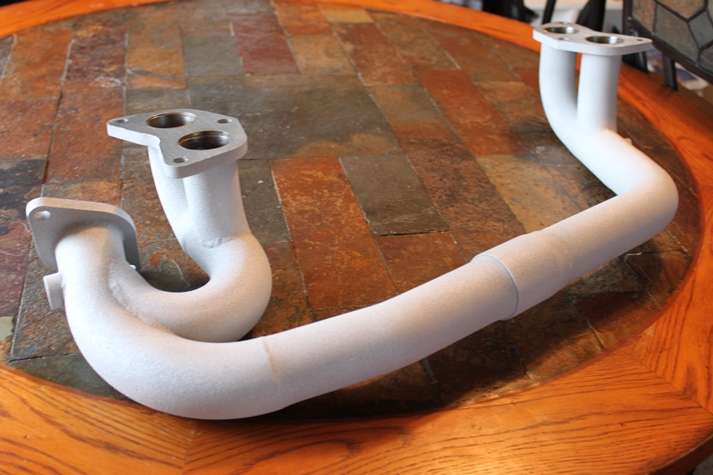
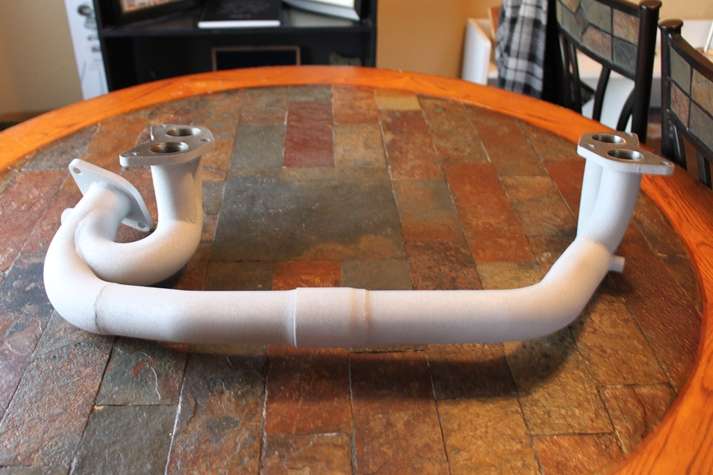
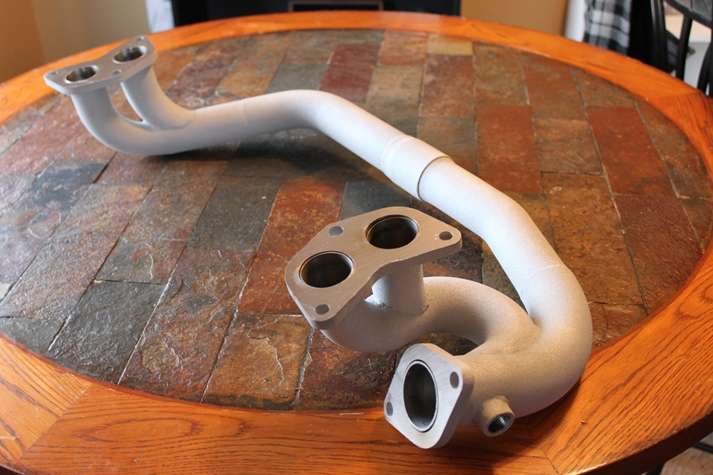
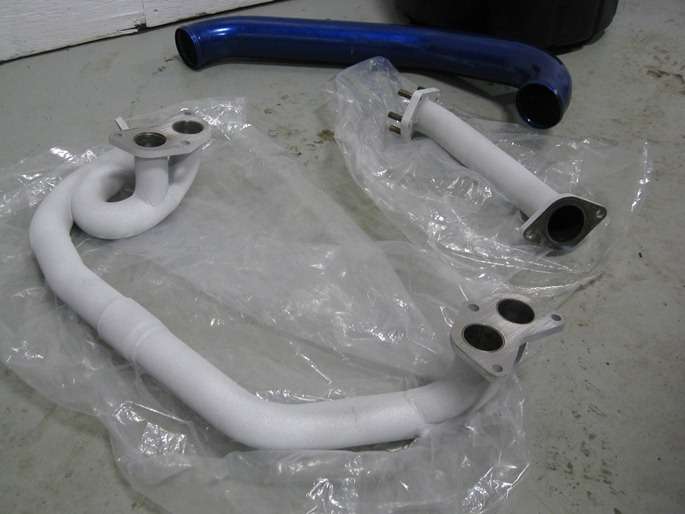
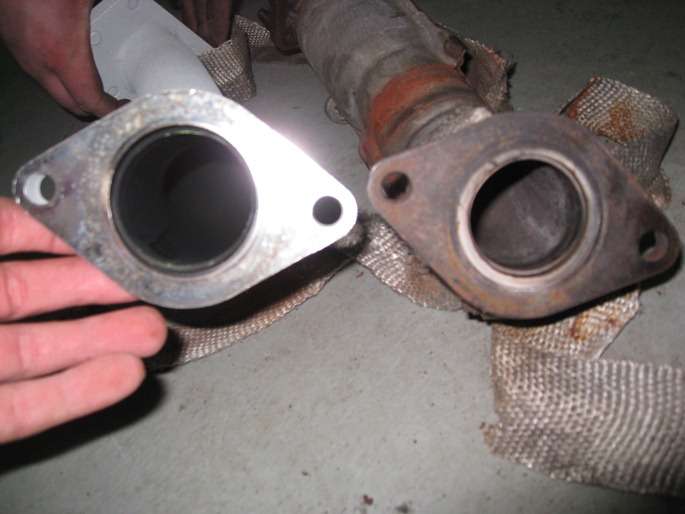
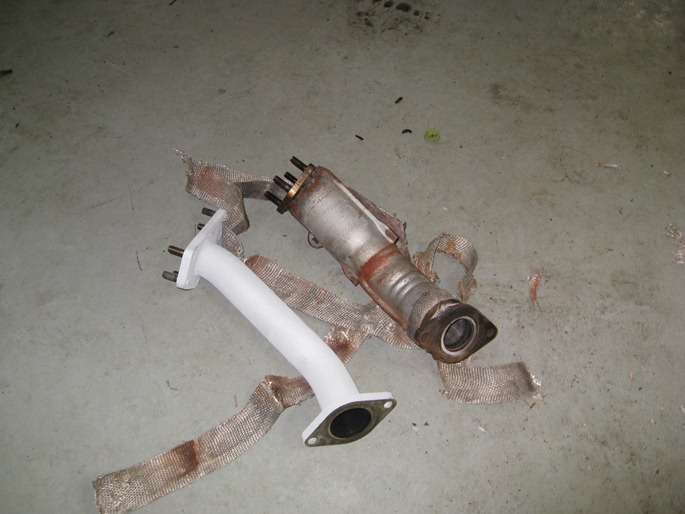
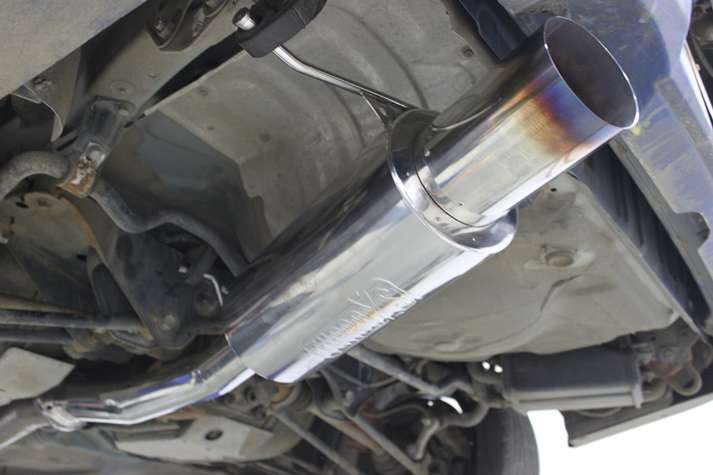
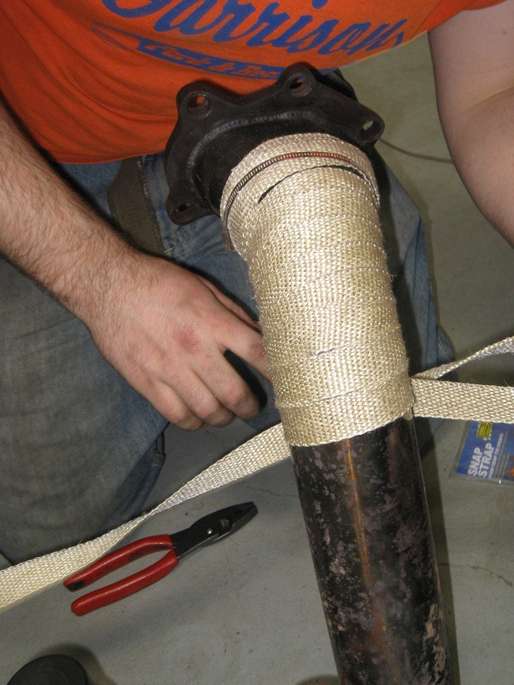
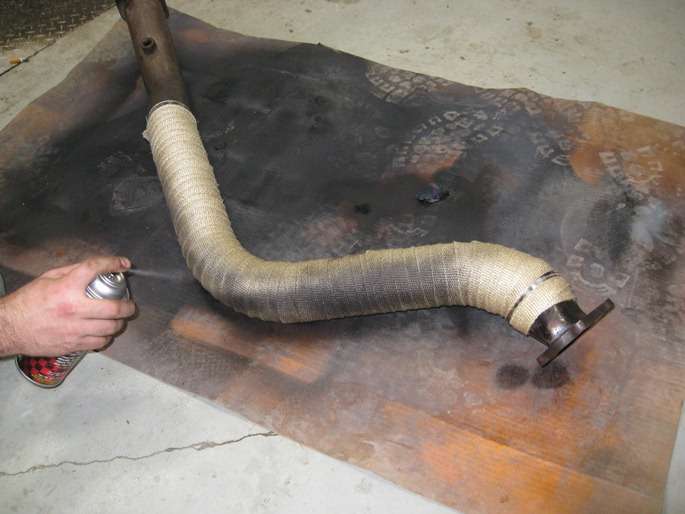
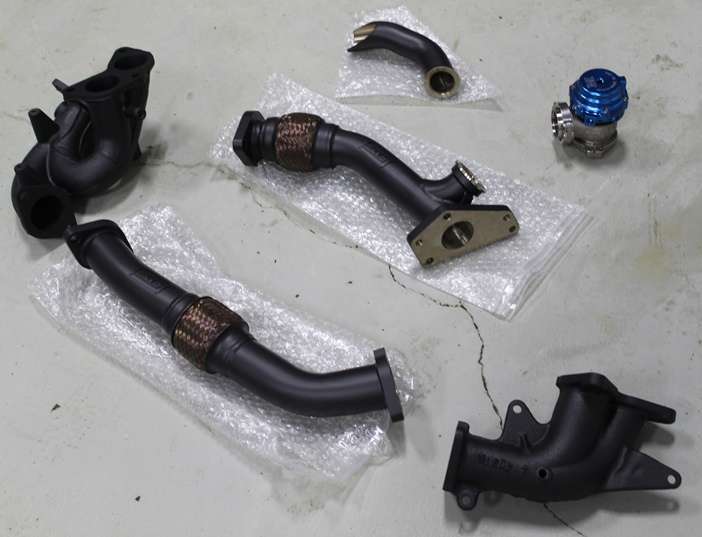
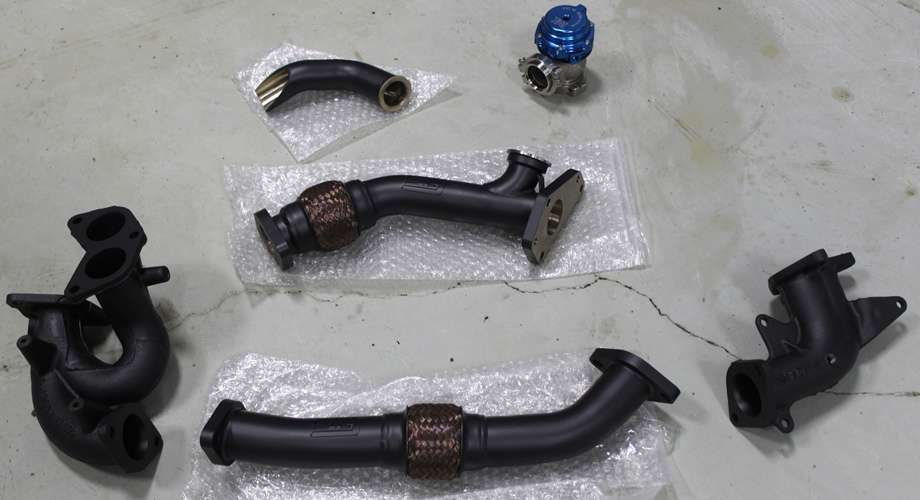
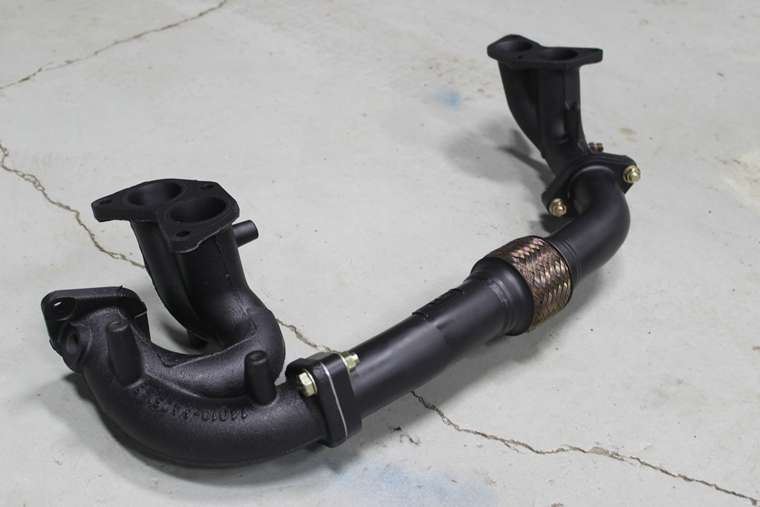
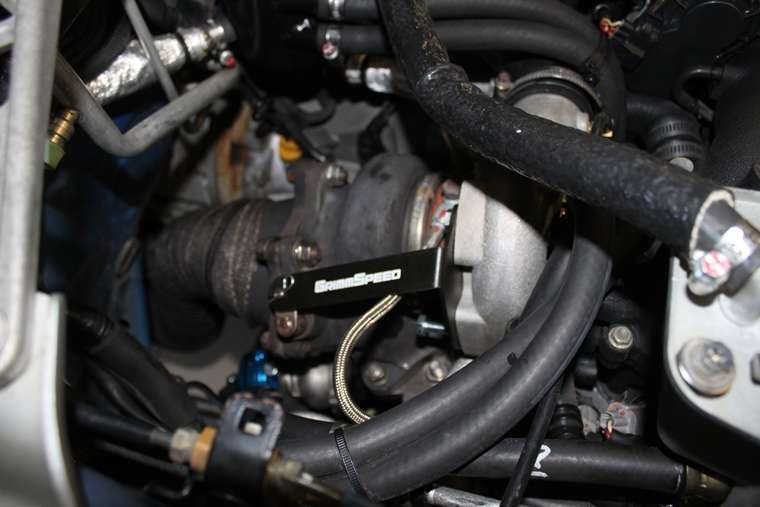
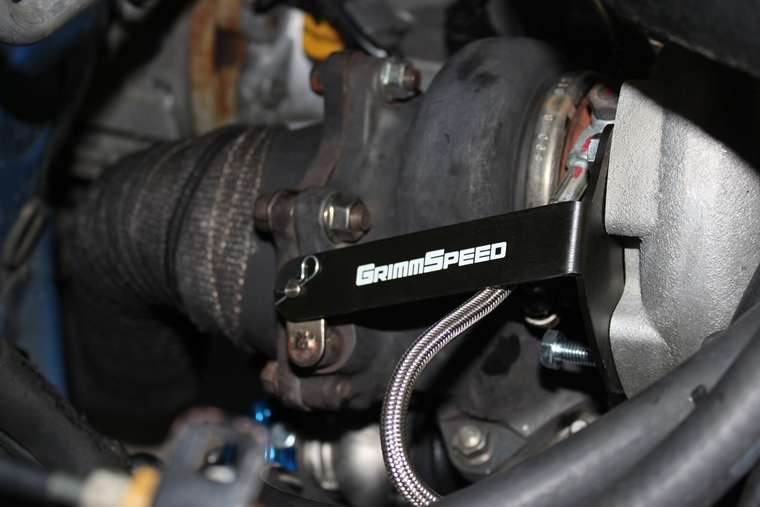
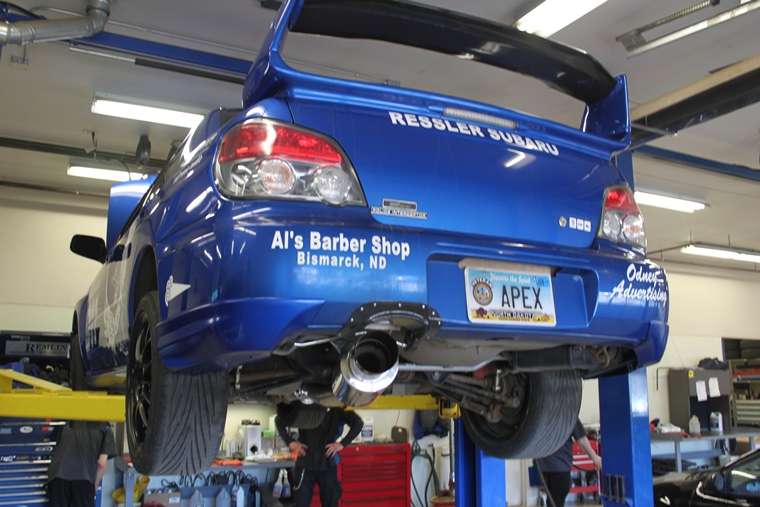
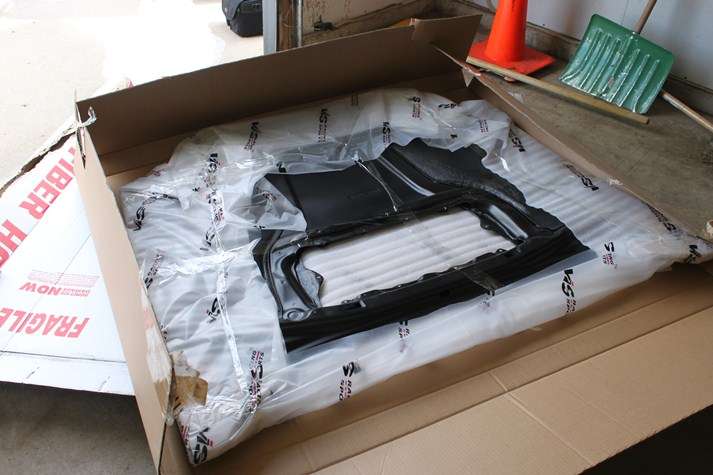
The second package from GrimmSpeed was just as fun as the first. This one contained their PnP manifolds, high-flow crosspipe, EWG up-pipe, and dump tube...all ceramic coated black, of course, to hold the heat in. Also, an internal wastegate bracket to hold shut the IWG on my 18g-XT without having to weld it. For those of you wondering what became of the Litespeed header, I opted to go in a slightly different direction. If anyone wants, they can PM me about it. Back to GrimmSpeed.

2247r.jpg


2248r.jpg


2249g.jpg


2252.jpg


2836l.jpg


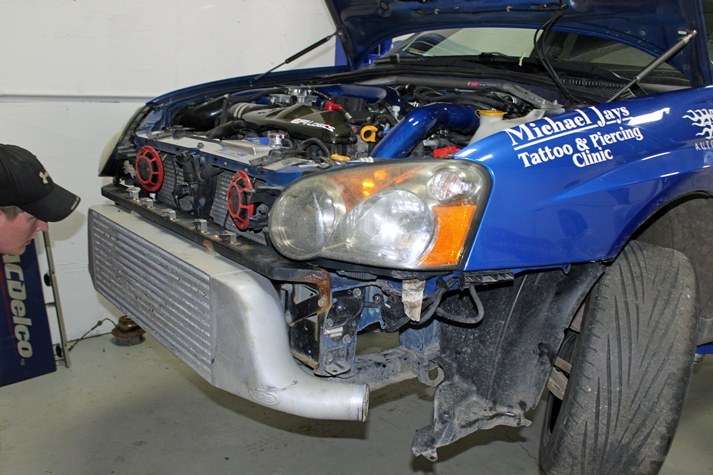
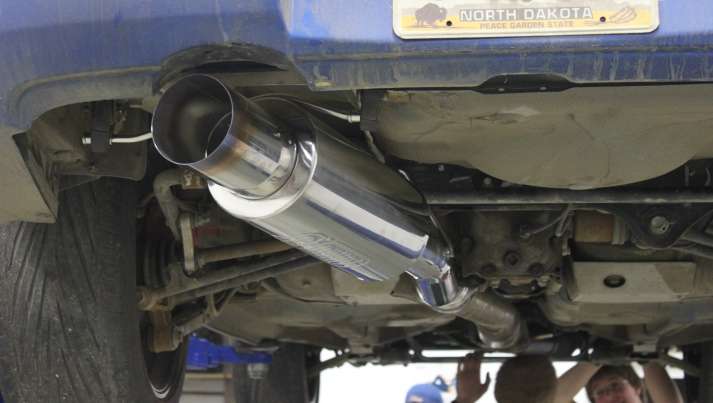
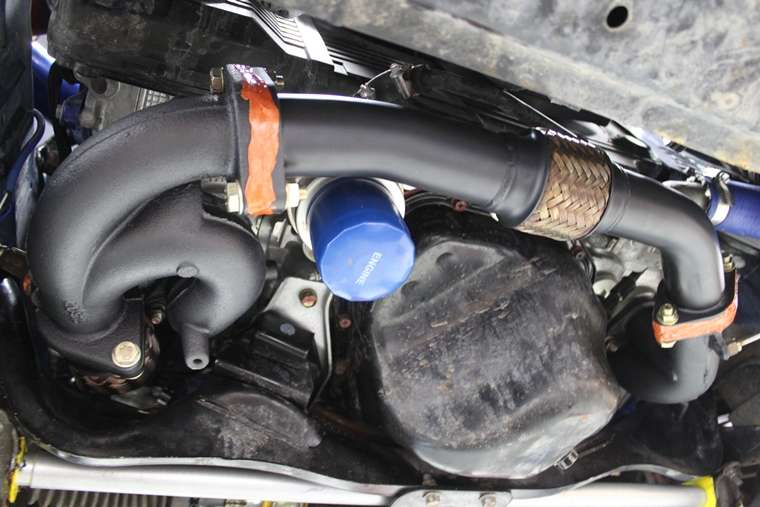
The TiAL 38mm v-band MVS wastegate was sourced from Apex Performance. The fitment on the GrimmSpeed stuff...spot on. Everything bolted right in and sealed with no headaches. When installing the TiAL wastegate to the GrimmSpeed up-pipe, it looked for a moment as though some power steering lines would cause an issue. Nope! Man, these guys have thought of everything. The wastegate was a perfect fit, with the dump tube routed down and underneath the downpipe...no clearance issues anywhere along the way. :tup:

3240.jpg


3222.jpg


3226r.jpg


3254.jpg


3257m.jpg


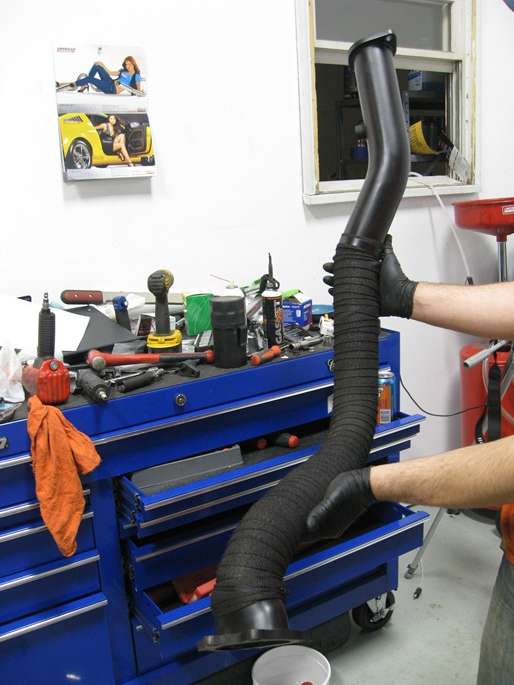
A quick note about the IWG bracket...at first attempt, I honestly didn't think it would fit. A quick call to Will at GrimmSpeed, and I had the proper install procedure...hook the flapper arm first, then MUSCLE. Fits with no problem, nice and tight to hold the IWG shut.


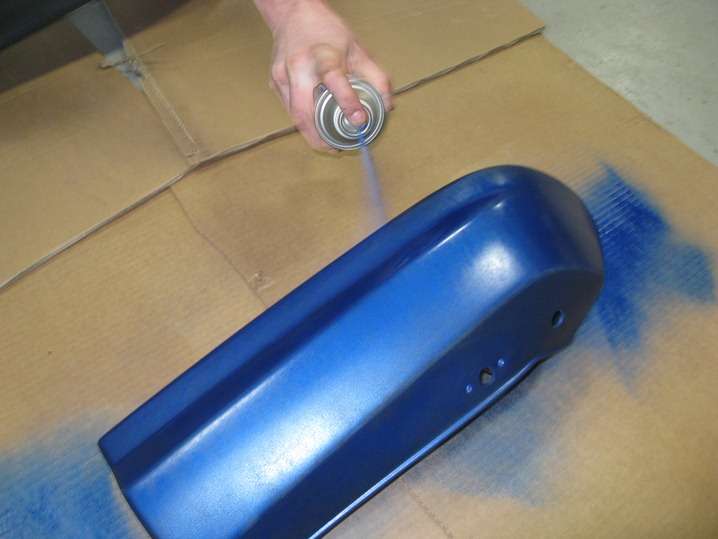
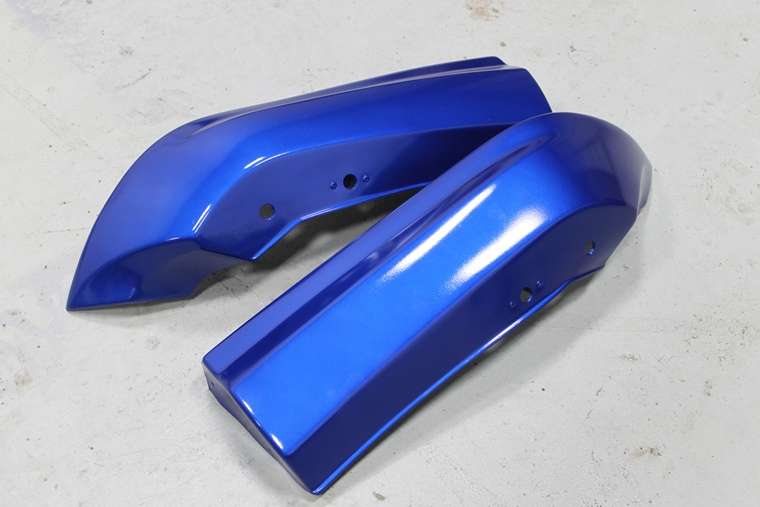
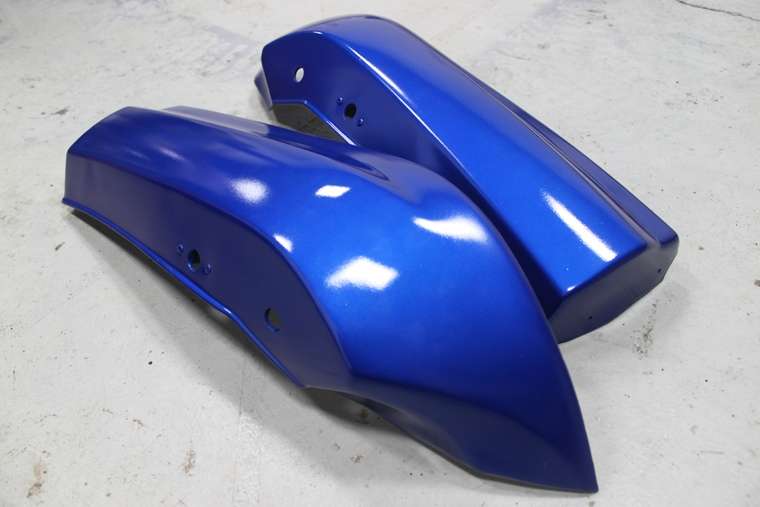
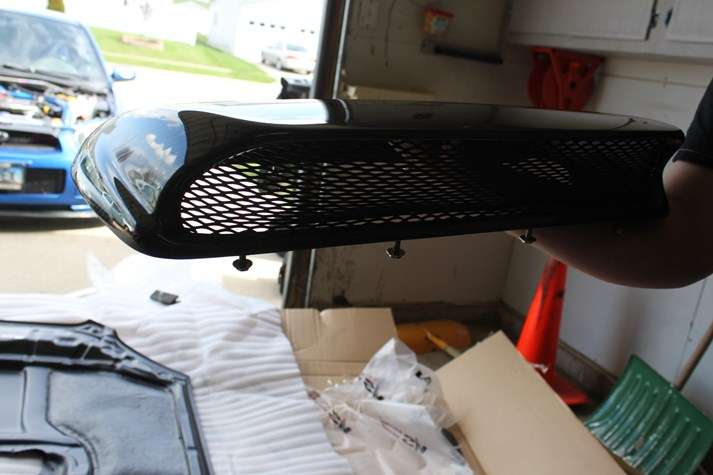
But what about the spats? Well, while the GrimmSpeed exhaust stuff was going on, Tyler at Performance Plus Automotive (they sponsor me, they just don't know it yet ) was painting my spats...with the GrimmSpeed WRB paint. Now, here's the thing. JNA's spats are polyurethane replicas of the JDM ones, so they're less expensive. But having a body shop paint them? Well, I was quoted over $230. That's when GrimmSpeed stepped in, and said "whoa, hold on Mike, we have a solution." The WRB paint retails right at $15/can. Now, I know what you're thinking...do you really want to rattlecan some nice body trim pieces like that? Yes. With some primer, the WRB paint, and some spray-on clearcoat, Tyler at PPA got the job done for less than a fifth the cost of a body shop...and it does NOT look like a rattlecan job. My only complaint is the paint on my spats looks better than the paint on the rest of the car. :lol:

1101j.jpg


1103lq.jpg


1105r.jpg


1106w.jpg


And the finished product:

3230.jpg


3231o.jpg


3233d.jpg


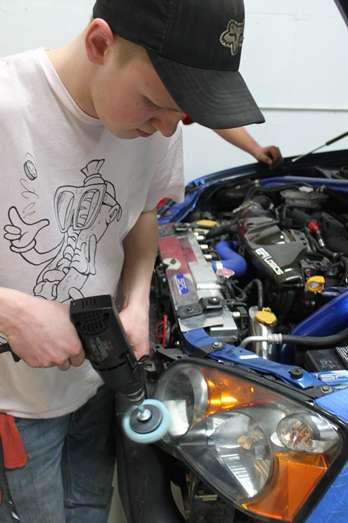
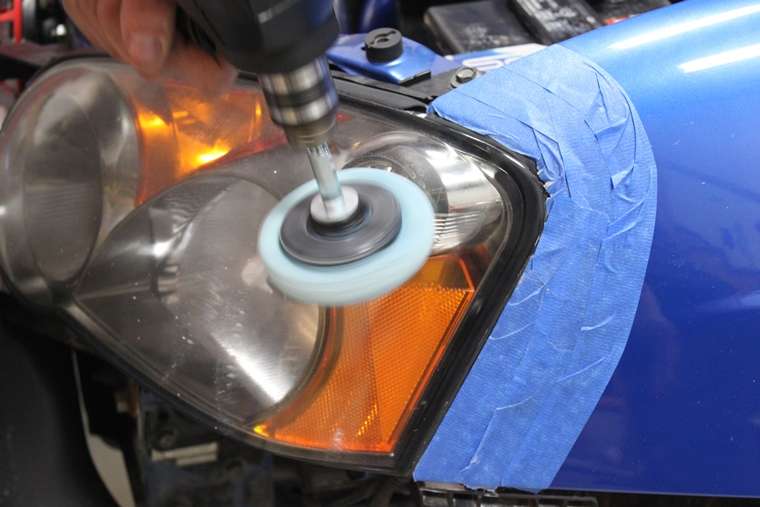
Tyler was also able to give my headlights a little lovin with the kit that Corbin from PPA bought for my birthday.

3234.jpg


3237.jpg


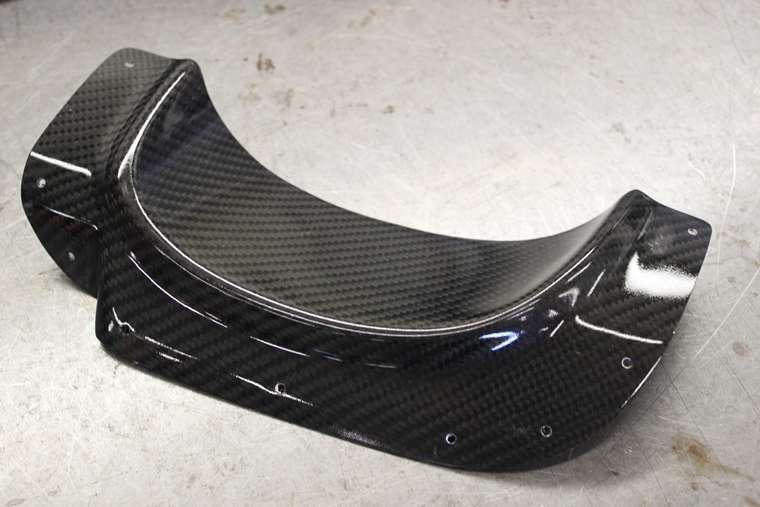
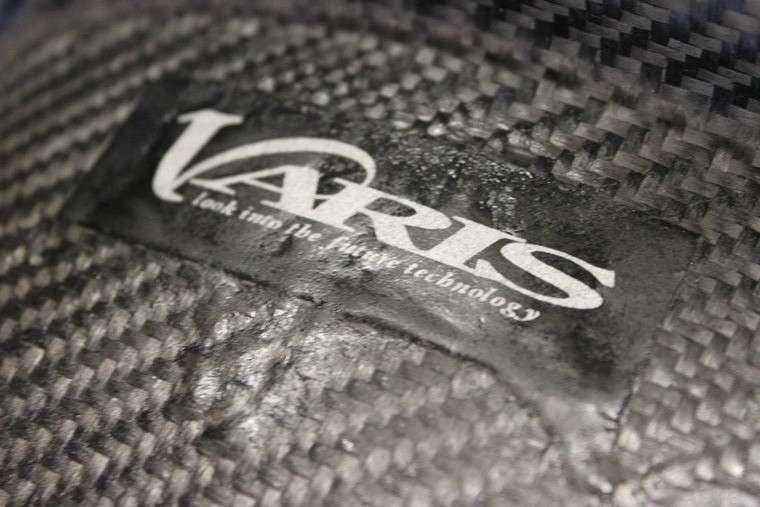
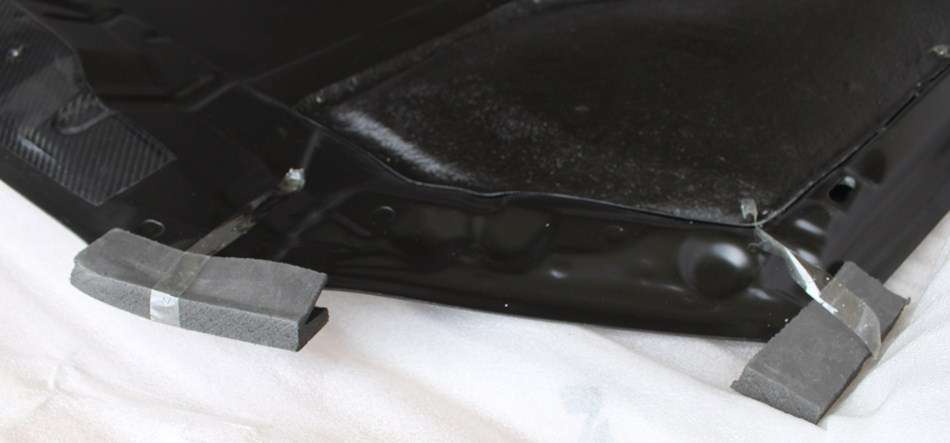
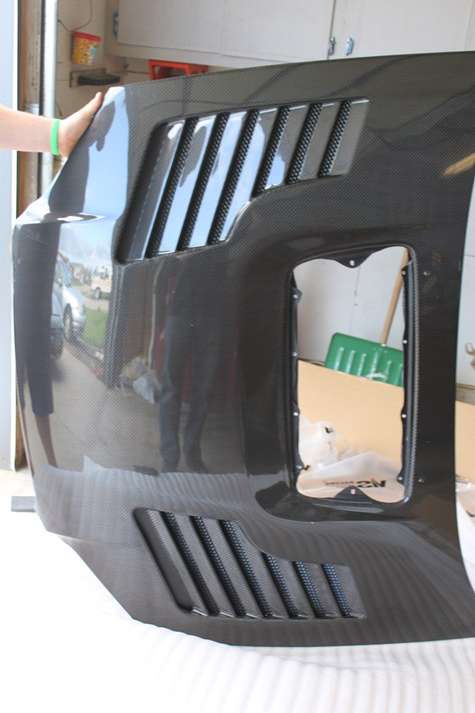
To wrap it up, I picked up a Varis carbon fiber exhaust heat shield courtesy of t3h_clap, and had Ressler/Kupper Subaru install that and the spats (I'm not terribly comfortable drilling into my own bumper). The spats installed with some 3m stickiness and some self-tapping screws...the heat shield required a drill and rivet gun.

3260o.jpg


varis.jpg


3268.jpg


3271.jpg


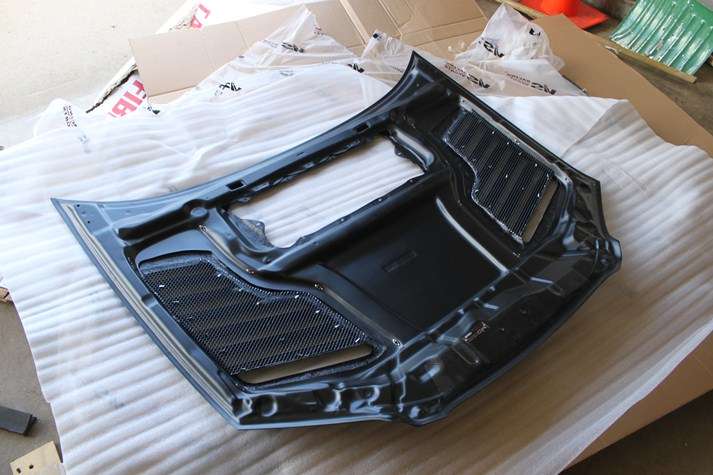
Final shot with the heat shield and spats installed:

3272p.jpg


So, that's that! EFI Logics and I will coordinate the tune via email and hopefully soon I'll be able to do another AP dyno pull and at least get a rough idea of a power increase from the GrimmSpeed mani and EWG setup. I'm pretty happy with the way things have gone for this car over the next couple days. Racing season is getting closer!

Next up? More weight reduction...and installing the BC Racing coilovers, and Whiteline tidbits! I'll be around! And if anyone is interesting in buying my RCE Black springs once the coilovers go on, let me know!

Big thanks to all of my awesome sponsors for making more great things happen with the car, and to Pat, Tyler, and Corbin at PPA for helping me with the install process and just generally making everything as smooth as silk. :tup:
 

BadlandsRacer

New member
Wow. So, I haven't been in the forum scene for awhile. I came home from an Army leadership course only to come on emergency state active duty to help fight the severe flooding in Bismarck. The Missouri River (and the Mouse River in Minot) have been pretty much out of control, and there was a few weeks where Bismarck residents were scrambling first to sandbag their homes, then to construct a dike for the city. Being military police, my unit was tasked with running traffic control points to move the dirt trucks that were helping build the dike through the city faster. A lot of people have lost their homes or had them severely damaged, and even before I started with the military I was helping people move furniture out of their homes or fill and lay sandbags. Things have calmed down quite a bit, and my unit has been released, but I plan to continue volunteering to work with other National Guard task forces through the summer, helping do what needs to be done in this flood fight.

Moving on to the car though...you a lot has transpired, and you guys get the benefit of three posts today. Firstly, my VIS Tracer carbon fiber hood arrived shortly before I came home from my army course...and I installed it right away. I have to say I'm glad I picked this hood. Quality is amazing and it looks absolutely gorgeous. Here are some pictures to show it off, including the full un-packing to demonstrate how well these are packed to prevent any sort of shipping damage.

3535.jpg


3537p.jpg


3538.jpg


3539.jpg


Wrapped hood scoop:

3540.jpg


Padding and wood on the corners to prevent damage:

3545q.jpg


3546x.jpg


3547.jpg


3550m.jpg


3551.jpg


3541z.jpg


3553b.jpg


Installed picture:

3554.jpg


The VIS Tracer hood comes with all hardware necessary for installation. Just make sure you grab the stuff you need off your stock hood if you're getting rid of it, like the striker plate for the latch, and the windshield wiper nozzles. I neglected to do this, and had to order the stuff in. :lol:

Referencing this post , the VIS Tracer is 5lbs lighter than the stock hood with all trim and splitter. I did not retain the splitter, which AnorexicSTi has weighed in at ~2lbs, so I'm just going to go ahead and estimate on the low side and say that this hood took another 6 lbs off the car, for a total of 39 lbs removed so far. I have yet to weigh the strut and spring combo and compare it to the coilovers. I'll also be relying heavily on the removal of rear tools/jack/spare tire to get me to that 130 lbs, but we'll see if I can make it.

The VIS Tracer hood also comes with panels that can be screwed in place under the vents to catch water. I keep the driver's side one on as the Braille battery sits right underneath the vent and I'd like to keep water away from that. Possibly time for trunk relocation? :D

The lining of the hood wasn't quite right...I have more gap between hood and fender on one side than on the other...but that could have been my fault during install and I'm too lazy to fix it. All in all, I love the difference the VIS hood made with my car. Looks awesome, great quality, and lightweight. I'm not using hood pins...between the Tein hood dampers and stock latch, I have had no problems with hood lift at all. If you're looking for a VIS carbon fiber hood, ask me where I got mine from!
 
Top